Easidew PRO I.S. User’s Manual
Michell Instruments 7
INSTALLATION
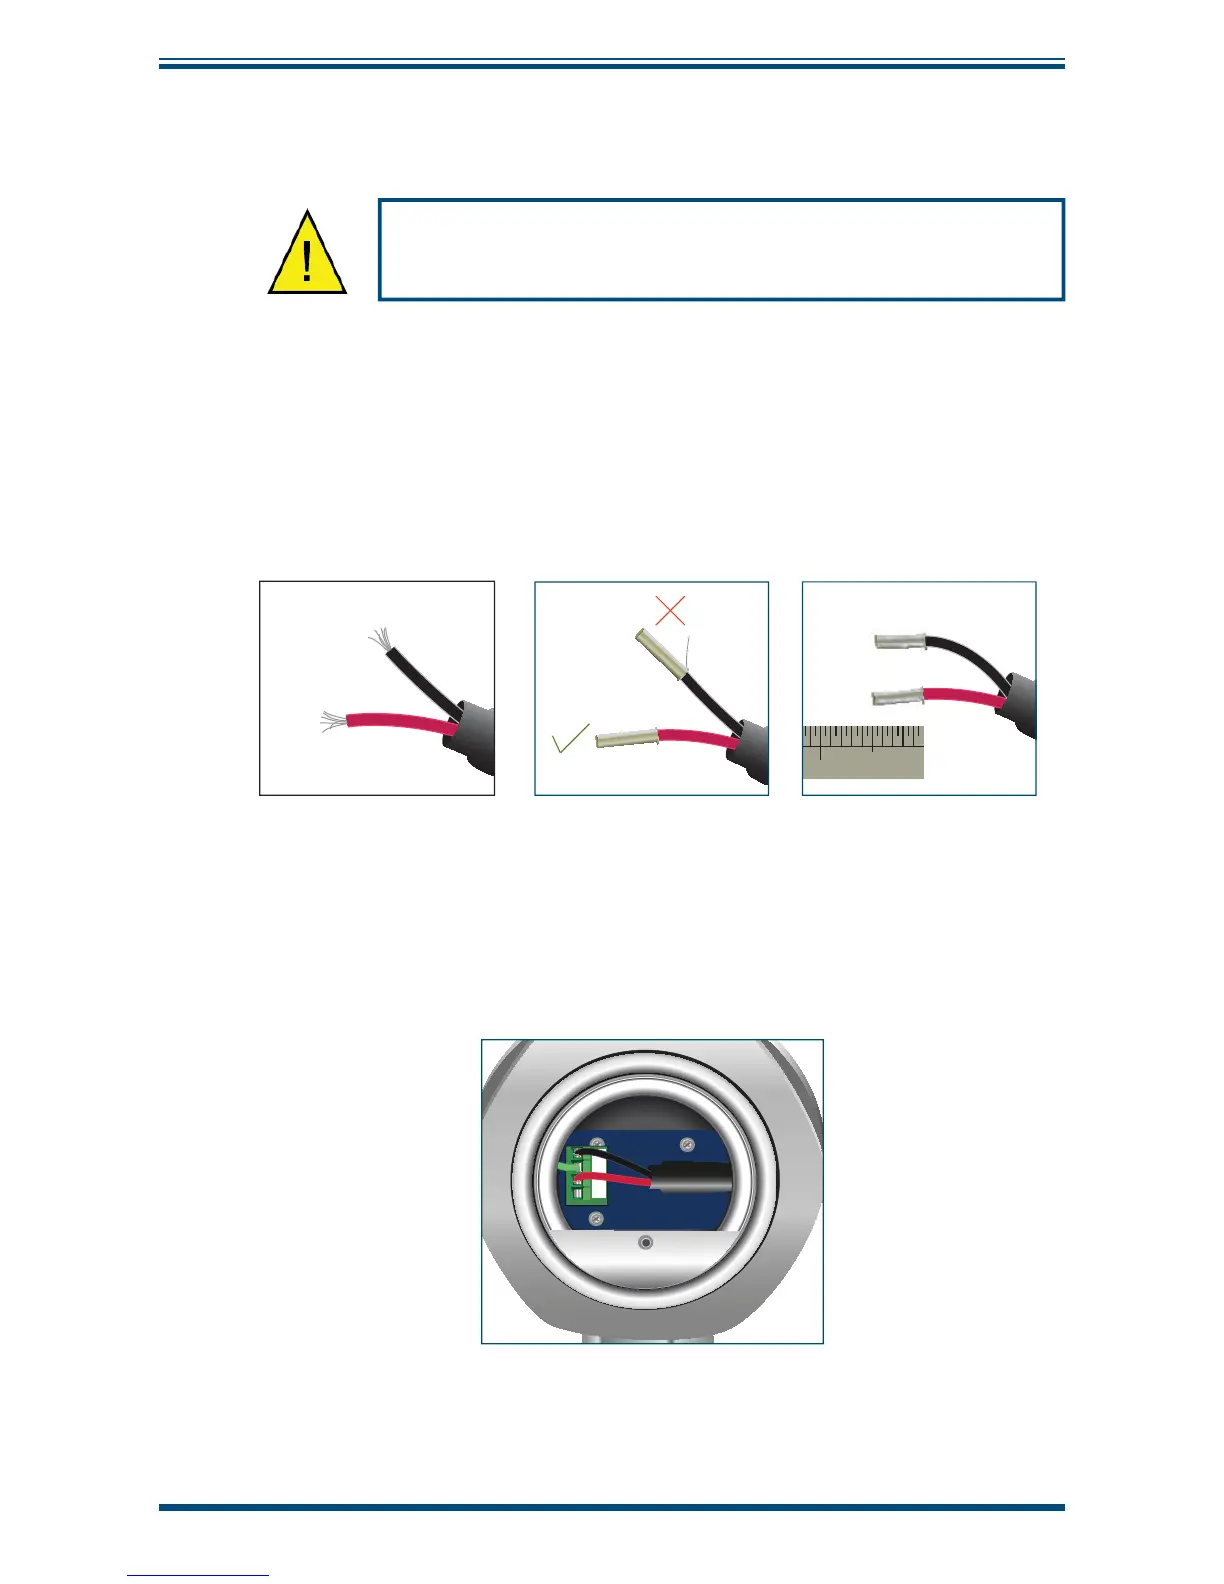
2.3 Preparation of the Sensor Cable
The sensor cable is NOT supplied as standard.
The crimps supplied must be fi tted onto any cable installed
into the connector in order to comply with Hazardous Area
Certifi cation of the product.
When making a cable assembly it is important that the cable is correctly terminated
(see below).
NOTE:
Figure 5
shown below, should be followed in detail. The crimps should
be applied such that there is no possibility of a conductor strand of a core
becoming free.
When the crimp is made it should have a minimum of 2 positions of crimping. After the
crimp is made it should be trimmed to a length of 5mm.
10
mm
Figure 5
Wire and Crimp Details
Cable connection to the Easidew PRO I.S. is made via the connector terminal block.
When the crimps are installed into the connector terminal block ensure they are fully
inserted, before tightening the terminal clamping screws.
NOTE: Ensure the assembled green wire in terminal 3 remains connected.
1 2 3 4
Figure 6
Terminal Block Connection
When all wire connections are made, ensure that there is a minimum clearance distance
and a minimum creepage distance in air of 2mm (0.8”) between each terminal.