INSTRUCTIONS FOR USE
ENDOSCOPE FOCUS AND ALIGNMENT
1. ADJUSTING THE EYEPIECE ENDOSCOPE AND CAMERA
Turn the eyepiece endoscope in the coupler until the view is aligned correctly, using the alignment notch as a reference.
Tighten the coupler lock screw and focus the camera coupler according to the recommendation of the camera manufacturer.
Adjust the focus by using the focus ring on the coupler of the camera to focus the endoscope.
NOTE: TROUBLESHOOTING GUIDE FOR FOGGING – Reference Page 14
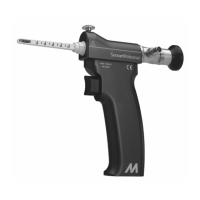
2. ADJUSTING THE VIDEO ENDOSCOPE AND CAMERA
Adjust the camera and video endoscope by turning the camera until the view on the monitor is aligned correctly, using the
alignment notch as a reference. Turn the camera lock screw on the Endoscope clockwise until tight to hold the view in place.
Adjust the focus of the camera by turning the focus disc on the Endoscope until the desired clarity is achieved.
NOTE:
1. If the image is not clear, the endoscope should be replaced.
2. If the view is obstructed, the Blade Assembly should be replaced.
3. If the view remains unclear, the endoscope should not be used. Return it for service.
NOTE: TROUBLESHOOTING GUIDE FOR FOGGING – Reference Page 14
CAMERA-TO-ENDOSCOPE SET-UP GUIDE
Please follow the guide below to determine the appropriate solution for connecting the camera to the endoscope. Depending on
which type of camera and endoscope you use, this may vary.
TYPE OF ENDOSCOPE SET-UP GUIDE
Eyepiece Endoscope* Compatibility Tips
Camera cord orientation is 45° or 90° Raise patient’s hand by placing rolled towel underneath to keep camera cord
from hitting the forearm
Endoscope rotates within coupler For Stryker® camera, add spacer (Stryker® Cat. #280-121) to coupler. Tighten
locking mechanism
Picture size too small Use a camera with coupler of longer focal length
Video Endoscope** Connecting Camera to Endoscope
C-mount camera Screw on Endoscope directly (no adapters necessary)
V-mount camera Use camera manufacturer-supplied V-C mount adapters
* Eyepiece Endoscope is compatible with most manufacturers’ cameras.
** If coupler cannot be removed or camera manufacturer advises against coupler removal, use the Eyepiece Endoscope.