Do you have a question about the Micron IMTB and is the answer not in the manual?
Avoid plugging multiple devices into a socket simultaneously to prevent overheating and fire.
Do not connect other products while the device is in use to prevent breakdown.
Avoid forcibly bending the cord or placing heavy objects on it to prevent fire hazards.
Use a dry cloth for cleaning to prevent breakdown or electric shock, avoid solvents.
Do not install the product in a humid place to prevent electric shock or fire.
Do not pull the cord forcibly from the socket; damaged cords can cause fire or shock.
Avoid touching the plug with wet hands to prevent electric shock.
Do not disassemble, repair, or modify the product to prevent fire, shock, or injury.
Do not use AC circuit breakers as they may cause electric shock.
Do not insert the plug if socket holes are larger than normal to prevent shock or fire.
Ensure no dust or foreign substances gather on the product to prevent breakdown.
Prevent foreign substances from entering the product to avoid breakdown.
Do not place heavy objects on the product to prevent breakdown.
Avoid disassembling or impacting the product to prevent damage.
Avoid direct sunlight or heating devices during installation to prevent damage.
Install the product on a flat and stable surface to ensure proper function.
Pull the plug if the product is not used for a long time.
If strange sounds occur, pull the plug immediately and contact the service center.
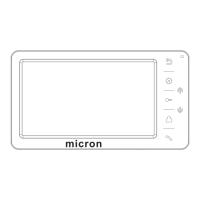
Used for returning to the previous screen or hanging up a call.
Indicates the power status of the device.
Enters the system menu or confirms selections.
Used for choosing options or adjusting settings within menus.
Activates the door unlock function.
Initiates or controls the monitoring function.
Answers incoming calls or initiates a call.
Turns the device on or off.
The screen interface for viewing video and menus.
Details the wiring for CCTV, Slave Monitor, Door 2, and Door 1.
Illustrates the connection point for an external power source.
Highlights include a 7" color screen, hands-free design, and touch buttons.
Includes lock control, adjustable display settings, and inter-monitor communication.
Lists monitor, user manual, wall bracket, expansion bolts, desiccant, screws, connectors, and adapter.
Supports 1 master monitor, 3 sub monitors, 2 door stations, and 8 CCTV cameras.
Specifies that Port 2 connects to the door station.
Details the wiring configuration for multiple rooms and door stations.
Explains wiring for electronic locks and relays for unlocking.
Suggests installing the monitor at a height of 1.5-1.6 meters.
Covers cable connection, bracket installation, and final monitor mounting.
Specifies shielded 4x0.5mm² cable for distances under 30 meters.
Recommends coaxial cable for video with additional shielded cable for distances over 30 meters.
Notes using an electronic relay for the KEY wire unlock function.
Instructions on how to answer, transfer, and manage calls with visitors.
How to monitor door stations or CCTV cameras and initiate calls.
Steps to make internal calls between indoor monitors or to a management center.
How to broadcast messages to all indoor monitors in the system.
How to listen to audio from other monitors, with attention to privacy.
How to adjust volume, brightness, contrast, and other display parameters.
Option to set the display language, defaulting to English.
Adjustable settings for chime duration and volume level.
Settings for different ring types for door stations and intercom calls.
Enables or disables incoming call notifications.
Allows other intercoms to monitor the current unit when enabled.
Configures whether the monitor chimes once or repeatedly.
Assigns a unique address to each monitor in the system.
Configures the state for Port 4, options include None, CCTV1, or CCTV1&2.
Enables unlocking the door via the monitor interface.
Resets all system settings to their original factory defaults.
Details the input power requirements: AC100-240V, DC 15V 1A.
Specifies maximum power consumption of 7W and standby of 0.7W.
Defines the operational temperature range (0°C to +40°C) and humidity (0%-95%).
Information on LCD size (7 inch) and intercom mode (Hands-free).
Specifies connection type (4 wires) and physical dimensions (210*116*25mm).
The device weighs 430g.
| Brand | Micron |
|---|---|
| Model | IMTB |
| Category | Intercom System |
| Language | English |