receptacle is recommended and should be compatible with the Amphenol and Cinch Series 57
or Amp Champ.
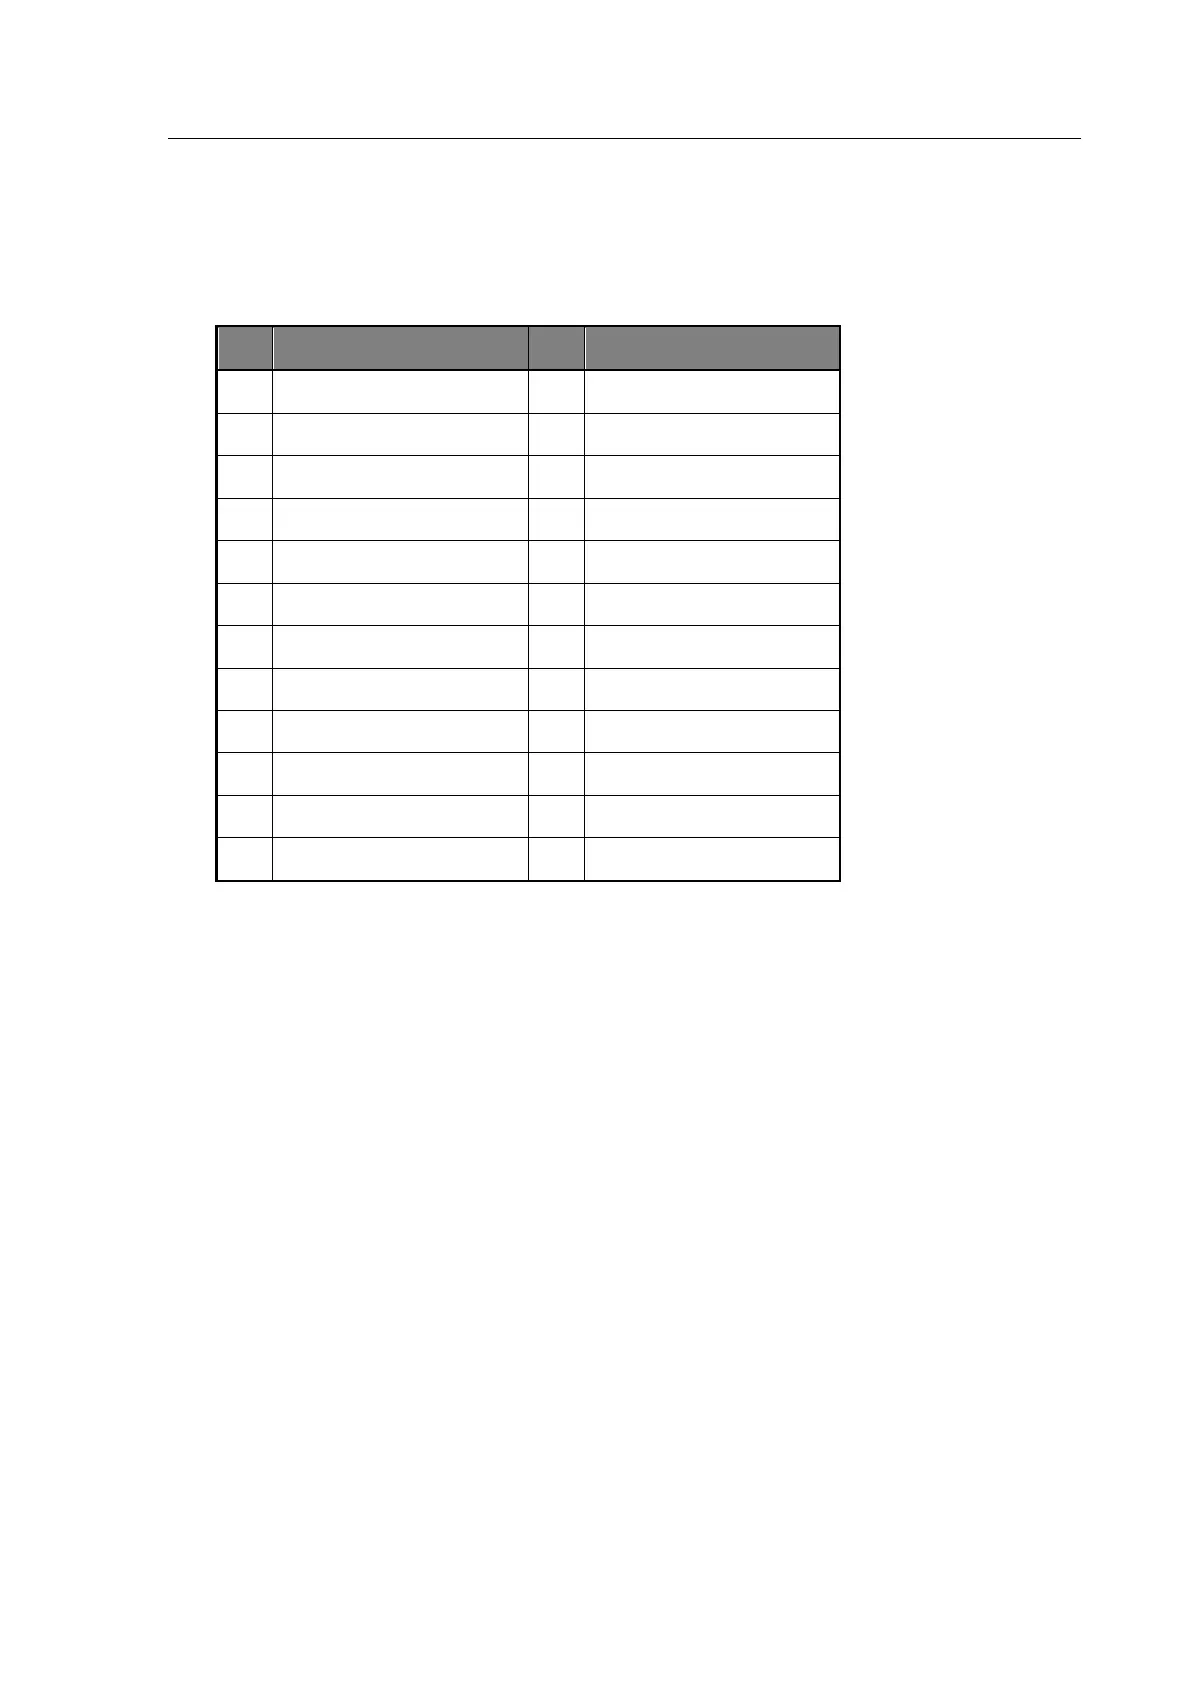
4.1.5.1 GPIB Connector Pin Assignment
NRFD (Not Ready For Data)
4.1.6 Switching the Instrument ON
With the instrument connected to the correct AC power supply (see section 3—Installation)
press the POWER switch. The instrument will display the mode and settings selected when the
instrument was last switched off.
If the display is too bright or too dark, use the CONTRAST control above the power switch to
set the contrast level.
If the meter had previously been set up for measuring components, testing can recommence after
checking the settings.
To return to the MAIN MENU press the Menu control key.
4.1.7 Switching the Instrument OFF
The power can be switched OFF at any time without damage to the instrument, but to avoid
losing trim and calibration data, the instrument should be switched OFF when it is in a
quiescent state rather than when it is running a routine, e.g. trimming, calibration or data entry.