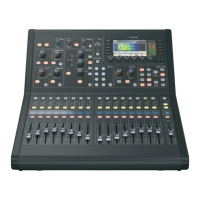
Note, stereo panning is handled by even BUS SEND rotary controls as described in Using Buses above.
Using DCA Groups
Use DCA Groups to control the volume of multiple channels with a single fader.
1. To assign a channel to a DCA, first be sure you have the GROUP DCA 1-8 layer selected.
2. Press and hold the select button of the DCA group you wish to edit.
3. Simultaneously press the select buttons of a channel you wish to add or remove.
4. When a channel is assigned, its select button will light up when you press the SEL button of its DCA.
Sends on Fader
To use Sends on Faders, press the Sends on Faders button located near the middle of the console.
You can now use Sends On Faders in one of two different ways.
1. Using eight input faders: Select a bus on the output fader section on right and the input faders on the left will
reflect the mix being sent to the selected bus.
2. Using eight bus faders: Press the select button of an input channel on the input section on the left. Raise the
bus fader on the right side of the console to send the channel to that bus.
Mute Groups
1. To assign/remove a channel from a Mute Group, press the MUTE GRP screen selection button.
You will know you are in edit mode when the MUTE GRP button lights and the six Mute Groups appear on the
six rotary controls.
2. Now press and hold one of the six Mute Group buttons you wish to use and simultaneously press the SEL
button of the channel you wish to add to or remove from that Mute Group.
3. When complete, press the MUTE GRP button again to reactivate the dedicated Mute Group buttons on the
M32R.
4. Your Mute Groups are ready to use.
Assignable Controls
1. The M32R features user-assignable rotary controls and buttons in three layers.
To assign them, press the VIEW button on the ASSIGN section.
2. Use the Left and Right Navigation button to select a Set or layer of controls. These will correspond to the SET A, B
and C buttons on the console.
3. Use the rotary controls to select the control and choose its function.
Note: The LCD Scribble Strips will change to indicate the controls for which they are set.
Effects Rack
1. Press the EFFECTS button near the screen to see an overview of the eight stereo effects processors. Keep in
mind that effects slots 1-4 are for Send type effects, and slots 5-8 are for Insert type effects.
2. To edit the effect, use the sixth rotary control to select an effects slot.
3. While a effects slot is selected, use the fifth rotary control to change which effect is in that slot, and confirm by
pressing the control.
Press the sixth rotary control to edit the parameters for that effect.
4. Over 60 effects include Reverbs, Delay, Chorus, Flanger, Limiter, 31-Band GEQ, and more.
Please refer to the User Manual for a full list and functionality.
Firmware Updates & USB Stick Recording
To Update Firmware:
1. Download the new console firmware from the M32R product page onto the root level of a USB memory stick.
2. Press and hold the RECORDER section’s VIEW button while switching the console on to enter the update
mode.

 Loading...