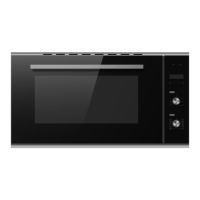
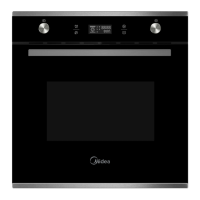
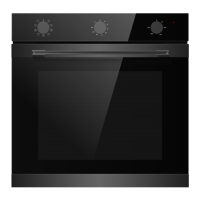
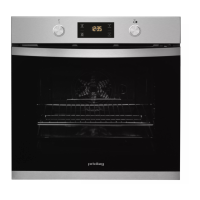
This document describes the BIH 90x48 MIDEA 93M90D0 multifunction electric oven, providing instructions for its use and maintenance.
Function Description
The Midea 93M90D0 is a multifunction electric oven designed for household use. It offers various cooking functions, including:
- Oven Lamp: To switch on the lamp without a cooking function.
- Defrost: To thaw meat, poultry, bread, and desserts. The fan circulates warm air to wrap around the food.
- Double grilling with fan: The inner heating element and the outer heating element in the top of the oven are working with the fan. It is suitable for grilling large amounts of meat.
- Double grilling: The inner heating element and the outer heating element in the top of the oven are working. Suitable for grilling large quantities.
- Grill-small: This cooking method is normal grilling, utilizing the inner part only of the top heating element, which directs heat downwards onto the food.
- Convection with fan: Quick and uniform cooking with the aid of the top and bottom heating element and the fan. Ideal for baking flans and sweets and for roasting.
- Convection: For baking and roasting food on one rack position only. The heat gets distributed evenly from the top and bottom.
- Bottom heater: For baking cakes with a crispy bottom and for preserving foods. The heat is distributed from the bottom.
- 3D Convection: For sweets and biscuits on 1 and 2 levels. Inside the cooking chamber, the fan distributes the heat generated by the circular heating element on the rear wall of the oven.
- ECO function: This is equivalent to the 3D Convection function but allows cooking without using the oven lamps, allowing energy savings.
The oven features a control panel with a function knob, temperature knob, and an end-of-cooking timer/clock button. It also includes indicators for temperature and F switch, lamps, heating element, and a fan. The oven has five rack positions and a removable shelf support.
Important Technical Specifications
- Power Supply: 230 V~
- Nominal Power: 2.92 kW
- Cable: 3 x 1.5 mm² type H05VV-F or H05RR-F
- Heating Elements:
- Oven light: 50 Watts
- Rotisserie motor: 4 Watts
- Circular heating element: 2.50 kiloWatts
- Bottom heating element: 1.50 kiloWatts
- Top heating element: 0.90 kiloWatts
- Cooling fan: 23 Watts
- Grill heating element: 1.80 kiloWatts
- Dimensions:
- Overall: 595 mm (width) x 595 mm (height) x 575 mm (depth)
- Built-in: 560 mm (width) x 580 mm (height) x 550 mm (depth)
- Weight: Max. 15 kg (door capacity)
- Electrical Connection: The oven is provided with a three-pole power cable with free terminals. The connection is designed for permanent mains connection.
Usage Features
- Retractable Knobs: The selectors are retractable knobs. Press them to extract them and reinsert them. It is advisable to keep the knob out while the oven is working.
- Temperature Selector: The temperature selector is used to set the temperature. The oven does not heat up below 50°C. The warning light with the "°C" indicator symbol lights up when the oven is in operation; it goes out instead during the pauses in heating.
- End-of-Cooking Timer Selector: This feature allows setting the clock, alarm, duration, and end time for cooking.
- Clock: Set the current time.
- Alarm: Set an alarm, which will sound when the set time is reached.
- Duration: Set the cooking duration. The oven will switch off automatically after the set time.
- End Time: Set the time when cooking should end. The oven calculates the start time automatically.
- Lock Function: The lock button for 3 seconds activates and locks the oven display. Press again for 3 seconds to unlock.
- Accessories: The oven comes with a wire rack, a dripping pan, and telescopic rails.
- Wire Rack: Used as a support for baking pans, pastry tins, and other containers.
- Dripping Pan: Used to collect the juices of grilled foods or for cooking foods directly.
- Telescopic Rails: For positioning either the wire rack or the dripping pan.
- First Use: Before the first use, clean the accessories and removable shelf supports. Switch on the appliance with nothing inside it in order to burn off fat residues. Set the function and the maximum temperature for one hour.
- Cooking Guide Table: The manual provides detailed cooking guide tables for various dishes, including biscuits, small cakes, sponge cake, leavened sweet, apple pie, cheese cake, roast beef, meatloaf, lasagna, roast veal, pork loin, pork shoulder, roast rabbit, turkey rump, pork neck, roast chicken or roast guinea-fowl, grilled chicken, rainbow trout, pizza, bread, ciambella cake, jam tart, short pastry, cream puffs, angel food cake, rice cake, brioches, shortbread biscuits, frozen pizza, frozen chicken, frozen sandwiches, frozen brioches, frozen erbazzone, frozen strudel, and frozen fried potatoes. These tables specify the weight, accessories, pre-heating minutes, rack position, function, temperature, and time minutes for each dish.
Maintenance Features
- Routine Service Call: To ensure the appliance operates at peak performance, a routine service call is recommended yearly for the life of the appliance.
- Cleaning and Care:
- General Cleaning: Clean the front of the appliance with a soft cloth moistened with warm soapy water. Clean the metal surfaces using a regular detergent. Clean the inside of the appliance after each use. Fat or other food remains can cause a fire.
- Stubborn Dirt: Remove stubborn dirt with special oven detergents.
- Non-stick Coatings: Do not clean non-stick accessories with strong detergents, sharp objects, or in the dishwasher.
- Discolouration/Damage: All surfaces can discolour or alter if you use unsuitable products. In particular, the front of the oven gets damaged by cleaning sprays and descalers. Remove residual detergent immediately.
- Door Cleaning: The oven door is equipped with three glass panels. You can remove the oven door and the internal glass panels to clean them.
- Open the oven door completely.
- Position the hooks "A" of the hinges outwards.
- Slowly close the door to reach the hooks "A", making sure they lock in the slots "B" of the door, as shown in Fig.8.
- Using both hands, press lightly inwards on the door, allowing the door hinges "C" to detach from the slots "D".
- After cleaning, fit the door back on properly by following the procedure in reverse order.
- Shelf Supports: The shelf supports are removable for easier cleaning. Pull out the extraction rail from the side wall by pulling it forward. Pull out the back of the shelf support from the side wall and remove it. Install the rack supports by following the procedure described in reverse order.
- Changing the Light Bulb:
- Ensure the appliance is switched off before replacing the lamp to avoid the possibility of electric shock.
- Wear protective gloves to change the light bulb.
- Disconnect the power supply from the power socket or switch off the circuit breaker of the unit's power socket.
- Unscrew the glass lamp cover anticlockwise.
- Unscrew the glass lamp cover back into place.
- Note: Use only halogen lamps 25-40 W / 220 V-240 V, T300°C.
- Disassembly of Convection Motor:
- Turn off the electrical power supply to the appliance prior to servicing it.
- Use a screwdriver to remove the screws on the back of the cavity inside to disassemble the convection motor cover, and then pull it out from the clipping hole.
- To reassemble the convection motor cover, perform the operations described above in reverse.
- Disposal: Disconnect the plug from the power supply. Cut the mains cable and dispose of it. Remove the door block to prevent children and pets from getting closed inside the appliance.
- Spare Parts: Only use genuine spare parts. Contact the Authorized Service Centre to repair the appliance.