13
4. Open the lower door .
5. Use the after sale accessory—filter flushing tip, the arrow direction is the water
flow direction, insert the PE pipe in the quick joint.
6. Insert the C1 active carbon filter into the filter flushing tip, tighten it by turning
anticlockwise, and open the water tap to flush the filter till it doesn't discharge black
water, for about 10min; Take the same step to flush the C2 active carbon filter-F1.
Take the same step to flush the PP filter for 5min.
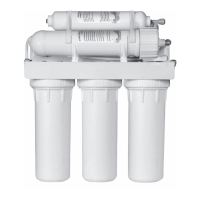
7. Install the clean filter in the product, hold the filter with the left hand and enclosure
of filter with the right hand, and insert it upwards in the filter, tighten it by turning
anticlockwise, the installation order is: PP sediment filter-F1→C1 active carbon
filter-F1→RO reverse osmosis filter-F1→C2 active carbon filter-F1.After washing
and installation of filters, the lower door must be fixed with original screws.
8. Take out the pin of the quick joint at the rear of the products side plate's, and then
take out the white plug.
 Loading...