Installation
Page 131
6. Refrigerant Pipe Installation
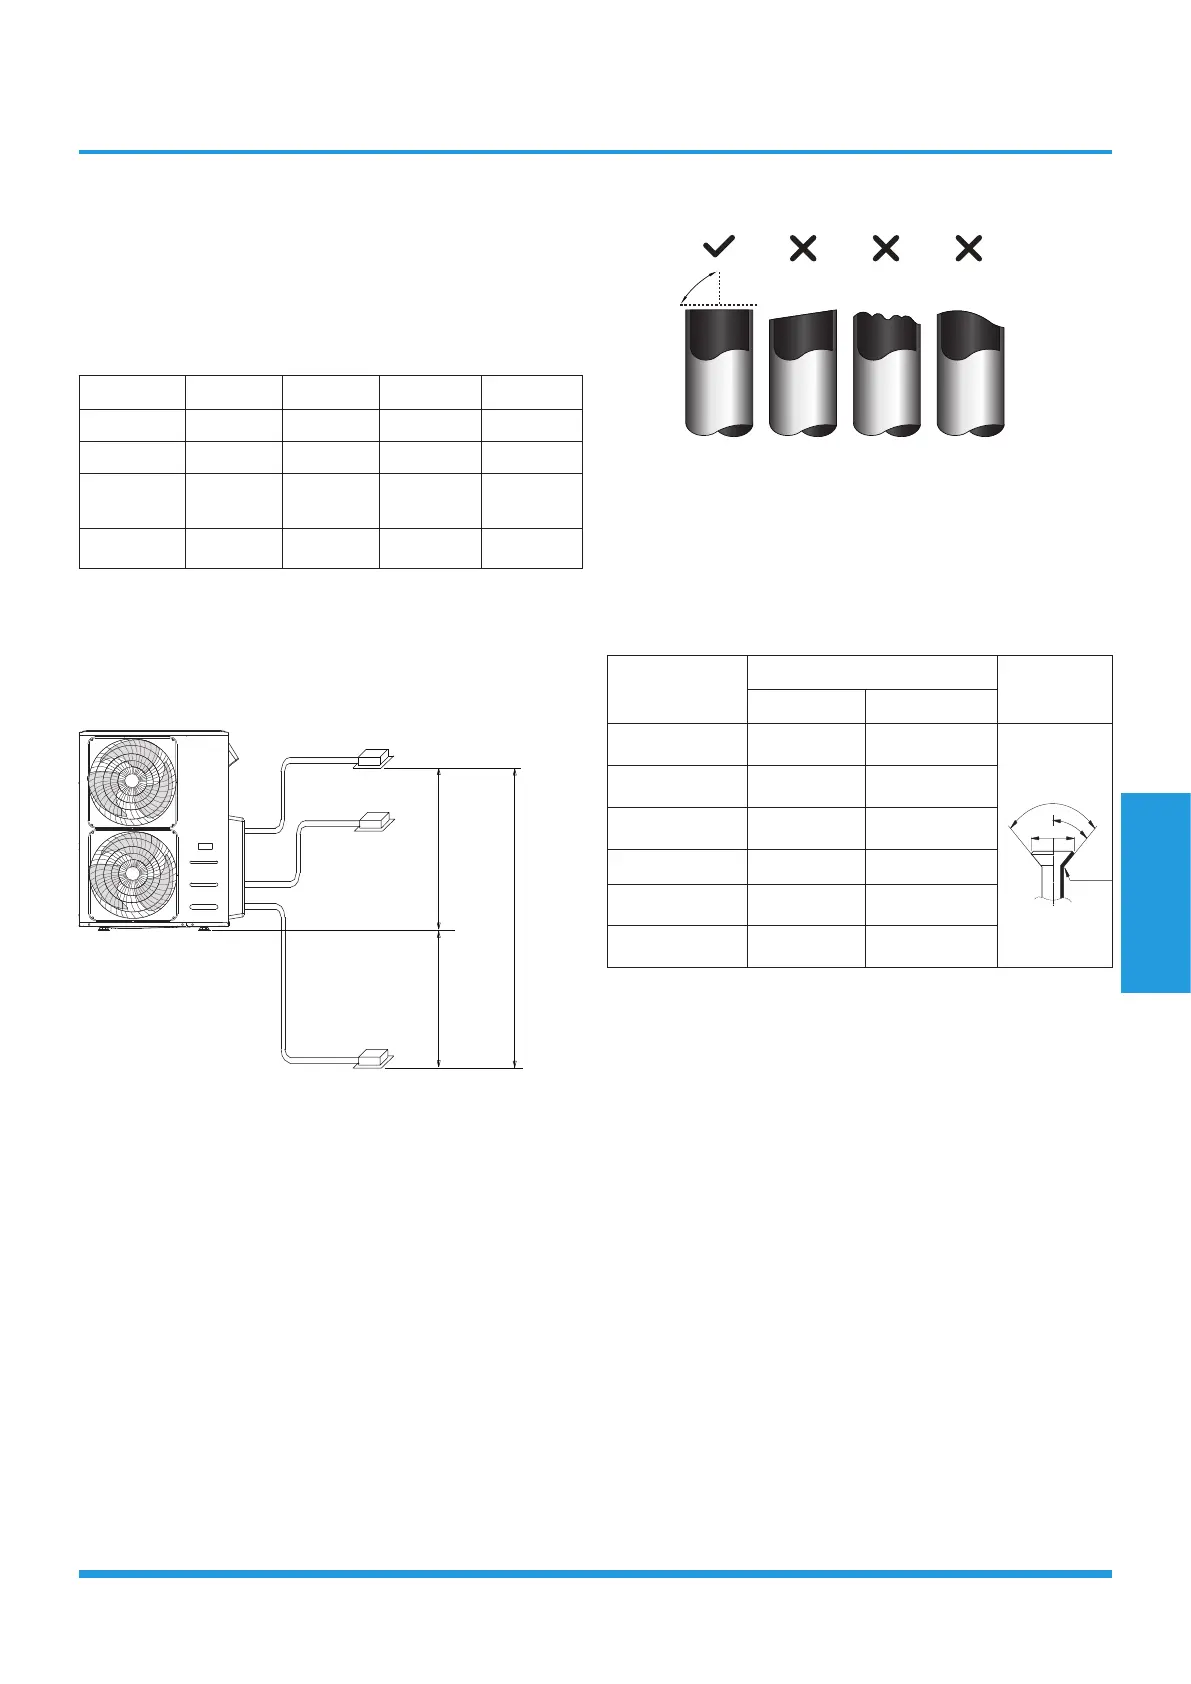
6.1 Maximum length and drop height
Ensure that the length of the refrigerant pipe and the drop
height between the indoor and outdoor units meets the
requirements shown in the following table.
M2OG-14HFN8-Q
M2OC-18HFN8-Q,
M2OD-18HFN8-Q
M3OE-27HFN8-Q,
M3OF-27HFN8-Q
M3OF-21HFN8-Q
M4OB-36HFN8-Q
M4OE-28HFN8-Q
M5OD-42HFN8-Q
Max. length for
all rooms
40 60 80 80
Max. length for
one indoor unit
25 30 35 35
Max. height
different
between IDU
and ODU
15 15 15 15
Max. height
different
between IDUs
10 10 10 10
• When installing multiple indoor units with a single
outdoor unit, ensure that the length of the refrigerant
pipe and the drop height between the indoor and
outdoor units meet the requirements illustrated in the
following diagram:
Indoor unit
Indoor unit
Indoor unit
Outdoor unit
15m(49ft)
15m(49ft)
Max.Height difference
6.2 The procedure of connecting pipes
1.Choose the pipe size according to the specification table.
2.Confirm the cross way of the pipes.
3.Measure the necessary pipe length.
4.Cut the selected pipe with pipe cutter
• Make the section flat and smooth.
l Ää áèì É
oçì ÖÜ
t ~ê éÉÇ
VM
5. Insulate the copper pipe
• Before test operation, the joint parts should not be
heat insulated.
6. Flare the pipe
• Insert a flare nut into the pipe before flaring the
pipe
• According to the following table to flare the pipe.
Pipe diameter
(inch(mm))
Flare dimension A (mm/inch)
Flare shape
Min Max
1/4" (6.35) 8.4/0.33 8.7/0.34
R0.4~0.8
4
5
°
±
2
90
°
±
4
A
3/8" (9.52) 13.2/0.52 13.5/0.53
1/2" (12.7) 16.2/0.64 16.5/0.65
5/8" (15.9) 19.2/0.76 19.7/0.78
3/4" (19) 23.2/0.91 23.7/0.93
7/8" (22) 26.4/1.04 26.9/1.06
• After flared the pipe, the opening part must be seal
by end cover or adhesive tape to avoid duct or exog-
enous impurity come into the pipe.
7. Drill holes if the pipes need to pass the wall.
8. According to the field condition to bend the pipes so
that it can pass the wall smoothly.
9. Bind and wrap the wire together with the insulated pipe
if necessary.
10. Set the wall conduit
11. Set the supporter for the pipe.
12. Locate the pipe and fix it by supporter
• For horizontal refrigerant pipe, the distance be-
tween supporters should not be exceed 1m.
• For vertical refrigerant pipe, the distance between
supporters should not be exceed 1.5m.
13. Connect the pipe to indoor unit and outdoor unit by
using two spanners.
• Be sure to use two spanners and proper torque to
fasten the nut, too large torque will damage the
 Loading...