15
Safety
Precautions
Installation
Requirements
Installation
Instructions
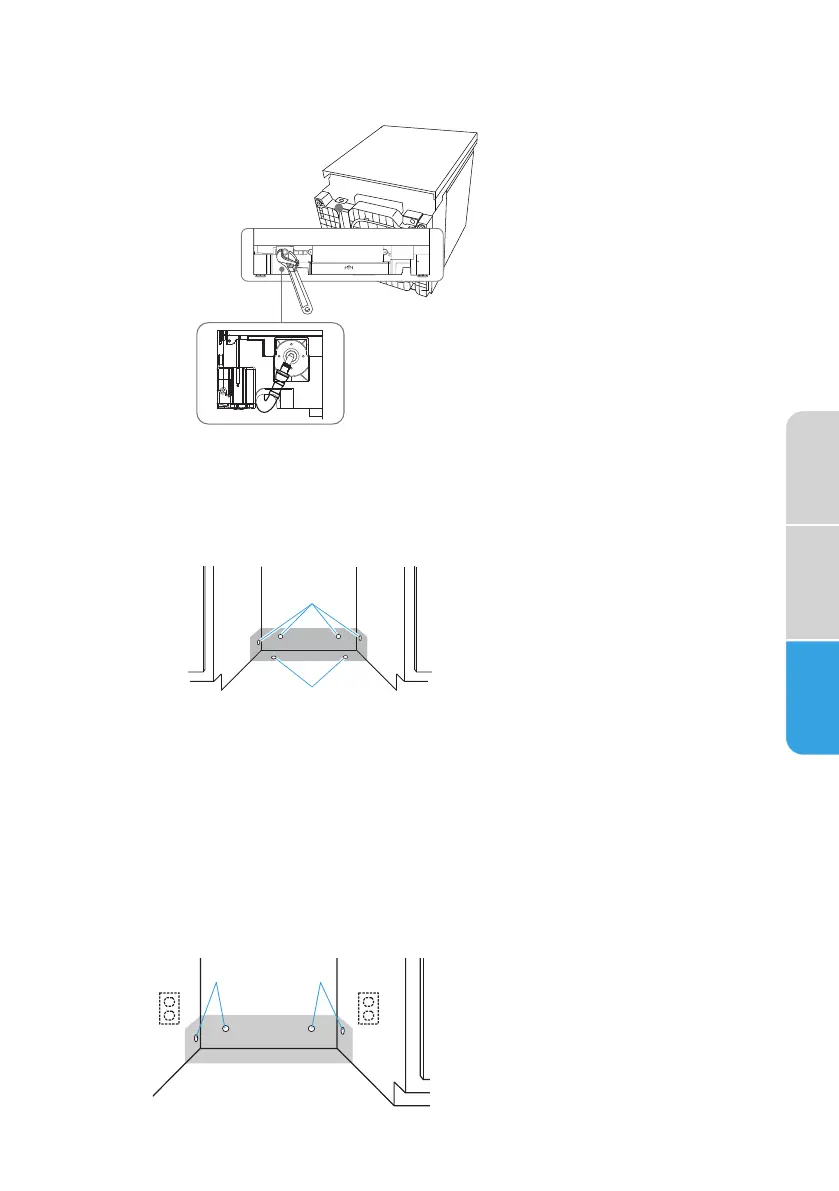
2. Position the end of the elbow so that it faces the bottom left of the
dishwasher.
PREPARE INSTALLATION OPENING
•
The wiring and plumbing may enter the opening from either the right-
hand or left-hand side of the rear wall, the side cabinets, or the floor
within the shaded area. See “Location Requirements” for dimensions.
a
a
a
Possible Utility
Hole Locations
NOTE: Connecting the dishwasher to utilities will be easier if you route
the wiring into the installation opening from the right-hand side and
the plumbing from the left-hand side.
IMPORTANT: Any plumbing or electrical line run outside of the shaded
area can become pinched.
•
The direct wire cable may enter the opening through either the
same hole used for the drain hose and hot water line or through an
additional 1
" (3.8 cm) diameter hole.
NOTE: The hole must be free of sharp edges. If the cabinet wall is
metal, the edge of the hole must be covered with a bushing/grommet.
•
Power cords with a plug MUST pass through a separate hole.
ba
a
Preferred Electrical
Locations
b
Preferred Plumbing
Locations
NOTE:
After installation, the elbow
face the dishwasher card slot at the right
on the bottom.
should