Installation detail
15
f. Turn the stem of the packed valve B about 45 counterclockwise for 6~7 seconds after the gas
coming out, then tighten the flare nut again. Make sure the pressure display in the pressure
indicator is a little higher than the atmosphere pressure.
g. Remove the charge hose from the low pressure charge hose.
h. Fully open the packed valve stems B and A.
i. Securely tighten the cap of the packed valve.
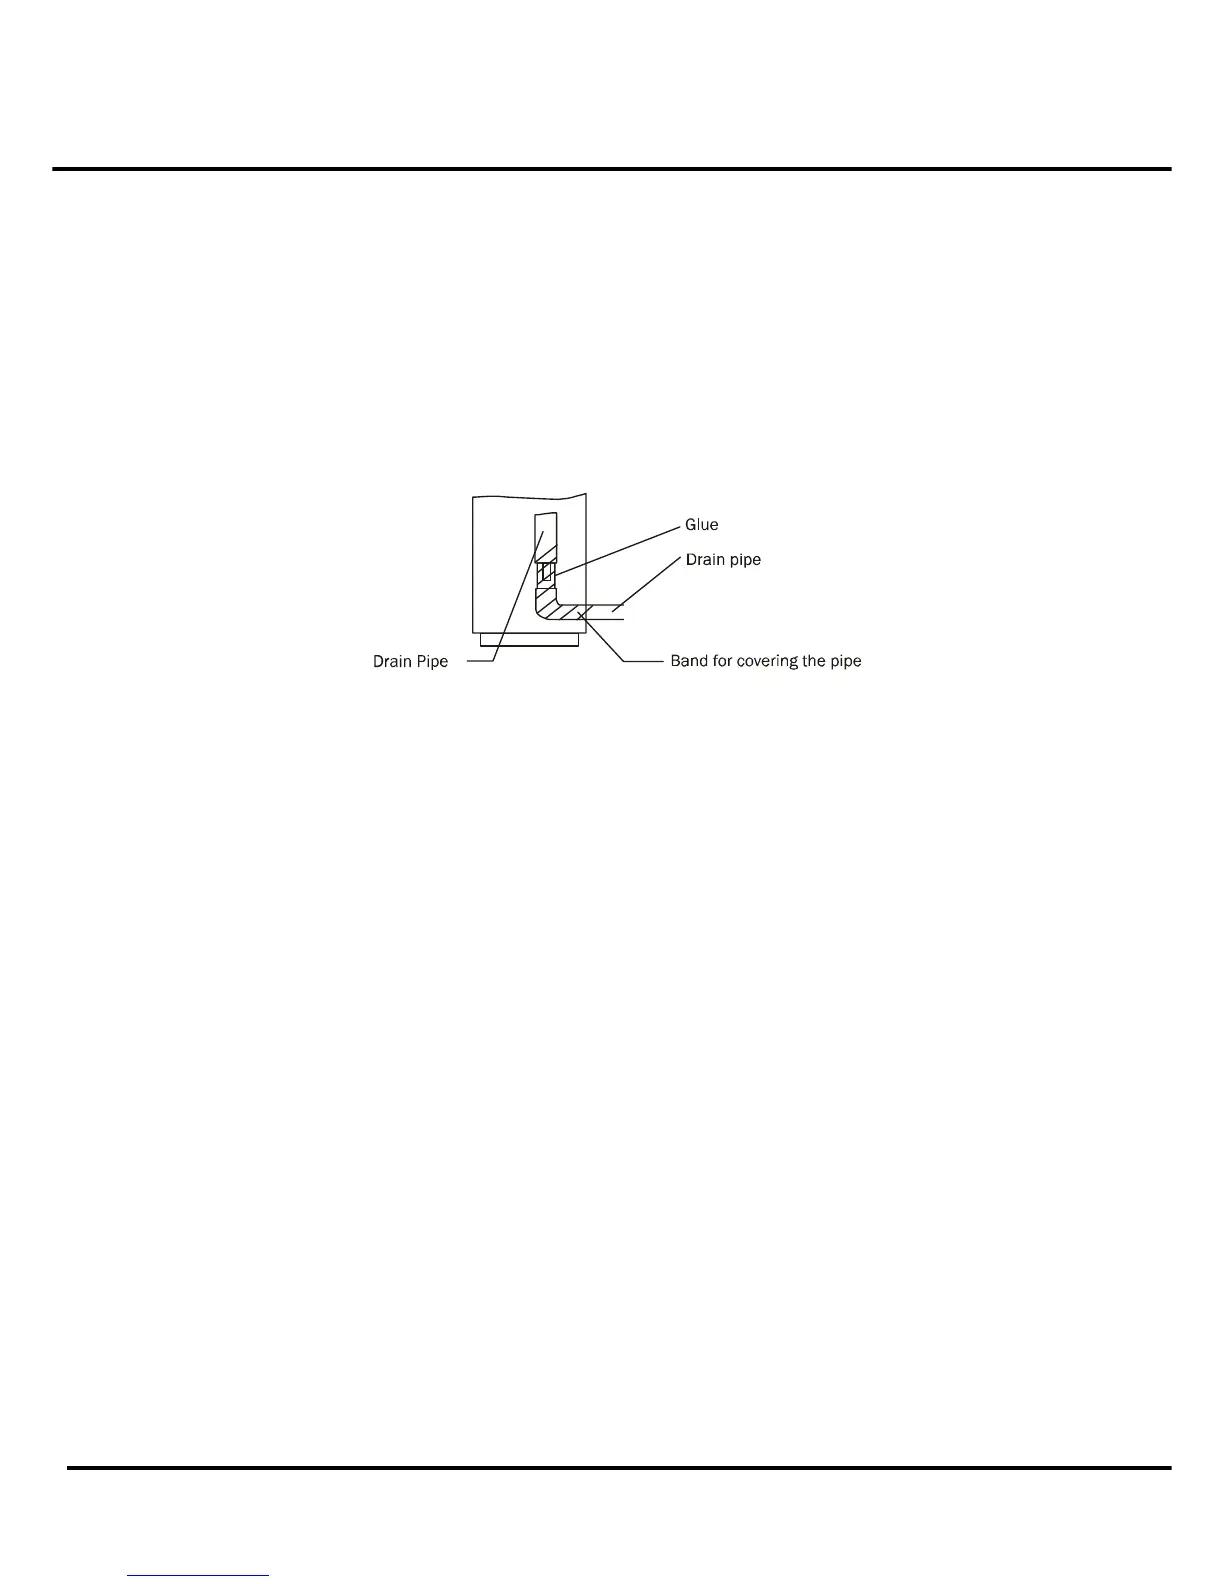
6.4 Drain Pipe of The Indoor Unit
Make sure the drainpipe is connected to the outdoor side downward;
The hard polyvinyl chloride(PVC)plastic pipe (external diameter 26 mm) sold is the market is
suitable for the attached soft drain pipe;
Please connect the Soft Drain Pipe with the Drain Pipe, then fix it with band;
If you have to connect the Drain Pipe indoors, to avoid condensing caused by air intake, you
must cover the pipe with heat-insulation material (polyethylene with Specific Gravity of 0.03, at least
9 mm in thickness), and use Glue Band to fix it.
After the Drain Pipe has been connected, please check if the water drains out of the pipe
efficiently and has no leakage.
Refrigerant pipe and Drainpipe should be heat-insulated to avoid condensing and
water-dropping later on.
6.5 Wiring
Please refer to the Wiring Diagram.
 Loading...