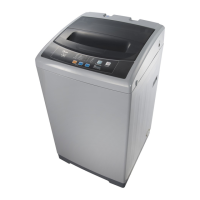
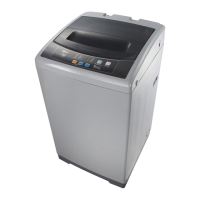
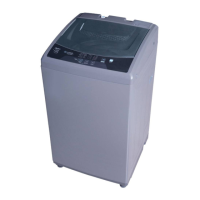
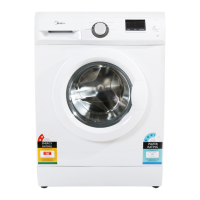
This document is the owner's manual for a Midea Washing Machine, model MFW-1250MV2. It provides comprehensive instructions for safe operation, installation, usage, and maintenance of the appliance.
The washing machine is designed for indoor use and offers a range of automatic wash programs, as well as options for customized wash cycles. Before using the machine, users are advised to read the manual carefully and keep it for future reference, as it contains helpful hints for proper use and maintenance, which can save time and money. The manual also includes a troubleshooting guide to help resolve common problems without needing to call for service.
Safety and Precautions
The manual emphasizes safety through various graphics and warnings. A "Warning" indicates potential for serious injury or death, while "Caution" points to risks of injury or property damage. Prohibitive graphics indicate actions that must not be taken, and "forcible execution" graphics highlight actions that must be performed.
Key safety instructions include:
- Do not disassemble or reassemble the machine without authorization.
- Do not insert hands into the spin barrel before it has fully stopped.
- Avoid installing the machine in damp or rainy environments to prevent electric shock, fire, faults, and distortion.
- Do not rinse the machine directly with water during cleaning.
- Use the correct power source and avoid pulling out or inserting the plug with wet hands.
- Ensure the water inlet pipe is properly connected and the tap is open before washing.
- The water temperature should not exceed 50°C when washing with warm water.
- Always pull out the plug from the socket when the machine is not in use.
- Ensure the earth line of the socket is well connected to prevent electric shock.
- Do not allow children to climb the machine or peer into the rotating spin barrel.
- Do not wash clothes touching kerosene, gasoline, alcohol, or other flammable materials.
- Regularly clean the power plug to remove dust and dirt.
- Do not damage the power flexible cord or plug.
- Do not place burning candles, mosquito-repellent incense, cigarettes, electric stoves, or heating fans on the washer.
- Do not wash down jackets, raincoats, fishing coats, or similar clothes in the washer.
- Customers are not allowed to change the power line without permission.
- It is strictly prohibited to place children or lay weights on the washer.
Installation of the Washer
Installation involves several steps:
- Remove Package: Take out the bottom board of the cabinet from the foam cover and accessories from inside the washer door. Trial operation or washing on the foamed cushion is strictly forbidden.
- Installation of Drain Hose: The drain hose must be completely sleeved over the sewer, fixed, and tightened with a hoop. The placed height of the drain hose should not exceed 15cm for lower drain systems. If extended, its length should not exceed 3 meters. For upper drain systems, the drain hose height should be between 86-100 cm, with a diameter of not less than 3 cm and flow capacity not less than 40 L/Min. The drain pipe must be hung up at 86-100cm height from the floor before washing.
- Installation of Water Inlet Pipe: This involves connecting the water inlet hose to the tap and the water inlet valve. For models with a single screw thread water inlet pipe, the metallic filtering bag pipe screws onto the tap, and the other end screws onto the water inlet valve. For models with a double screw thread water inlet pipe, a connection socket (consisting of two parts, A and B) is used. Part A is sleeved over the tap mouth and tightened, then part B is screwed on. The speedy connector is then pushed onto the connection socket. The other end of the hose screws onto the water inlet valve. Evenly apply force when tightening the clamping nut to avoid twisting the water inlet valve joint. The manual specifies that new hose-sets must be used for connection, and old hose-sets should not be reused.
Preparation Before Washing
- Adjust Adjustable Foot: Slightly incline the washer, loosen the adjustable foot knob, and adjust the foot to ensure all four corners of the washer are steadily in contact with the ground. Then tighten the knob. If the ground is uneven, corrections should be made to the ground surface to prevent the washer barrel from inclining and knocking the cabinet.
- Install Water Inlet Hose: Connect the water inlet hose as per the instructions above.
- Connect to Power Source.
- Turn on Water Supply.
- Put Down Drain Hose: Ensure the drain hose is positioned correctly for gravity drain or upper drain, depending on the model.
- Put in Clothes and Suitable Amount of Washing Powder.
- Notice: Before washing, remove coins, keys, and other hard objects from clothes, and zip up clothes tightly to prevent damage to them and the barrel.
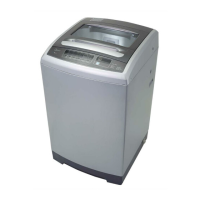
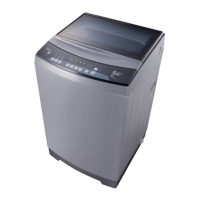
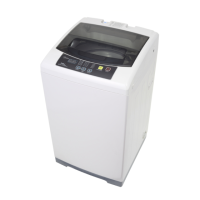
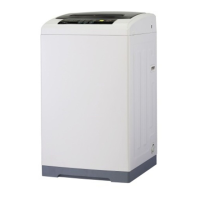
Parts Identification
The manual provides a diagram identifying key parts:
- Upper drain hose (for upper drain only)
- Top lid
- Frame
- Control panel
- Cabinet
- Drain hose (for lower drain only)
- Adjustable leg
- Adjustable foot knob
Accessories include a fixing ring (for lower drain hose), a universal connector, self-tapping screws, water inlet hose assemblies (for single and double screw thread pipes), and a base cover.
Instruction of Washer Operation Panel
The control panel features several buttons and indicators:
- Power: On & off power, with automatic power off.
- Delay: Presets delay time. Each press adds an hour (up to 24 hours), then 6 hours (up to 48 hours). The preset indicator changes automatically.
- Start/Pause: Starts the selected program or pauses it during operation. Pressing again resumes the program.
- Wash: Selects washing time.
- Rinse: Selects rinse time.
- Spin: Selects spin time.
- Water Level: Selects water level based on washing quantity. Indicator lights move and flash.
- Program: Selects fully automatic programs: Standard, Quick, Jeans, ECO, Anti-crease, Air Dry.
- Child Lock: Press "Water level" and "Spin" simultaneously to lock/unlock control panel buttons.
The Main Wash
- STANDARD Program: This is the easiest and most common program. After powering on, pressing "Start/Pause" initiates the standard wash. The digital tube displays remaining time, and the indicator light flickers.
- Press the power switch.
- Choose the proper water level based on the washing amount.
- Press "Start/Pause".
- Single Wash Procedure: Users can select any single procedure (WASH, RINSE, SPIN) or a combination. To select a single procedure, turn off the indicators for the procedures not needed. For example, for single wash, turn off RINSE and SPIN indicators.
- Use the Cleaning Solution for Twice: This procedure involves washing the laundry in two batches, with separate wash, rinse, and spin cycles for each batch, and a final rinse and spin for the first batch.
Wash Stops
- When the wash stops, the buzzer sounds 6 times, and the power automatically cuts off.
- Turn off the water tap.
- Even if power cuts off automatically, the power plug must be pulled out for safety.
Special Features
- Delay Time Program: Presets the beginning time of washing.
- Switch on power.
- Open tap and lay drain hose.
- Put in laundry and detergent.
- Select proper water level.
- Select functions and programs.
- Press "DELAY" to select beginning time.
- Close lid and press "START/PAUSE".
- Confirmation/Inspection: The delay light flashes. Pressing "Delay" continuously allows inspection of preset program and function.
- Cancel/Alternate: Press "Power" to cancel, or cancel first then reset with "Delay".
- Quick: Short wash time, suitable for lightly stained clothes or summer clothes.
- ECO: One rinse cycle, suitable for lightly contaminated clothes to save water.
- Jeans: High wash ability, suitable for heavy or seriously stained clothes.
- Anti-crease: Short wash time, multiple rinses with high water level to thoroughly wash garments.
- Air Dry: For clothes not easily fading, deforming, or non-waterproof, this function dries clothes without heating, achieving a room-dried result.
- Child Lock: Press "Water level" and "Spin" simultaneously to lock/unlock control panel buttons.
- Function of Automatic Power Shut Off:
- If the machine doesn't start within 10 minutes after powering on, it automatically powers off.
- After operation ends and the buzzer sounds 6 times, it automatically powers off.
- Function of Adjusting for Imbalance:
- If laundry is unevenly placed before spinning, it can cause vibration. The machine automatically inspects its operation state. If vibration is too great, it starts an adjusting program.
- During imbalance adjustment, the rinse light flashes, and the machine injects water to the set level. It adjusts for about 1 minute, drains water, then returns to the original spinning state. If adjustment fails twice, it alarms.
- Fuzzy Control Function: The standard program defaults to fuzzy control. After startup, water level selection is automatically cancelled based on fuzzy control. If there's no water, tub fuzzy measurement determines the water level, defaulting to 6 gear levels. Fuzzy control automatically determines water level after measuring clothing amount. During fuzzy testing, water circulation lights flash, and the digital display shows "--".
- Power Failure Memory Function: If power is suddenly lost during operation, the machine remembers the current state and returns to it automatically when power is restored (for washers with this function).
- One Touch System: After power on, pressing "Start/Pause" directly initiates One-key Washing. This function is canceled if other buttons (water level, program, temperature, function) are pressed before. It is also invalid if water remains in the inner tube, defaulting to "Normal" with default water level 6. The WM performs fuzzy detection, selecting "Rapid" with auto water level 1/2/3, or "Normal" with auto water level 4/5/6, or "Super clean" with auto water level 7/8. The program runs automatically after detection.
Cleaning and Maintenance
- End of Program: The machine sounds "dou-dou" 6 times, then powers off. Users should turn off the tap and pull out the plug to prevent water leakage or fire.
- Maintenance: Wipe the surface with gentle clothing to remove water and dirt. Do not use detergent, propellant, or other chemicals to avoid damaging plastic accessories.
- Clean the Water Inlet: After prolonged use, the water inlet mesh bag may become blocked.
- Switch on power, then turn off the tap.
- Let the washer run for 5 seconds for water to flow into the tub, then turn off power.
- Unload the water inlet hose, clean the mesh bag, and restore the assembly.
- Clean the Filter (Lint Filter):
- Magic Filter: Take out the lint filter, open it, wash it clean in water, and restore it.
- Normal Filter: Take off the lint filter, turn over the mesh bag, wash it clean in water, and restore it.
- Clean the Lint Filter in the Drain Pump (only for models with a drain filter):
- Drain water from the pump into a container.
- Loosen the pump cover anticlockwise.
- Take out the lint filter.
- Clean the filter.
- Restore it, aligning the convex place at the pump hole.
- Tighten the pump cover clockwise.
- Note: If the drain filter is not cleaned regularly (every 10 uses), drain problems may occur.
Identify Usual Trouble of Washer
The manual provides a troubleshooting guide for common issues:
- No Water Flows In: Check power, fuse, water supply, water pressure, inlet hose connection, tap opening, filtering screen of inlet valve, inlet valve coil, and if "Start/Pause" was pressed.
- No Washing: Check power, fuse, power supply voltage, if water level reached, and if "Delay" mode is set.
- Abnormal Draining: Check drain hose placement (too high), if the end of the hose is sealed, and if the internal rubber ring of the drain valve is blocked.
- Abnormal Spin: Check if the door lid is closed, if clothing is piled unevenly or excessively, if the washer is unstable or inclined, and if the motor belt is loosened.
- Note: During de-spin, if clothes are piled unevenly, the washer's computer will detect imbalance and attempt to correct it by filling water. If three corrections fail, the user must manually rearrange clothes in the barrel.
Malfunction Display and Solutions
The manual lists specific alarm codes and their solutions:
- "E1" flares (Alarm for water inlet): Water injection for about 30 minutes, but preset water level not reached. The buzzer sounds for 10 seconds. To stop, open the lid, deal with the fault, then close the lid.
- "E2" flares (Alarm for opening lid): Lid opened after starting delay time or during spinning. Solution is the same as "E1".
- "E3" flares (Imbalance alarm): Imbalance checked for the third time. Solution is the same as "E1".
- "E4" flares (Drain alarm): Alarm for water drain time out. Solution is the same as "E1".
- "E5" flares (Overflow alarm): Water reaching preset level, but injection doesn't cease. After treatment failure, switch power key again.