14
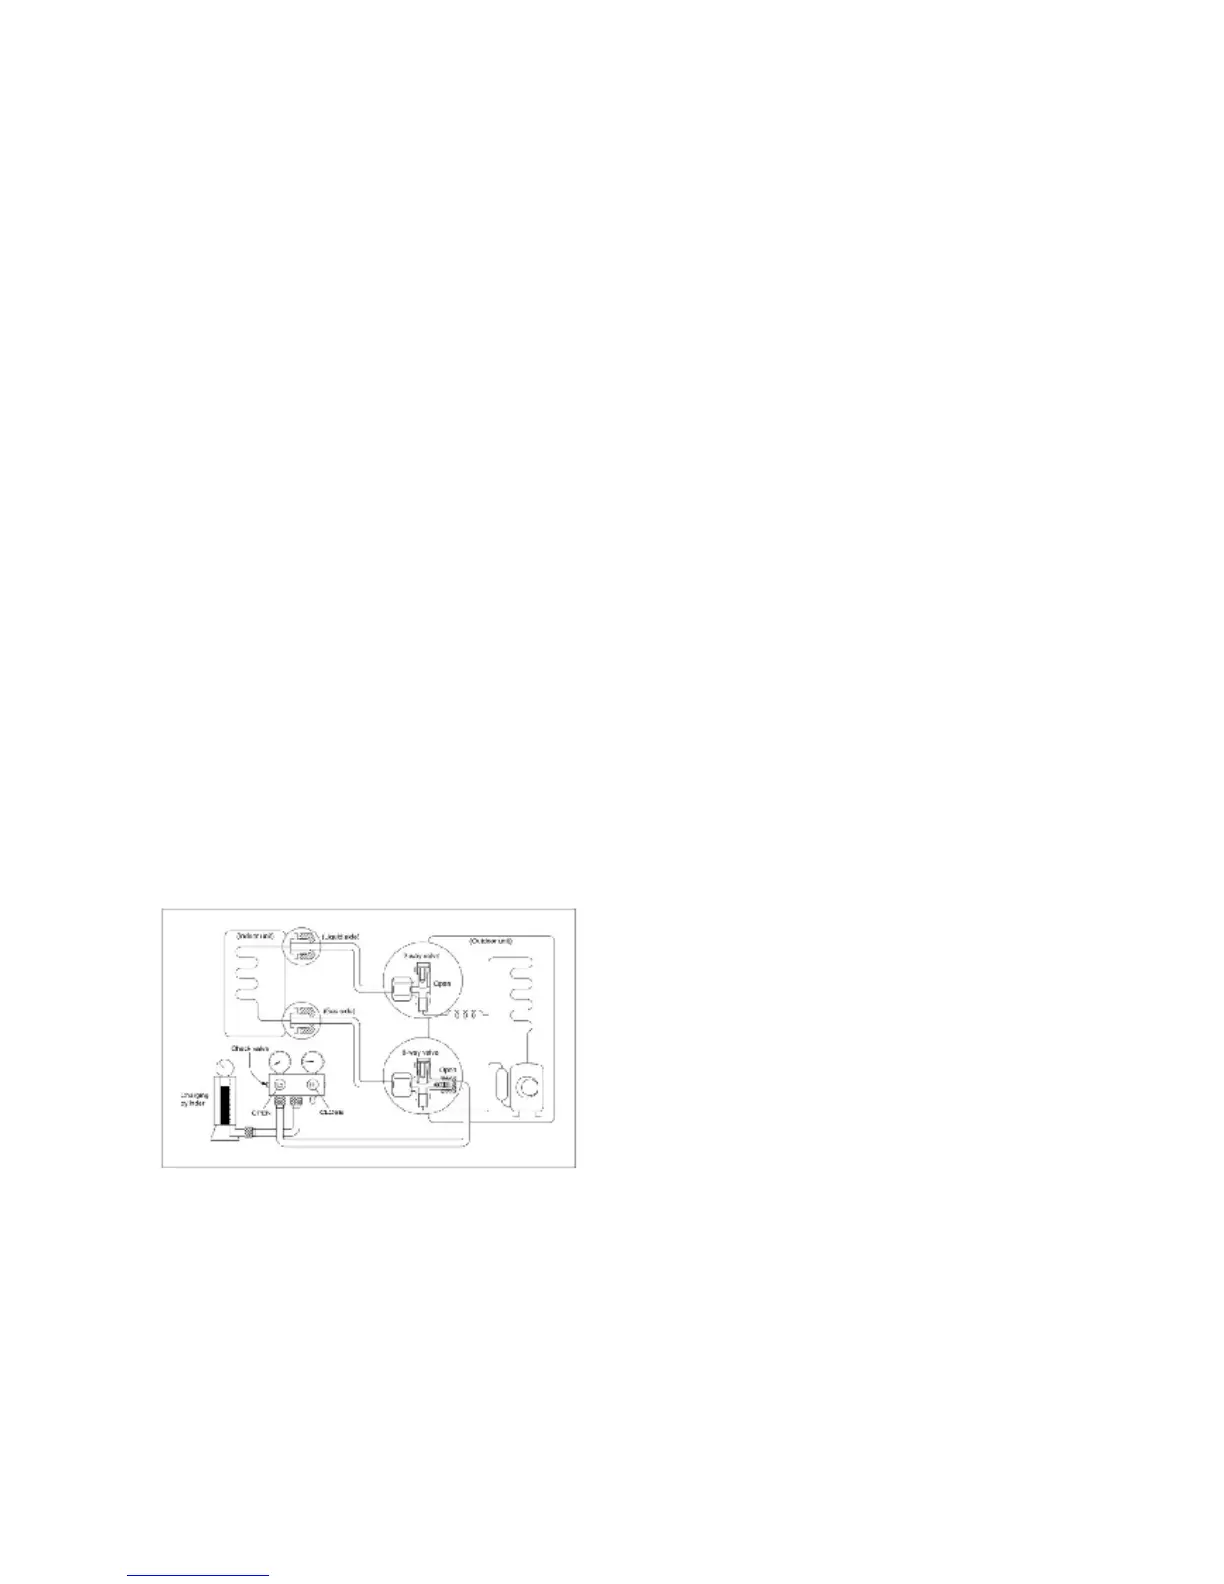
to the 3 way valve service port and a charging
cylinder to the service port of the 3-way valve.
3). Open the valve on the refrigerant container and
the low pressure gauge to allow the refrigerant to
enter the system, next loosen the flare connection
on the 2 way valve line to purge the air and
contaminants from the system for 30 to 50
seconds, then retighten the connection.
4). Next allow the pressure from the refrigerant to
reach 100 psi and then close the low pressure
gauge and the refrigerant container and check the
2 way and 3 way valve line connections for leaks
with liquid soap or electronic leak detector.
5). After the system has been check for leaks the
pressure should be adjusted to about 25 to 50 psi.
6). You can now disconnect the gauge manifold
and refrigerant container from the system and
open the 2 way and 3 way valves for system
operation
7). Mount the valve stems nuts and the service
port cap.
Be sure to use a torque wrench to tighten the
service port cap to a torque 18N·m(13.27 ft.lbs).
Be sure to check the gas leakage.
6.5 Adding the refrigerant after running
the system for many years
Procedure
1). 1st step; Connect the low pressure gauge from
the gauge manifold set to the 3 way service valve
(this is the blue hose on most sets) 2nd step;
Connect the middle hose from the manifold set to
the refrigerant container (this is the yellow line on
most sets). with refrigerant 410A the container
must be inverted (upside down) when adding the
refrigerant. Note that the 2 way and 3 way valves
must be in the open position.
3rd step; the air in the gauge hoses needs to be
purged out. use the pressure from the system to
purge the low side line, loosen the connection on
the manifold for a second, next open the to valve
on the refrigerant container to pressurize the line,
now loosen that hose at the manifold for a second
and purge that line.
3) Next step is to set the refrigerant container on
an electronic charging scale and record the weight
or zero the scale depending on the scale used.
Next determine the refrigerant charge to be
added.
4) Start the unit in the cooling mode and lower the
set point so the unit wont shut off during the
charging procedure.
5) Refrigerant can now be added to the system,
open the low pressure valve on the gauge manifold
set to start charging the unit with liquid refrigerant,
keep track of the refrigerant being added to the
system (do not overcharge the system)
6). Once the correct charge has been added to the
system close the low pressure valve on the gauge
manifold set and record the operating pressure.
The system is now charged and the unit can be
shut off. Close the valve on the refrigerant
container and disconnect the hose from the
manifold set, also disconnect the hose from the 3
way valve and replace and torque all caps.
7). Mount the valve stem caps and the service
port
Use torque wrench to tighten the service port
cap to a torque of 18N.m(13.27 ft,lbs).
Always leak check after servicing the refrigerant
system.
6.6 Procedure when servicing the indoor
unit refrigeration circuit.
1. Pumping down the system (isolating the
refrigerant charge in the condensing unit)
 Loading...