MCAC-UTSM-2014-03 R410A 380~415V 3Ph 50Hz TempMaker Series Split AC
130
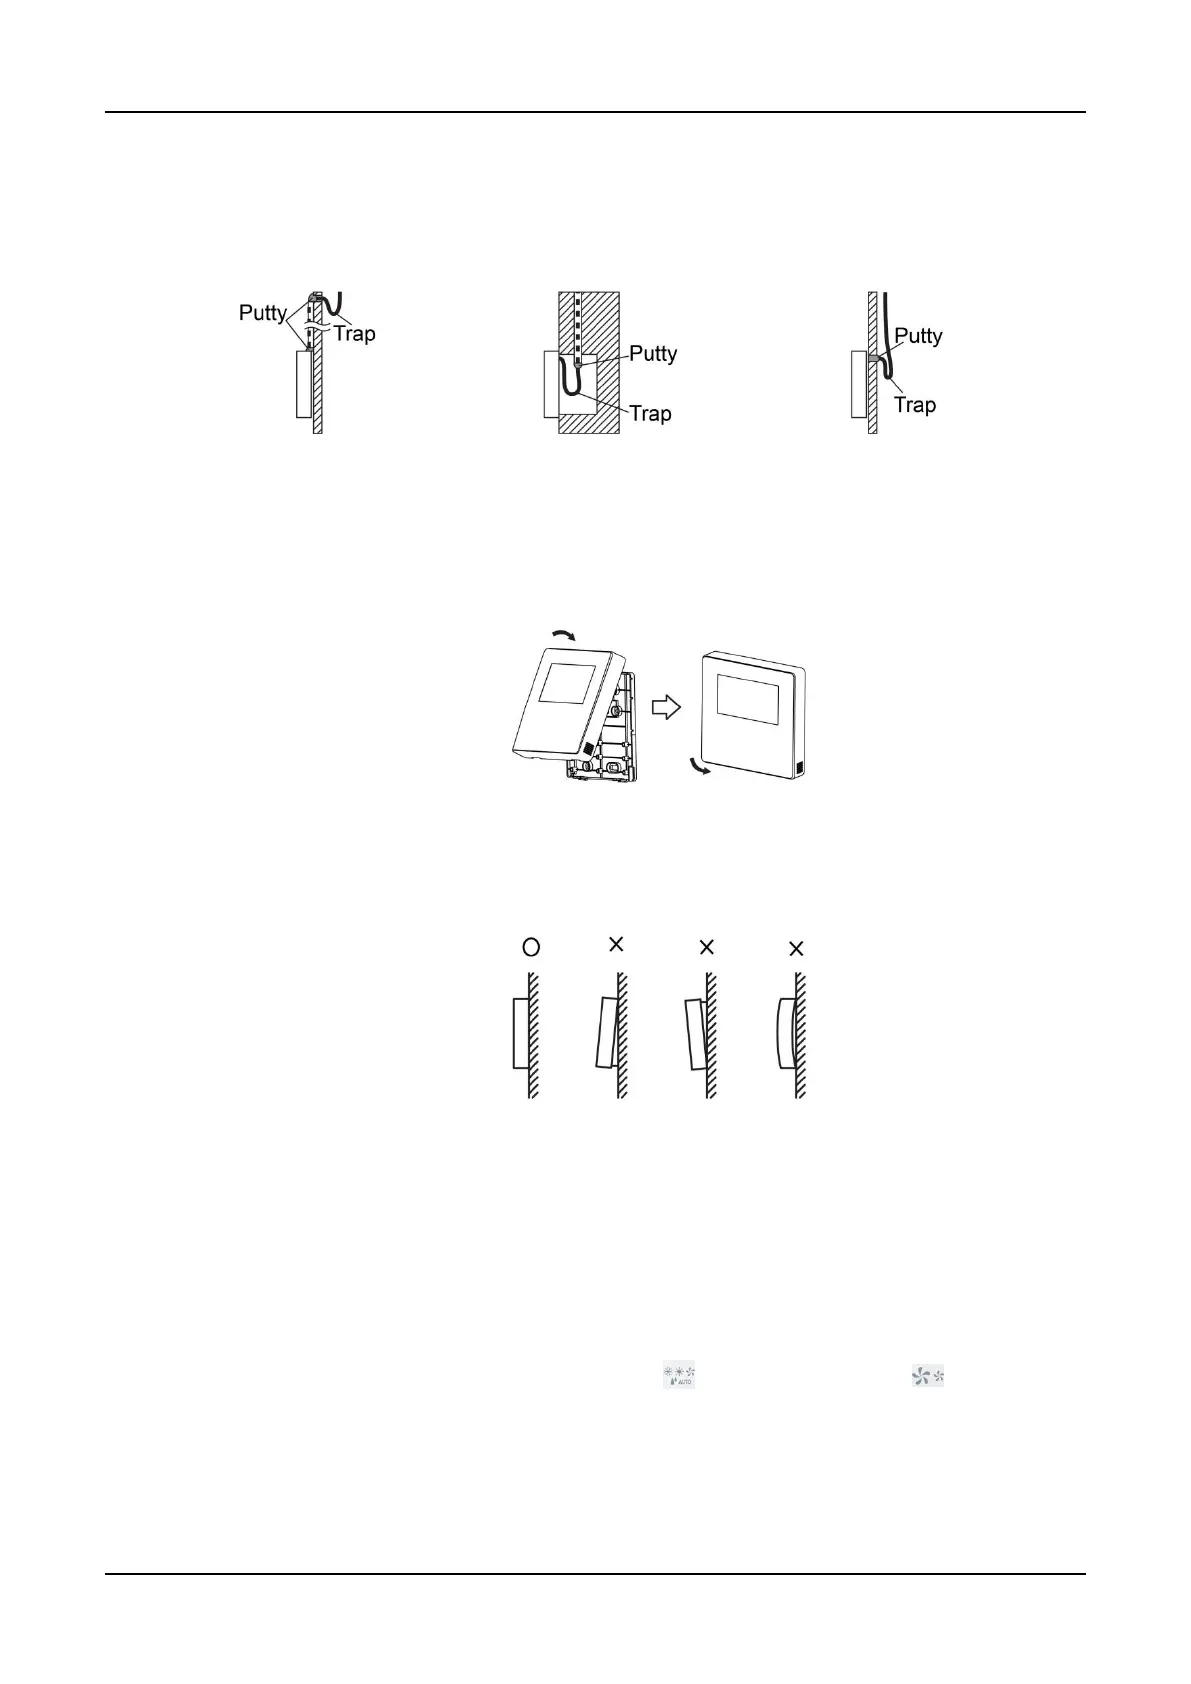
Avoid the water enter into the wired controller, use trap and putty to seal the connectors of
wires during wiring installation. When under installation, reserve certain length of the
connecting wire for convenient to take down the wired controller while during maintenance.
Wired controller’s front cover installation:
After adjusting the front cover and then buckle the front cover. Avoid clamping the
communication switching wire during installation.
Correct install the back cover and firmly buckle the front cover and back over, otherwise will
make the front cover drop off.
Wired controller initial parameter setting
Change the related functions of the controller through adjusting the initial parameters.
The wired controller initial parameter includes two codes ‘XY”. The first code ‘X’ means the
function class, the second code ‘Y’ means detailed configuration of this function.
Step1: Simultaneously press the mode button and fan speed button of the wired
controller for 5 seconds to enter the parameter setting state.