4
3.2 Radio
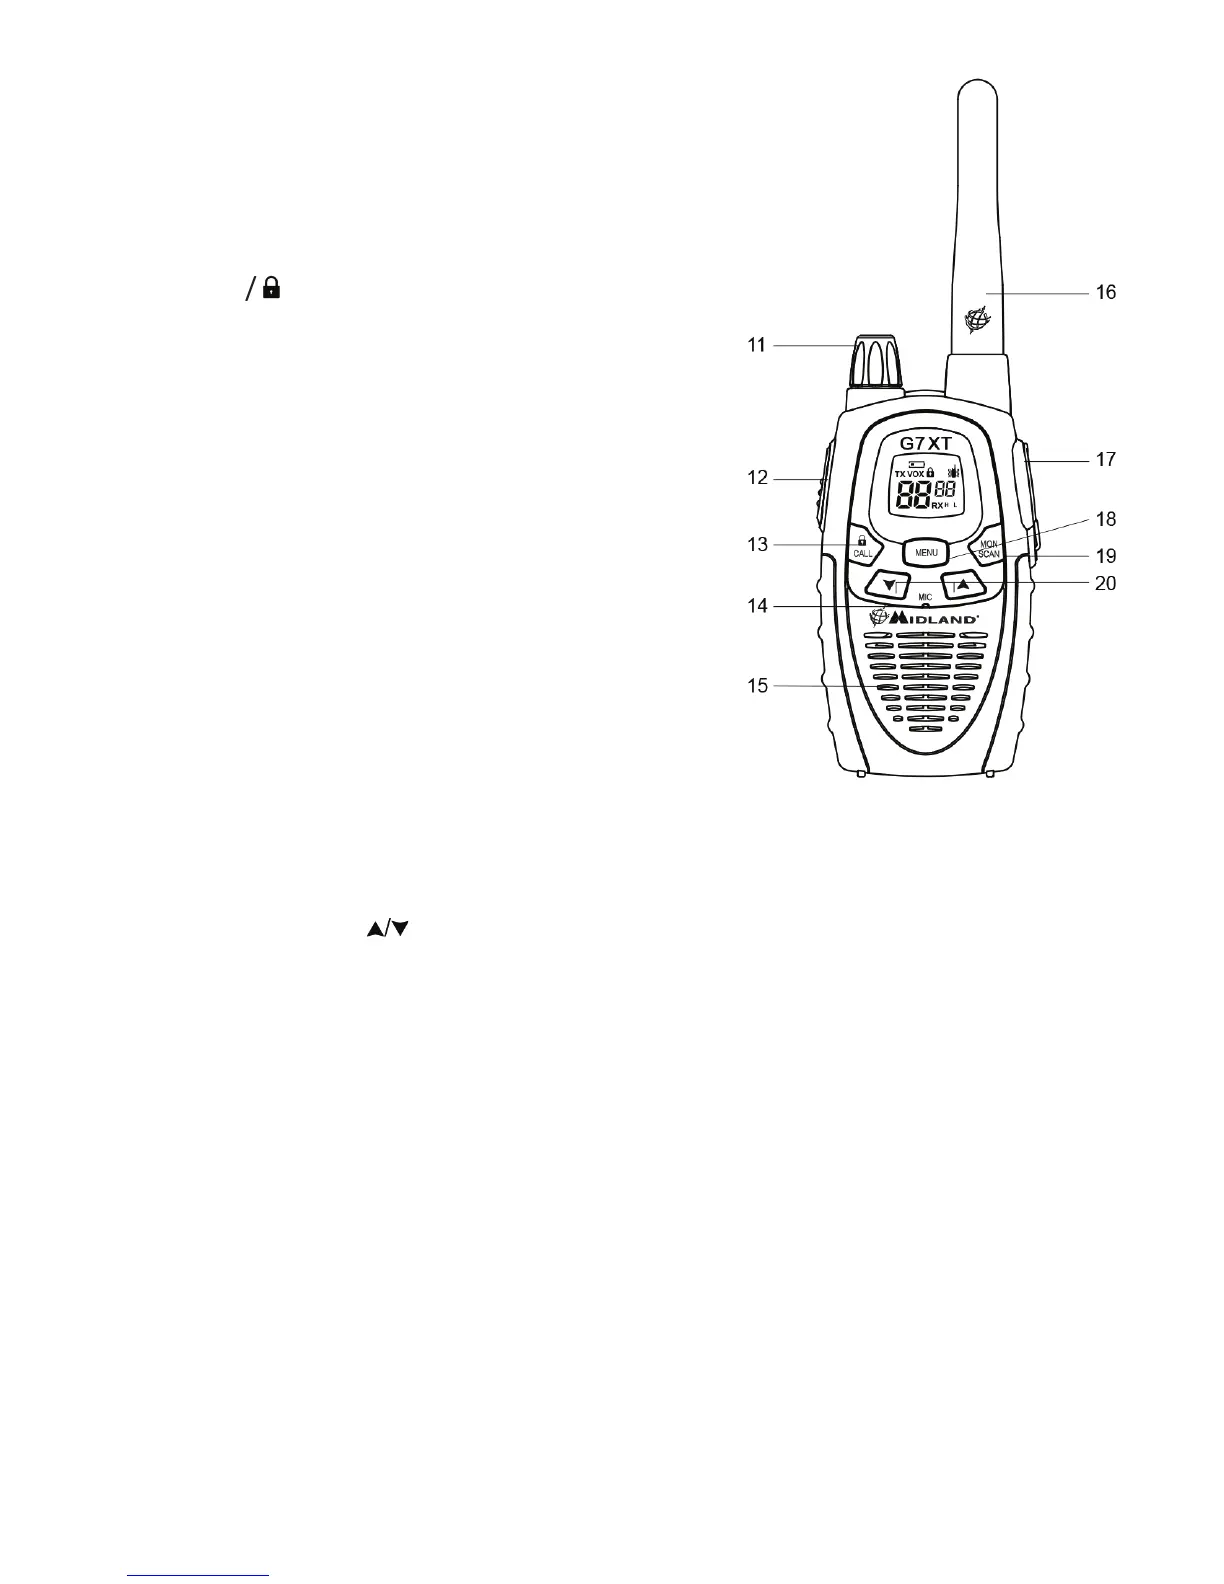
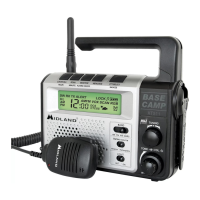
Refer to this picture to idenfy the various parts of the device:
11. VOLUME knob - On/o switch and volume
adjustment.
12. PTT buon (push to talk) – Press this buon to
transmit.
13. CALL/ buon – To send a call on the selected
channel. If pressed for about 5 seconds, the
keypad lock is acvated.
14. Built-in MICROPHONE – Sound is picked up
by this microphone.
15. Built-in SPEAKER – Here is where the speaker
is housed.
16. ANTENNA – Receives and transmits radio
signals.
17. SPK/MIC socket (under protecve cover) –
To connect to external audio devices
(headphones, microphone etc.) and to
the baery charger.
18. MENU buon – Press this buon to display
the device’s menu.
19. MONITOR/SCAN buon – Press this buon once to acvate SCAN (scanning of
channels). Keep the same buon pressed for about 2 seconds to acvate MON
funcon. This funcon temporarily cuts o Squelch (for weak signals).
20. Scroll buons
– Press these buons to change sengs within the MENU.
4. PREPARING THE TRANSCEIVER
The following items are supplied in the package: 2 transceivers; dual desktop charger;
wall adaptor; 2 x 800m A/h NiMH baery packs; 2 x belt clips; operaon manual. If any
of the above are missing or damaged, please contact your supplier immediately.
4.1 Baery pack recharge
The supplied baeries are 6.0V NiMH type and must be recharged whilst in the
transceiver. It takes about 12 hours to fully recharge.
To recharge the baeries:
1. Connect the socket of the wall adaptor to a mains power socket and insert the
charging plug of the radio into the wall adaptor.
2. When charging is complete, take out the plug from the radio and remove the
wall adaptor.
Do not overcharge baeries! When these are fully charged, the charging process may
not stop automacally. Do not forget to detach the wall adaptor from the radio as
soon as the baeries are charged.
Do not try to charge alkaline baeries or non-rechargeable baeries. Make sure
that when you charge the radio, only rechargeable NiMH baeries are ed in the
baery compartment! It is dangerous to aempt to recharge other types of baeries
(for example alkaline or manganese baeries). Baeries which are not suitable to be
recharged may leak, explode or even burn and cause damage!
Using a dierent baery charger other than the one specied can cause damage to
your device.
Do not throw baeries into re or place them near heat as this may cause injuries.
Dispose of baeries according to local regulaons. Do not mix old and new baeries
or baeries of dierent types.
4.2 Installing and removing the belt clip
The belt clip easily aaches the transceiver to your belt. This clip must be removed to
replace the baeries. To remove the belt clip follow the illustraon below. To re-ax
the clip, slot into the guides at the back of the transceiver unl it locks into place.
4.3 Removing/Installing the baeries
4.3a Removal
1. Remove the belt clip as depicted in
Picture 1.
2. Open the baery compartment as
shown in Picture 2.
3. Remove the baeries.
4.3b Installaon
1. Install the new baeries into compartment.
2. Re-ax the baery cover and belt clip.
5. BASIC OPERATION
5.1 Turning on/o
To turn on the transceiver, turn the Volume [11] knob clockwise unl you hear it click.
The LCD display will light up and do an Auto-Test. Subsequently you will hear 3 beeps
of dierent tones. To turn o the transceiver, turn the knob counter-clockwise unl you
hear another click. The LCD display will turn o and subsequently you will hear 3 beeps
of dierent tones.