Midtronics Inc. 7000 Monroe Street Willowbrook, IL 60527
www.midtronics.com
17
Chapter 4: Depower
EL-50332 EV/HEV Battery Service Tool
6. The TARGET VOLTAGE is displayed.
VOLTec Pack 280.0 V
VOLTec Sections 87.5 V (Section 1)
70.0 V (Section 2)
122.5 V (Section 3)
Minimum Voltages
7. For a VOLTec pack: Connect the orange high voltage cable
from the EL-50332 as directed in your GM documentation
and press NEXT to continue.
For a VOLTec section: Connect to the selected section of
the pack and press NEXT to continue.
For a eAssist pack: Connect to the battery pack studs and
press NEXT to continue.
8. For VOLTtec: Connect the black interface cable from the
EL-50332 as directed in your GM documentation and press
NEXT to continue.
For eAssist: Connect the black interface cable from the EL-
50332 to the K59 X2 and X3 connectors on the pack and
press NEXT to continue.
9. For a VOLTec pack: Install the Manual Service Disconnect.
For a eAssist pack: Make sure the fused cable between the
battery sections is properly connected.
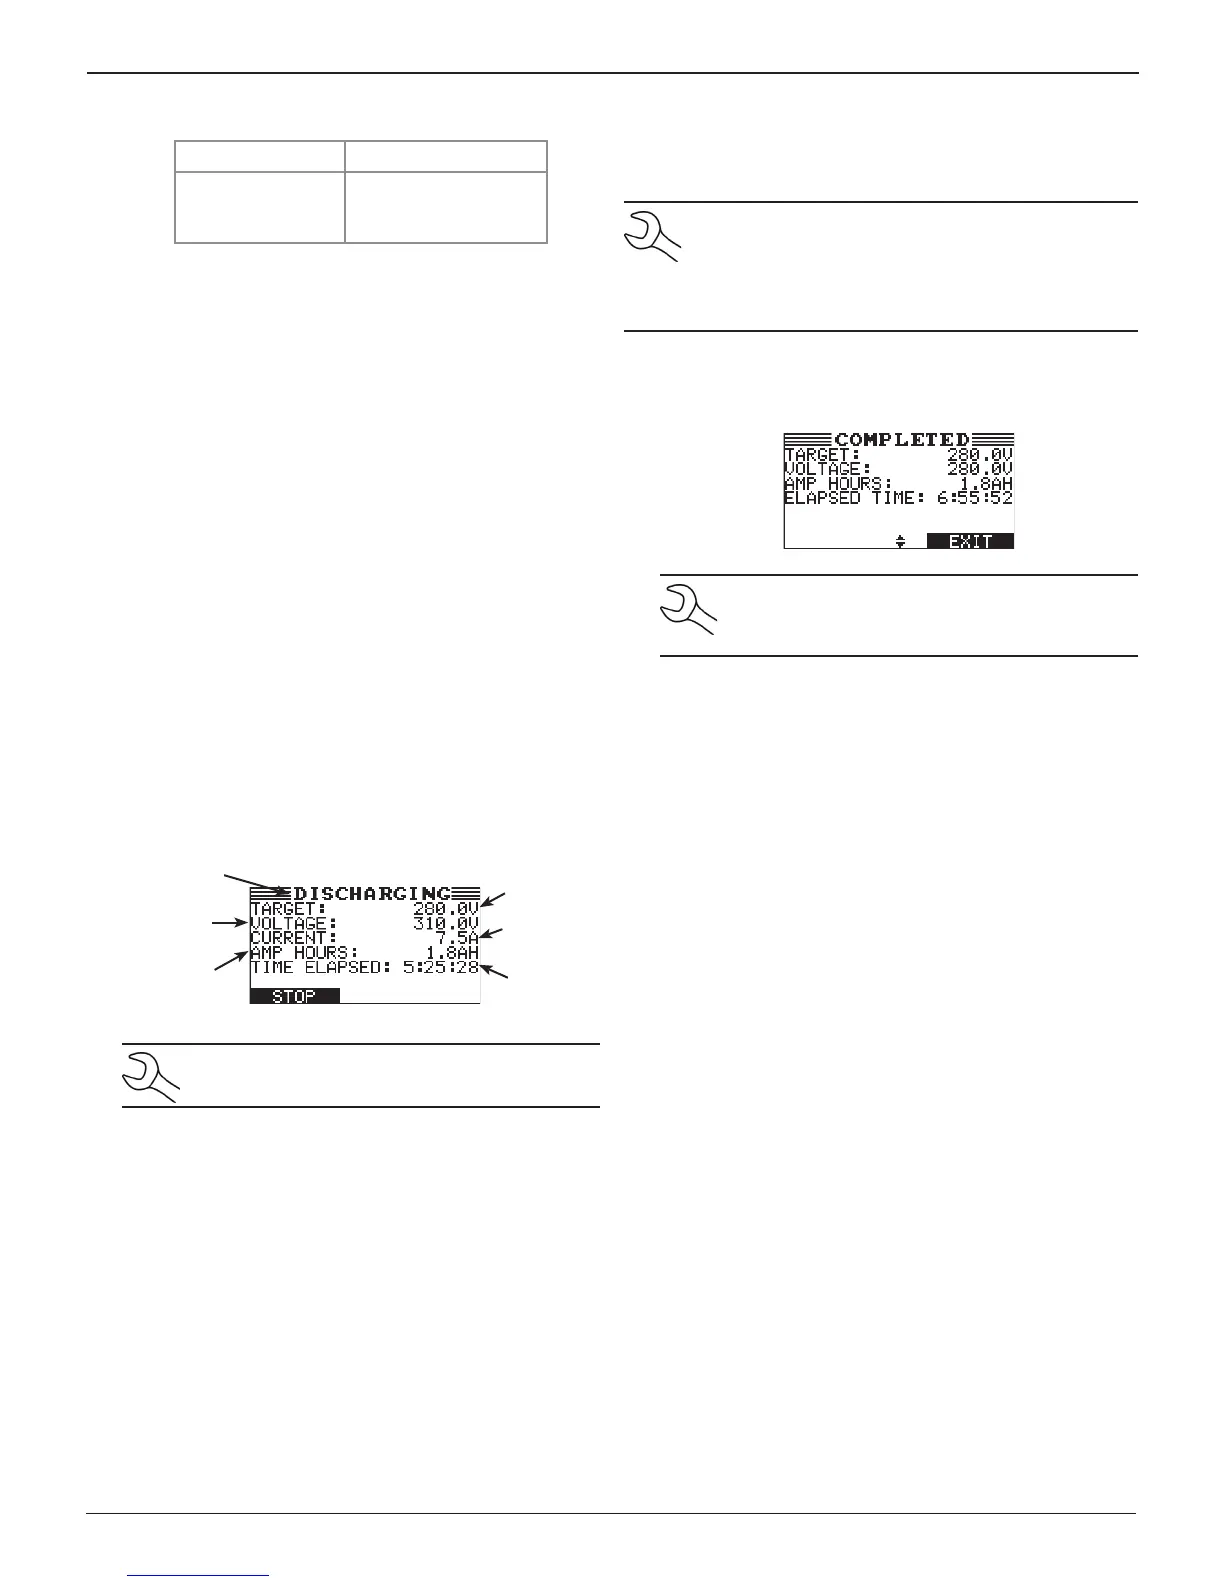
10. Press NEXT to continue. The de-powering process will
now begin. The status of the charging process is displayed
on the screen.
Discharging
Current
Target
Voltage
Discharging
Volts
Status
Discharge
Current
Amp Hours
Discharging
Time
NOTE:
Press STOP
if it becomes necessary to in-
terrupt the Depower session.
Depower Results
Following a successful de-powering session, the results are
written to an inserted USB jump drive.
NOTE:
A Warranty Code is generated for all Depower-
ing sessions including aborted sessions and anytime
an error is detected. The Warranty Code is also written
to the USB jump drive and displayed on the Battery
Service Tool screen.
1. Once the de-powering session is complete, the results are
displayed on the EL-50332 using multiple screens.
2. Use or to scroll through the screens.
NOTE:
If the measured voltage is already at the
Target Voltage, no conditioning is required and
the session is aborted.
3. Press EXIT to return to the Main Menu.
The battery pack or section can now be disconnected from the
EL-50332.