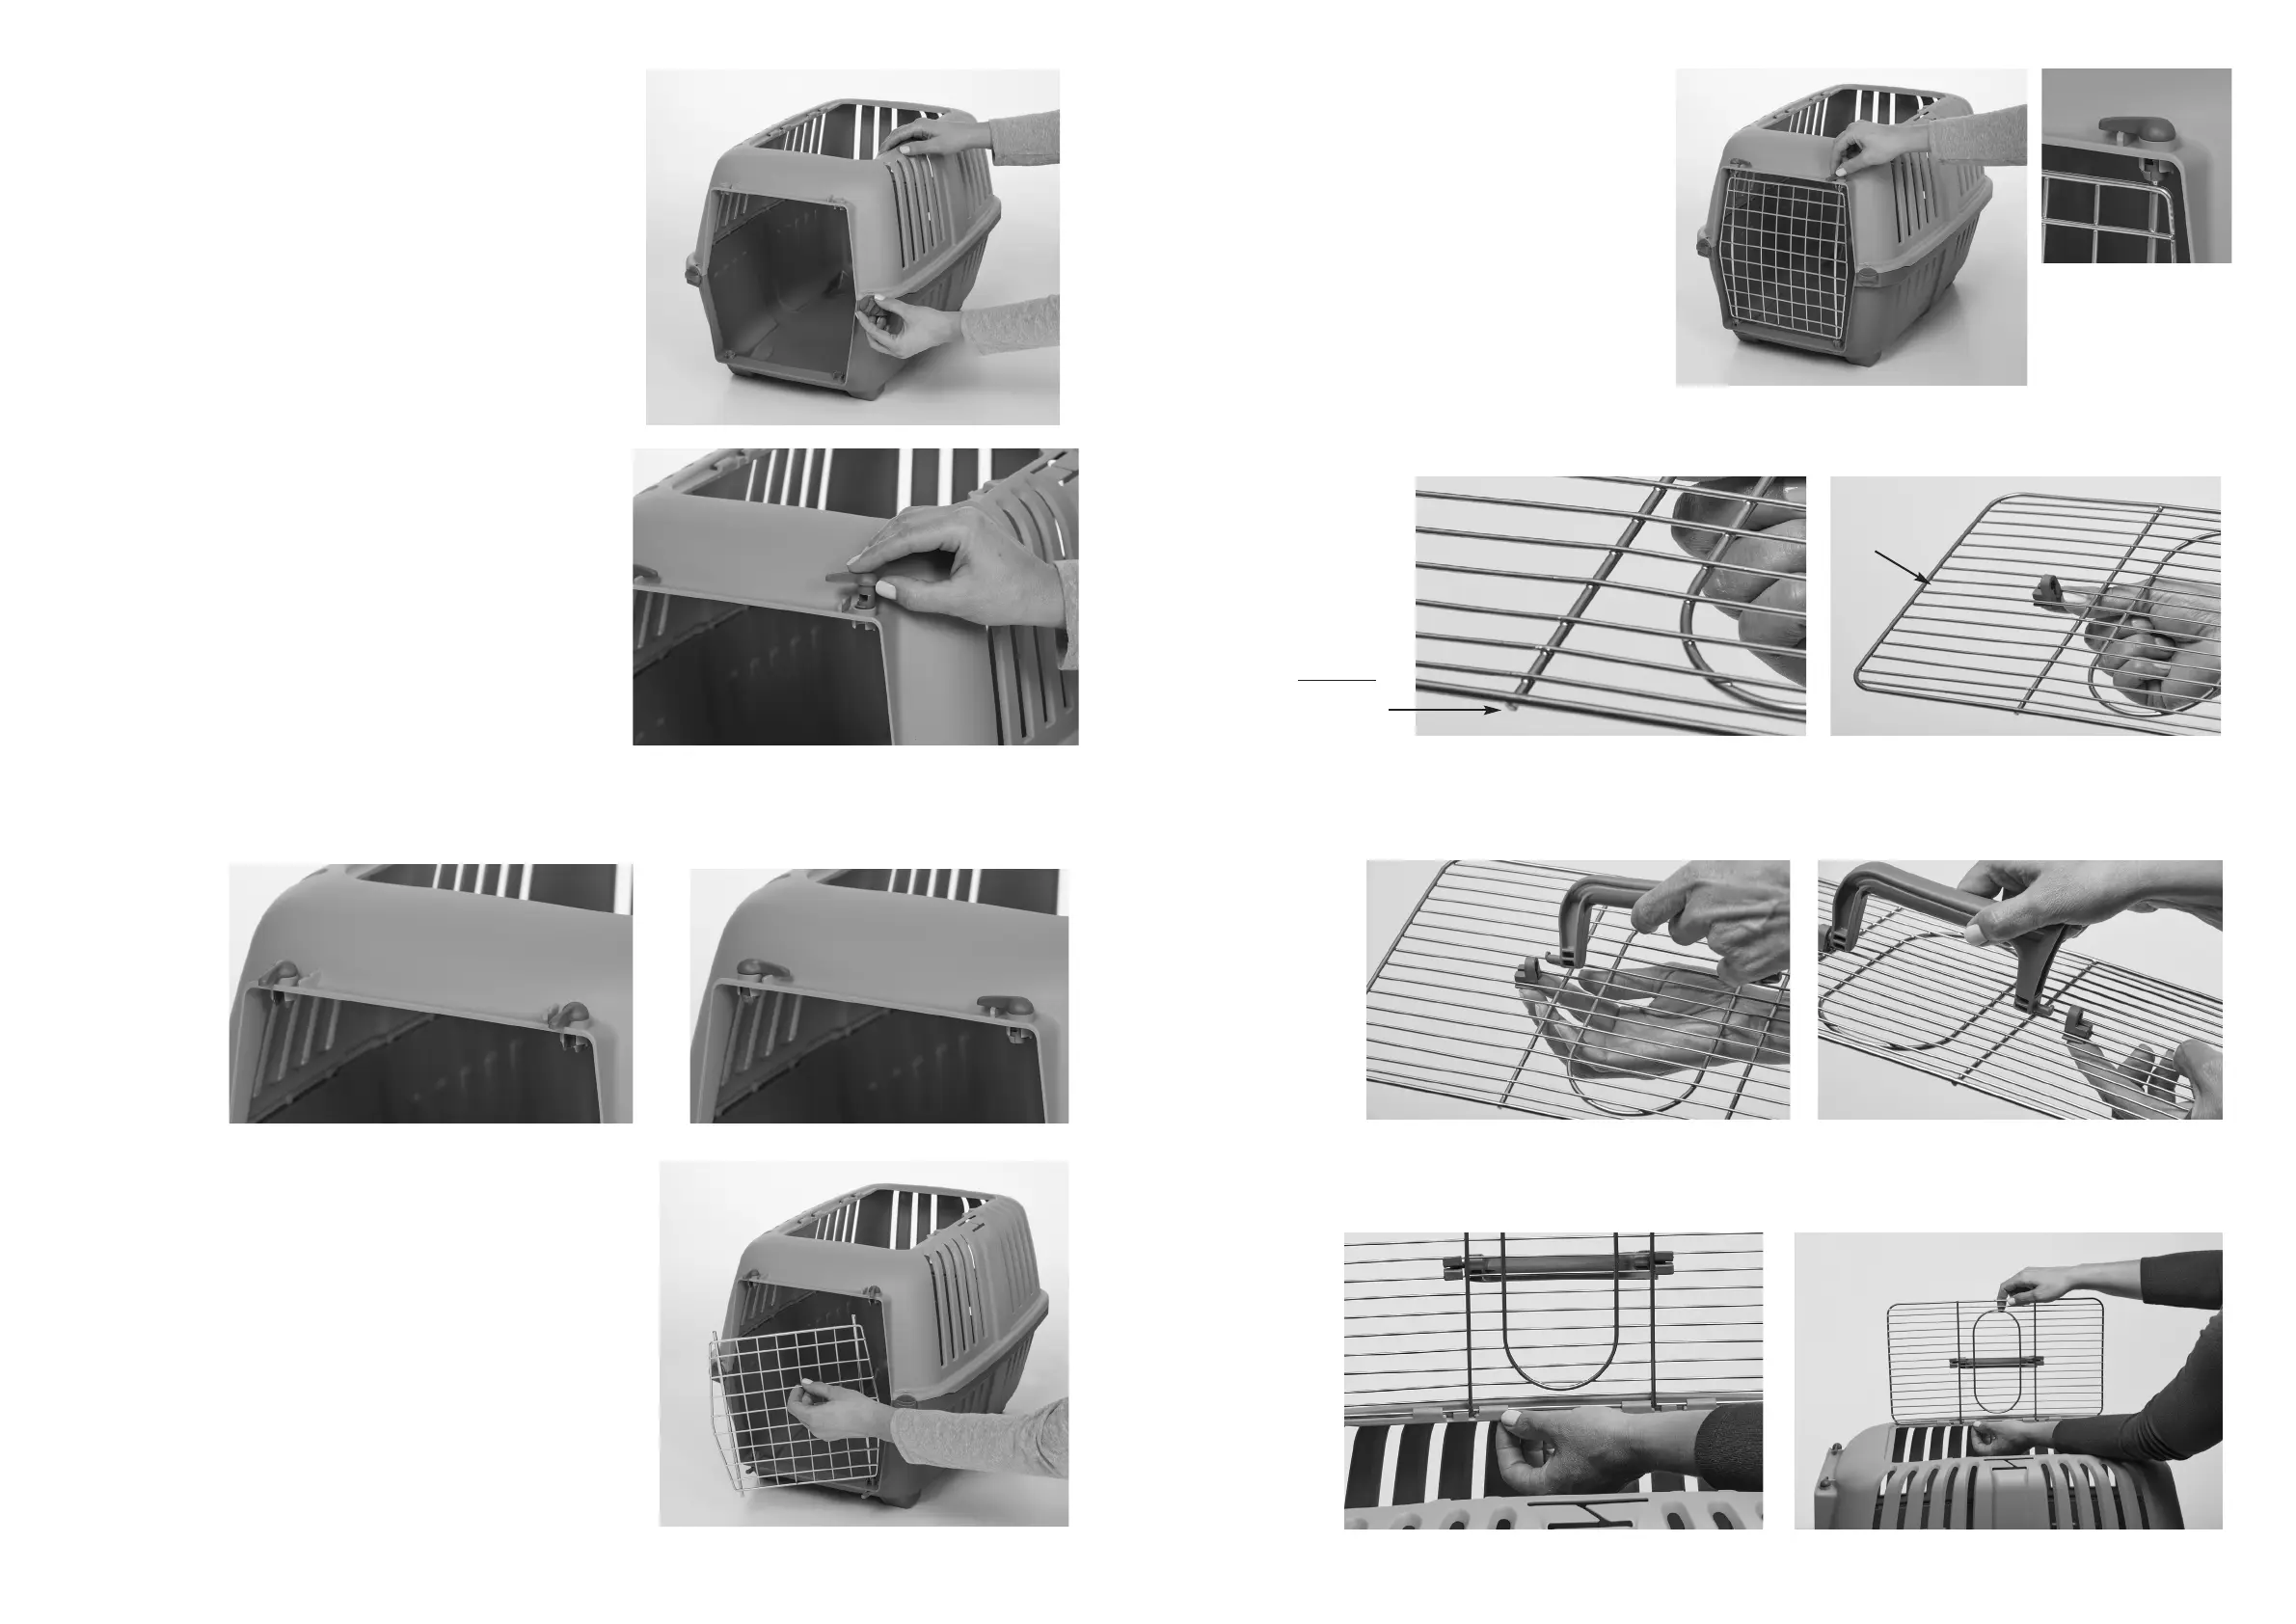
Turn the Knobs 90 degrees clockwise to lock the top and
the bottom together.
4.
Insert the four Front Door Hinges at the top and bottom
of the carrier’s opening.
NOTE: This step can also be completed at the
beginning, before Step 2; either way is fine and will not
affect assembly. Simply place the Front Door Hinges in
the hinge holes and press down until they click into
place.
5.
2
The hinges allow the door to be inserted, removed, or opened left-to-right or right-to-left. Simply twist the hinges
to the open and closed position as needed.
6.
Open
Closed
With all four Front Door Hinges in the open position,
insert the prongs of the Front Door into the bottom
and top of the carrier opening.
7.
Turn all four Front Door Hinges to the closed
position to secure the door in place.
To open the door left to right: turn the left side
hinges to the open position.
To open the door right to left: turn the right
side hinges to the open position.
To remove the door completely: turn all four
hinges to the open position and remove the
door.
8.
9.
3
10.
11.
With the vertical wires on the Top Door facing down and underneath the horizontal wires of the door, insert the
first Top Handle Clip up through the bottom and between the middle horizonal wires.
In this step, be sure
the vertical wires on
the Top Door are
underneath
the
horizonal wires.
Middle
Closed and locked position.
Secure the peg on the Top Door Handle through the hole in the Top Door Handle Clip. Then, repeat Steps 9 and
10 with the second handle clip, pushing it up through the bottom and between the middle horizonal wires on the
other end of the door, then inserting the second peg of the handle into this clip.
Attach the Top Door to the top of the carrier. On one side of the carrier’s top opening there are four fixed plastic
hinges. With the curved end of the handle facing the front of the carrier, guide the side of the Top Door into the
fixed plastic hinges, applying a small amount of pressure until the door snaps securely into the hinges.