OM-217 741 Page 7
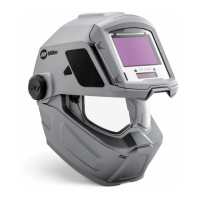
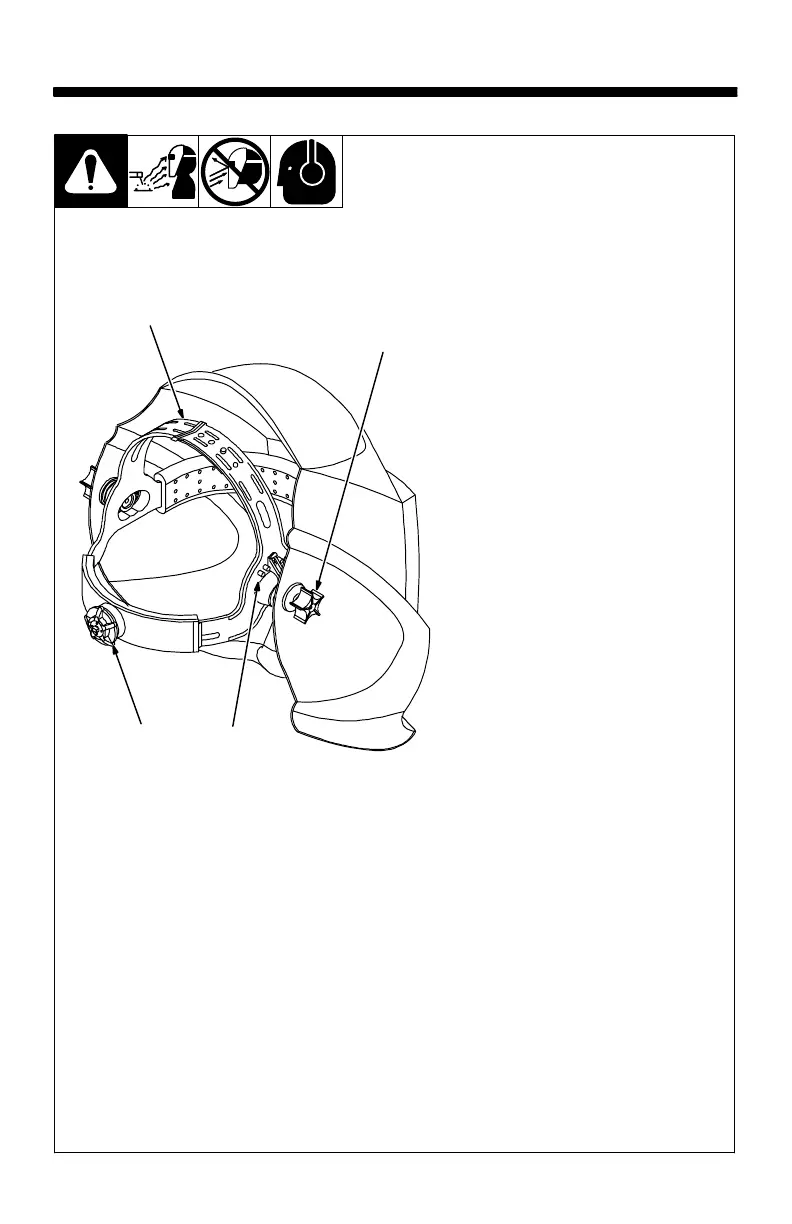
SECTION 4 − ADJUSTING HEADGEAR
. There are four headgear adjust-
ments: headgear top, tightness,
angle adjustment, and distance
adjustment.
1 Headgear Top
Adjusts headgear for proper depth
on the head to ensure correct bal-
ance and stability.
2 Headgear Tightness
To adjust, push in the adjusting knob
located on the back of the headgear
and turn left or right to desired tight-
ness.
. If adjustment is limited, it may be
necessary to remove the com-
fort cushion.
3 Distance Adjustment
Adjusts the distance between the
face and the lens. To adjust, loosen
both outside tension knobs and
press inward to free from adjustment
slots. Move forward or back to de-
sired position and retighten. (Both
sides must be equally positioned for
proper vision.)
4 Angle Adjustment
Four pins on the right side of the
headband top provide adjustment
for the forward tilt of the helmet. To
adjust, loosen the right outside ten-
sion adjustment knob then lift on the
control arm tab and move it to the de-
sired position. Retighten tension ad-
justment knob.
. When using the back distance
adjustment positions, only the
back three angle adjustment
pins can be used.
804 118
1
2
3
4
 Loading...