OPERATION
The meter is supplied complete with a 9V battery.
Slide off the battery compartment cover on the back
of the meter and install the battery into battery clip
connector while observing polarity.
Always remove the
electrode
protective cap
before
taking any measurement. If the electrode has been
left dry, soak the tip (bottom 2.5 cm) in rinse solution
(
M10000B
) for a few minutes to reactivate it.
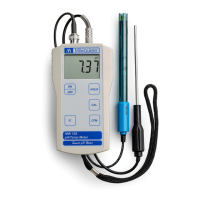
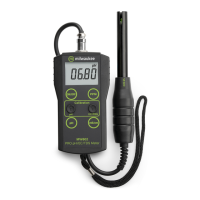
Connect the pH electrode and
the temperature probe to the
sockets on the meter’s top.
The temperature probe can
be used independently to take
temperature measurements,
or it can be used in conjunction
with the pH electrode to utilize
the meter’s ATC capability.
Turn
the
instrument
on
by
pressing
the
ON/OFF
key.
Before taking any measurements, make sure that the
meter has already been calibrated.
Immerse the tip (2.5 cm) of the
pH electrode into the sample and
stir gently.
The
pH
measurement
is
ready
when
the hourglass symbol turns off.
To display the measured temper-
ature, press and hold the °C key.
When
the
key
is
released,
the display will return to the
pH reading.
The HOLD function is activated
by pressing the HOLD key. The
measured value is frozen on the
display and the “HOLD” tag lights
up. Release “HOLD” by pressing
HOLD key again.
After completing measurements,
switch the meter off and store
the electrode with a few drops
of storage solution in the
protective cap.
Error
message
on
display:
Blinking full scale value: reading is out of range;
“Eb”:
battery
low
voltage
indication;
“Ec”:
wrong
buffer
solution;
“Ec” together with “ °C ” blinking: the temperature of
the calibration is out of accepted range;
“Clr”:
the
calibration
data
has
been
lost
and
recalibration is needed.
CALIBRATION
PROCEDURE
A)
Preparation:
Select two pH calibration buffers: pH 7.01 and a second
to bracket your measurement range.
1.
pH
7.01
(
MA9007
)
2.
pH 4.01
(
MA9004
)
for
measuring in
the
acid range
(pH lower than 7) or
pH 10.01
(
MA9010
) for
measuring
in the alkaline range (pH higher than 7).
Use
two
beakers
for
each
reference
solution.
One beaker for rinsing the electrode, the other for
calibration. This way contamination between solutions
during calibration is minimized.
B)
Procedure:
Offset
calibration
Remove the electrode protective
cap and rinse the tip with some
pH
7.01
solution,
then
immerse
the
electrode tip and the temperature
probe into a pH 7.01 buffer solution.
Press the CAL key to enter the
Calibration mode.
The display flashes
“pH
7.01” and
the hourglass lights up.
Wait till the hourglass symbol
on the display turns off and the
“pH” tag stops blinking, then press
the CFM key
to
confirm the
offset
calibration.
Note:
Pressing the CAL key again will change the
buffer value, allowing a single point calibration at
pH 4.01 or pH 10.01.
Slope
calibration
After completing the pH 7.01
calibration the next buffer pH 4.01
will flash on the display.
Press
CAL
key
to
display
pH
10.01
if
desired.
Rinse the pH electrode and the
temperature probe in the rinse
buffer beaker, then immerse them
into the second buffer beaker.
Wait till the hourglass symbol on the LCD turns
off, then press the CFM key to confirm the slope
calibration.
Notes:
To exit the calibration mode, turn the meter off
by pressing the ON/OFF key.
To perform a single point calibration (offset) at
pH 7.01, press the ON/OFF key when the second buffer
is displayed.
To delete calibration press CAL and
CFM keys together.
BATTERY
REPLACEMENT
When the batteries become weak, the battery symbol
on the LCD starts blinking to advise that only a few
hours of working time is remaining.
The meter is also provided with BEPS (Battery Error
Prevention System), which avoids any erroneous
reading due to low battery level. The instrument will
display “Eb” for a while and then turn off.
Prompt
battery
replacement
is
required.
Battery replacement must only take place in a non-
hazardous area using a 9V
alkaline
battery.
Turn the meter off, slide the
battery compartment cover
located at the rear of the
meter off and replace the
9V battery with a new one.
Make sure the battery
contacts are fully engaged
in the connector, seat the
battery in its compartment
and replace the cover.