IINNSSTTAALLLLAATTIIOONN
4
IINNSSTTAALLLLAATTIIOONN::
We recommend that you have another person
help with this procedure. Tools required: 1/2"
wrench, #3 phillips screwdriver and electric
drill with a 11/32" bit.
1. Remove the four sideplate screws. Remove
the right sideplate and swing the left sideplate
out and away from the base extrusion.
2. Place the motor on the bow of the boat in the
deployed position:
• We recommend that the motor be mount-
ed as close to the centerline of the boat as
possible.
• Make sure the bow area under the
mounting location is clear and unobstructed
for drilling and accessible for you to attach
the nuts and washers.
• Make sure the mount is positioned so that
the shaft is out beyond the rub strip of the
boat. The lower unit, as it is lowered into the
water or raised into the boat, must not
encounter any obstructions.
3. Once in position, mark four of the six holes
provided in the bow mount base for drilling. If
possible, use the four holes that are farthest
apart. Drill through the marked holes using a
the 11/32" drill bit.
4. Mount the plate to the bow using the provid-
ed bolts, nuts and washers.
5. Replace the sideplates and sideplate screws.
6. Make sure the motor is mounted within 5° of
level. The internal compass must be level to
rotate freely.
CAUTION: MAKE SURE YOU MOUNT YOUR MOTOR ON A LEVEL SURFACE. USE
THE RUBBER WASHERS TO CREATE A LEVEL SURFACE — IF NECESSARY.
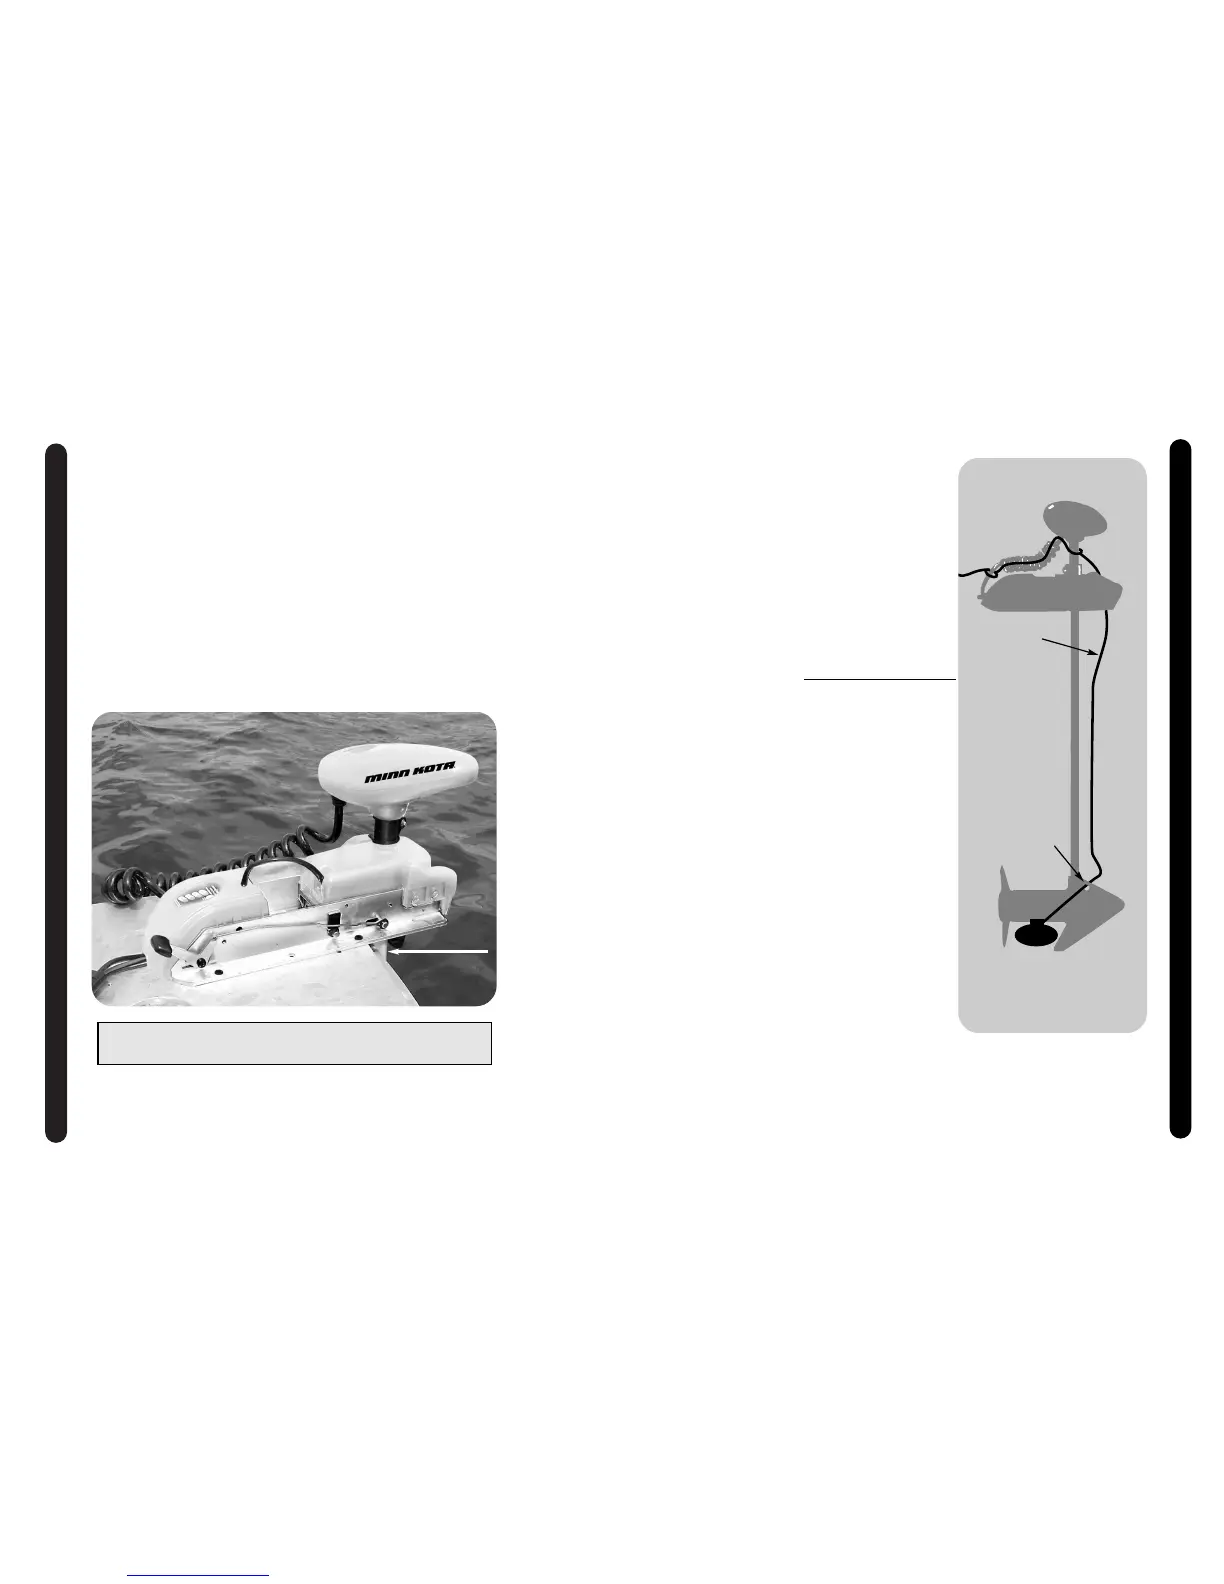
Mount Bracket so
that during stow /
deploy shaft will not
encounter boat’s rub
strip.
TTRRAANNSSDDUUCCEERR MMAAIINNTTEENNAANNCCEE
9
TTRRAANNSSDDUUCCEERR IINNSSTTAALLLLAATTIIOONN::
Transducer cables should be routed through the coil
cable and handle as shown. Leave enough slack for
proper deployment and retraction. Mount transducer
according to transducer instructions.
NNOOTTEE::
A transducer is not included with your trolling
motor.
TTRRAANNSSPPOORRTTAATTIIOONN::
In conditions where the stowed motor is subject to high
levels of shock or vibration, take care to provide a
secure stow. Move the depth collar snug against the
steering motor and tighten.
Drill a small hole in rib
Leave slack
MMAAIINNTTEENNAANNCCEE::
1. After use in salt or brackish water these units should
be rinsed with fresh water, then wiped down with a
cloth dampened with an aqueous based silicone spray
such as Armoral®.
2. The propeller must be cleaned of weeds and fishing
line. The line can get behind the prop, wear away the
seals and allow water to enter the motor. Check this
after every 20 hours of operation.
3. To prevent accidental damage during trailering or stor-
age, disconnect the battery whenever the motor is off
of the water. For prolonged storage, lightly coat all
metal parts with silicone spray.
4. For maximum performance, restore battery to full
charge before each use. Unless you are using a power
panel or MINN KOTA battery charger, disconnect the
trolling motor when charging the battery.
5. The composite shaft requires periodic cleaning and
lubrication for proper retraction and deployment. A
coating of Armorall
®
will provide “like new” operation.
6. Replace the sacrificial anode / nut and washer after
2000 hours of run time or 1.5 seasons, which ever
comes first. See Propeller Replacement, steps 1 - 2
and 5 - 6.
Tie wrap cable
 Loading...