Do you have a question about the MINN KOTA RT55SP and is the answer not in the manual?
Expresses gratitude for choosing Minn Kota and highlights the product's advantages.
Instructions to register the trolling motor via mail or online.
Explains the importance of the 11-character serial number for model and year identification.
Fields for recording model, serial, purchase date, and store.
Outlines the limited two-year warranty on the product and lifetime on the composite shaft.
Details what the limited warranty does not cover, such as misuse or non-approved parts.
Provides instructions on how to obtain warranty service in the U.S. and abroad.
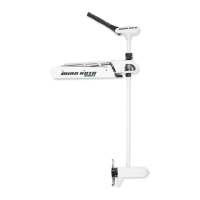
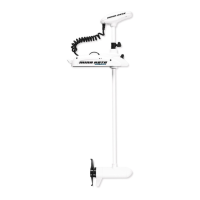
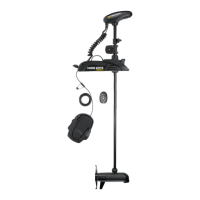
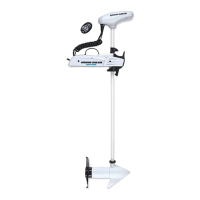
Identifies key features of the motor mount assembly.
Explains the function of the push-to-test battery meter.
Introduces the installation process and directs users to further resources.
Lists the parts required for installation with item numbers and descriptions.
Provides recommendations for motor mounting location and placement.
Lists the necessary tools and assistance for installation.
Details the first step of placing the mount and removing sideplates.
Instructions on removing and swinging out sideplates.
Warning about ensuring power cables are disconnected.
Guidance on placing the mount on the boat for optimal positioning.
Checks for shaft clearance and mount levelness.
Recommends drilling locations and drilling the deck.
Instructions for securing the motor with screws and washers.
Securing the motor with flat washers and nylock nuts.
Replacing the sideplates to secure the mount.
Reattaching the four sideplate screws.
Applying foot pedal pads for better grip.
Advises following ABYC standards and using qualified technicians for wiring.
Provides a table for selecting wire gauge and circuit breaker size based on motor thrust and wire length.
Recommends deep cycle marine batteries and provides guidance on Li-ion battery usage.
Discusses DC/alternator chargers and accessory connections to batteries.
Explains proper connection of negative leads and warnings for jump start systems.
Step-by-step guide for connecting a 12-volt system.
Details how to wire two 12-volt batteries in series for 24 volts.
Specific steps for connecting a 24-volt system.
Wiring diagram for Riptide PowerDrive models without factory i-Pilot.
Wiring diagram for Riptide PowerDrive models with factory i-Pilot.
Identifies key features of the motor mount assembly.
Describes the depth collar for setting depth and its adjustment knob.
Describes the function of the deploy-assist lever.
Explains the function of the latch collar for securing the motor.
Details the tilt lock lever's role in stowing the motor.
Explains the mount ramp's role in stowing the lower unit.
Provides instructions for stowing and deploying the motor.
Details the operation and interpretation of the battery meter.
Guides on setting the motor's submergence depth for optimal performance.
Steps to adjust the depth collar for desired motor depth.
Instructions to adjust the latch collar for secure stowing.
Steps for mounting and routing an external transducer cable.
Instructions to ensure the lower unit rests correctly on mount ramps for transport.
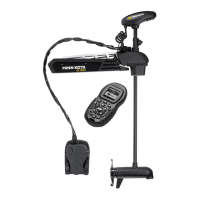
Explains how to use the foot pedal for speed control and steering.
Describes the function of the momentary button on the foot pedal.
Explains the switch for toggling between momentary and constant modes.
Details the speed control dial on the foot pedal.
Explains how to use the foot pedal for steering the motor.
Instructions on reversing thrust direction by turning the motor 180°.
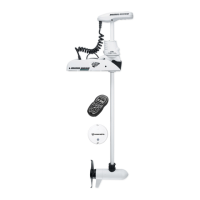
Introduces the CoPilot remote control for the motor.
Explains the function of Prop ON/OFF, steering, and speed buttons.
Outlines general operation principles for CoPilot.
Details interaction between remote and foot pedal controls.
Describes the three available receiver audio modes and how to switch them.
Explains CoPilot receiver behavior when the foot pedal is not used.
Explains how the CoPilot receiver stores learned remotes.
Step-by-step guide for learning new remotes to the receiver.
Instructions for erasing all learned remotes from the receiver.
Step-by-step guide for replacing the battery in the remote.
Steps for reassembling the remote case after battery replacement.
Detailed instructions for replacing the motor propeller.
Provides routine cleaning and maintenance procedures for the motor.
Lists common motor issues and their potential solutions.
Provides solutions for common CoPilot remote and receiver issues.
Offers options for parts, FAQs, calling support, and finding service centers.
States Johnson Outdoors' commitment to environmental responsibility.
Explains the Waste Electrical and Electronic Equipment Directive.
Provides guidance on proper disposal of the motor and battery.
Lists regulatory information for i-Pilot equipped motors and CoPilot model.
Details compliance with FCC rules for the device.
Outlines Industry Canada technical specifications compliance.
Lists ambient operating temperature, humidity, and altitude limits.
Introduces the parts diagram and list for the control head.
Lists specific parts for the control head assembly.
Diagram showing the parts of the 12-volt motor assembly.
Lists specific parts for the 12-volt motor assembly.
Lists remaining parts for the motor assembly.
Diagram showing the parts of the 24-volt motor assembly.
Lists specific parts for the 24-volt motor assembly.
Lists remaining parts for the 24-volt motor assembly.
Diagram showing the parts of the steering housing.
Lists specific parts for the steering housing assembly.
Diagram showing the parts of the foot pedal.
Lists specific parts for the foot pedal assembly.
Diagram showing the parts of the motor mount assembly.
Lists specific parts for the motor mount assembly.
Lists remaining parts for the mount assembly.
Discusses battery chargers and their impact on battery life.
Introduces the Talon shallow water anchor and its features.
Lists various trolling motor accessories offered by Minn Kota.
| Thrust | 55 lbs |
|---|---|
| Voltage | 12V |
| Battery Indicator | Yes |
| Shaft Length | 36 inches |
| Mounting Style | Transom |
| Speed Control | Variable |
| Speed Settings | 5 |