12 | minnkota.johnsonoutdoors.com ©2023 Johnson Outdoors Marine Electronics, Inc.
INSTALLING THE MOUNT
ITEM(S) NEEDED
#4 x 6
NOTICE: To prevent seizing of the stainless steel
hardware, do not use high-speed installation tools.
Wetting the screws or applying an anti-seize may help
prevent seizing.
ScrewScrew
DeckDeck
Nylock NutNylock Nut
Flat WasherFlat Washer
5
#3 x 6
#2 x 6
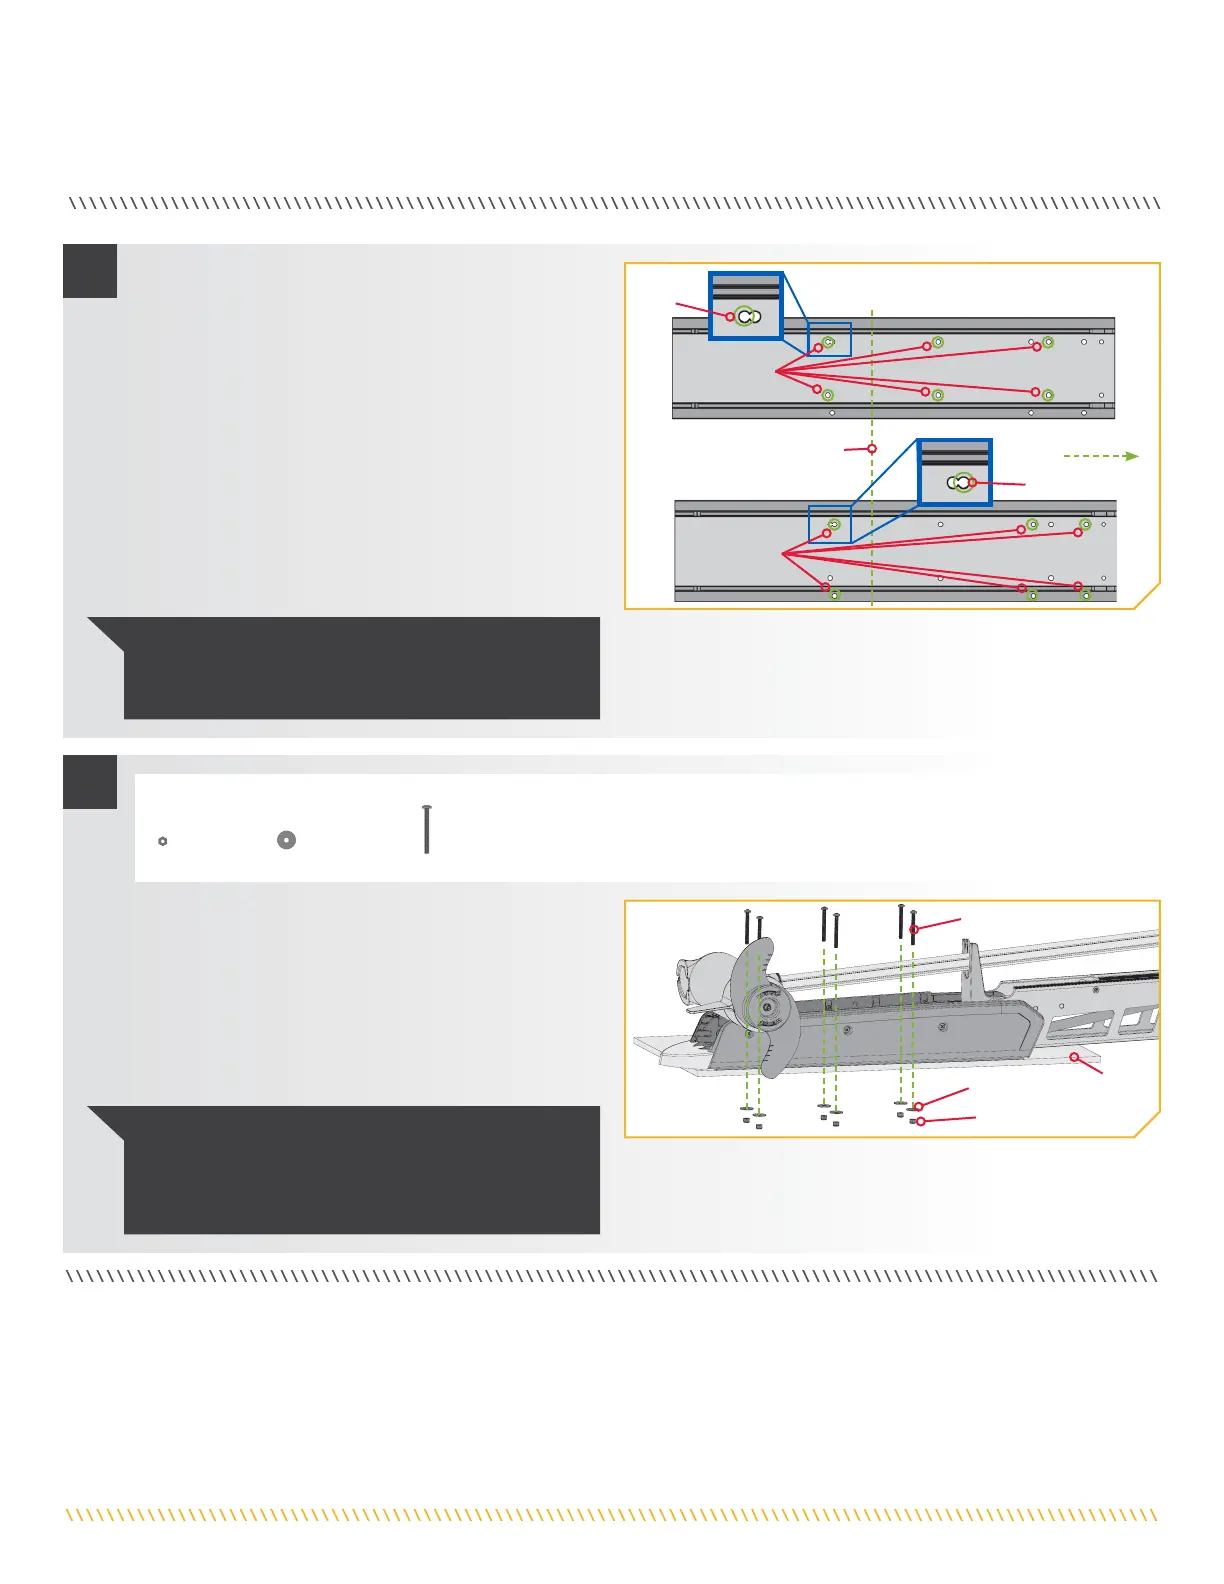
i. Put a 1/4-20 x 2 1/2" Screw (Item #2) in each of the
drilled locations. The Screw should pass through the
Mount Plate and the boat deck.
j. Place a Flat Washer (Item #4) and then a Nylock Nut
(Item #3) at the end of each screw as shown and
secure. Make sure all hardware is secure using a #3
Phillips Screwdriver and a 7/16” Box End Wrench.
NOTICE: If Pattern 2 is used, the right sideplate must
be removed to access the mounting holes in the base of
the Mount.
Pattern Pattern
11
Pattern Pattern
22
BowBow
4
Hold-Down StrapHold-Down Strap
Pattern 1Pattern 1
Pattern 2Pattern 2
f. Once the Mount is in position, determine which bolt
pattern to use. The bolt pattern selected will depend
on the deck space available on your boat. Minn Kota
requires the use of all six mounting bolts.
g. Mark six mounting holes. Drill through the
deck of the boat using a 9/32" Drill Bit on the
marked locations.
h. Be sure the Hold-Down Strap under the base of the
Mount Plate sits between the second and third set
of bolts according to the mounting pattern selected.
Double check that it can close around the Mount
when stowed.
 Loading...