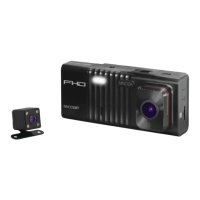
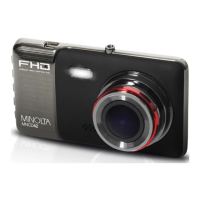
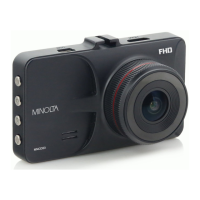
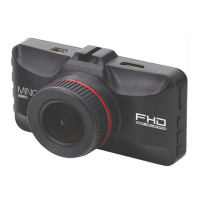
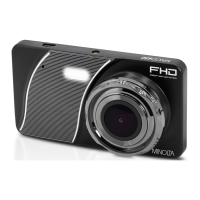
The Minolta MNCD338T Dash Cam is a car camcorder designed for in-vehicle shooting, enabling the collection of evidence for driving accidents, daily life, traveling, and outdoor activities. It integrates multi-functions including 1080P HD video capture, high-resolution photo capture, and a compact form factor. The device utilizes high-performance video decoding technology and compression ratios to deliver excellent video quality.
Important Technical Specifications:
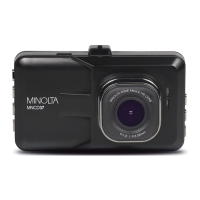
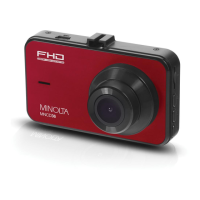
- Model Number: MNCD338T
- LCD Display Screen: 3.0 Inch LCD Screen
- Field of View:
- Front Lens: Super wide angle; 130 Degrees
- In-Car Lens: 90 Degrees
- Rear Lens: 90 Degrees
- Video Resolution:
- Front Lens: 1080FHD, 1080P, 720P
- In-Car Lens: 480P
- Rear Lens: 480P
- Photo Resolutions: 12 Mega Pixels, 10 Mega Pixels, 8 Mega Pixels, 5 Mega Pixels, 3 Mega Pixels, 2 Mega Pixels, 1.3 Mega Pixels
- File Format: Picture: JPEG, Video: AVI
- Loop Recording: Supported
- Collision Auto Recording: Supported
- Motion Detection Recording: Supported
- Time & Date Stamp: Supported
- External Storage: MicroSD, MicroSD Card (32GB max.) – Class 10 Recommended
- Languages: English, French, German, Italian, Portuguese, Spanish, Chinese (simplified), Korean, Russian
- USB Function: USB 2.0 Built-in
- Microphone and Speaker: Built-in
- Built-in Battery: 3.7V 150mAh - for use as a backup power source during power outage
Usage Features:
The camcorder is designed for easy operation. Upon inserting a MicroSD memory card and plugging the camcorder into a power source, it automatically powers on and begins recording in Video Mode. Recording can be stopped or started at any time by pressing the OK button. The device can also be manually powered on or off by pressing the POWER button for 3 seconds.
Modes of Operation:
The MNCD338T offers three operation modes: Video Capture, Photo Capture, and Playback. Users can cycle through these modes by pressing the MODE button. It's important to note that modes cannot be changed while a video is being recorded; recording must be stopped first.
- Video Capture Mode: This is the default mode upon power-on, and recording starts automatically. The OK button controls recording, and the RIGHT button changes the view of the rear camera.
- Photo Capture Mode: To capture a photo, users enter PHOTO Mode by pressing the MODE button until a camera icon appears. Pressing the OK button instantly captures a photo.
- Playback Mode: To review videos and photos, users enter PLAYBACK Mode. The most recent file is displayed first. UP and DOWN buttons cycle through files. The MENU button allows for file deletion or protection. The OK button plays or pauses video clips.
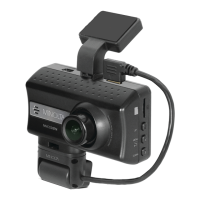
Mounting:
The camcorder comes with a windshield mount. The smaller plastic end attaches to the camcorder, and the suction cup side applies to the windshield. A lever on the suction cup secures it. The optimal mounting location is to the right of or directly below the rearview mirror, ensuring the power cable does not obstruct the driver's view.
Rear Camera Mounting:
The rear camera can be mounted in two locations: at the top of the rear windshield for an outward view or above the license plate for a reverse camera view. A certified professional is recommended for installation. The rear camera can function as a reverse camera by wiring it to the car's reverse lights, activating automatically when the car is in Reverse. Mounting options for the rear camera include double-sided tape, screws, or both. The metal bracket should always be at the top to ensure the image is not upside down.
In-Car Camera:
The camcorder features a second built-in camera for recording the vehicle's interior simultaneously with the front camera. Video files from the in-car camera are saved separately. The RIGHT button changes the LCD screen view to the in-car camera, and rotating the in-car camera changes its view.
USB Cord / Computer Use:
Connecting the camcorder to a computer via USB allows for battery charging and access to two modes: 'Mass Storage' for accessing stored videos and images, and 'PC camera' for webcam functionality. Files can be accessed on a PC by navigating to 'This PC' and finding 'Removable Disk'.
IR Night Vision Mode:
Built-in infrared (IR) LEDs enable night vision recording for capturing photos and videos in dark environments. The IR LEDs automatically activate in low ambient light and turn off when light levels are high. Videos recorded in this mode are in black and white.
Settings Interface:
The camcorder offers user-adjustable settings to customize video and photo capture. The settings menu is accessible by pressing and holding the MODE button (not during recording).
-
Video Mode Settings:
- Video Resolution: Select from 1080FHD (highest), 1080P (higher), and 720P (lowest).
- Loop Recording: Set video clip durations (Off, 1 Minute, 2 Minutes, 3 Minutes, 5 Minutes).
- Exposure: Adjust frame brightness (+2.0 to -2.0).
- Motion Detection: Automatically starts recording when movement is detected; stops after 10 seconds of no movement. Can be set to Off or On.
- Record Audio: Enable or disable the built-in microphone during video recording (Off or On).
- Date Stamp: Imprint date and time on recorded video files (Off or On).
- Collision Sensitivity: Set sensitivity for automatic recording upon collision, saving locked, protected files (Off, Low, Medium, High).
-
Photo Mode Settings:
- Photo Resolution: Select from 12 Mega Pixels (highest) down to 1.3 Mega Pixels (lowest).
-
Setup Mode Settings:
- Park Mode: Automatically records a video clip if a collision is detected while parked and powered off, provided sufficient battery power. Saves locked, protected files. Can be set to Off or On.
- Date & Time Setup: Set date (YYYY/MM/DD) and time (HH:MM:SS, 24-hour format) for display on videos and photos. Date format can be changed (DD/MM/YY or MM/DD/YY).
- Auto Power Off Delay: Sets the time before the camcorder automatically powers off due to inactivity (Off, 1 Minute, 3 Minutes).
- Screen Saver: Sets the time before the LCD screen turns off due to inactivity (Off, 3 Minutes, 5 Minutes, 10 Minutes).
- Beep Sound: Enable or disable button press sounds (Off or On).
- Language: Select from several different languages for menus.
- Frequency: Set power frequency (50Hz or 60Hz; default 60Hz for the US).
- Format Memory Card: Erase all video and photo files on the memory card. Caution: Formatted media cannot be recovered.
- Restore Factory Settings: Reset all menu settings to default without deleting media.
- Firmware Version: Displays the current firmware version.
Maintenance Features:
- Memory Card Insertion and Removal: Ensure the camcorder is off before inserting or removing the MicroSD card. Insert with gold pins facing the display screen until it clicks. Push to eject. Do not remove or insert the card during recording to prevent damage or data loss.
- Windshield Mount Cleaning: If the suction cup loses grip, clean it thoroughly with soap and water, allow it to dry for 2 hours, and then reapply.
- Cleaning the Product: Do not use abrasive chemicals, cleaning solvents, or strong detergents. Wipe with a slightly damp soft cloth.
- Reset Button: If the camcorder freezes or becomes unresponsive, press the RESET button with a pointy object to power cycle and fully reset it.
Safety and Handling Precautions:
- Do not attempt to service the camcorder yourself.
- Avoid exposing the camcorder to moisture or extreme temperatures.
- Allow the camera to warm up when moving from cold to warm temperatures.
- Do not touch or put pressure on the camera lens.
- Do not expose the lens to direct sunlight for extended periods.
- The camera body may feel warm during extended use, which is normal.
- Do not subject the LCD monitor to impact.
- To prevent fire or electric shock, do not expose the appliance to rain or moisture.
- Consult local state laws regarding the placement of objects on the windshield.