Do you have a question about the Minolta MNCD337N and is the answer not in the manual?
Provides essential safety guidelines and handling instructions for the camcorder to prevent damage or injury.
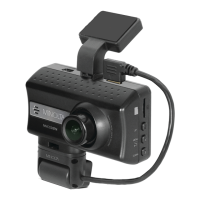
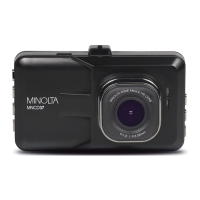
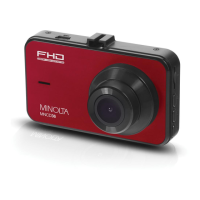
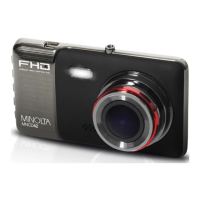
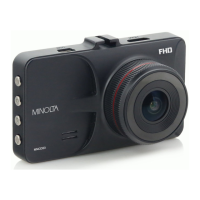
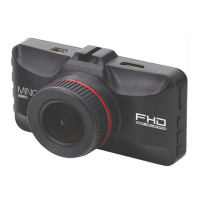
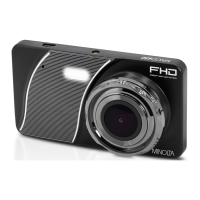
Identifies and explains the various external parts and components of the dash cam.
Details the function of each button and its operation for controlling the camcorder.
Guides users on how to properly insert and remove the MicroSD memory card.
Instructions for attaching and positioning the dash cam's windshield mount for optimal placement.
Explains how to adjust the dash cam's front lens for the desired viewing angle.
Describes the mirror finish of the camcorder display and its secondary use.
Covers initial setup procedures including in-car use, connecting the in-car camera, and USB computer connection.
Details how to connect the camcorder to a computer for charging, data transfer, or PC camera functionality.
Explains the function of built-in IR LEDs for capturing video in low-light conditions.
Provides instructions on how to reset the camcorder if it becomes unresponsive.
Basic steps to quickly set up and start recording with the dash cam.
Details how to operate the camcorder in video recording mode, including starting and stopping.
Explains how to switch to photo mode and capture still images with the camcorder.
Guides users on how to review recorded video clips and photos.
Illustrates and explains the icons and information displayed on the camcorder's main screen.
Overview of user-adjustable settings for fine-tuning video and photo capture.
Allows selection of video resolution and frame rates for desired quality and file size.
Sets the maximum duration for each video clip, enabling seamless recording.
Adjusts the frame brightness for video recordings to optimize lighting conditions.
Enables automatic recording when movement is detected in front of the lens.
Allows enabling or disabling the sound feedback for button presses.
Sets the sensitivity for automatic recording triggered by detected collisions.
Selects the resolution for captured photos, affecting quality and file size.
Controls whether audio is recorded along with video files.
Determines the compression level for photos, balancing quality and storage space.
Adjusts the visible detail and clarity of captured photos.
Sets the color temperature to correct for different lighting conditions.
Adjusts the light sensitivity for photo capture.
Reduces motion blur and shake for clearer images in shaky or low-light conditions.
Allows immediate review of a photo after it is taken.
Imprints the date and time onto recorded video files.
Allows setting the date and time that will be displayed on videos and photos.
Automatically records a clip upon detecting a collision while parked.
Sets the time delay before the camcorder automatically powers off.
Allows selection of the menu language for the camcorder.
Sets the power frequency based on the region for optimal performance.
Erases all files from the memory card, caution advised as data is unrecoverable.
Resets all menu settings to their original factory default values.
Displays the current firmware version installed on the camcorder.
Provides options for managing recorded files within the playback mode.
Allows users to delete recorded video and photo files directly from the camcorder.
| Loop Recording | Yes |
|---|---|
| G-Sensor | Yes |
| GPS | No |
| Night Vision | Yes |
| Storage | Micro SD card up to 32GB |
| Video Resolution | 1920x1080 |