EasyManua.ls Logo

Minolta MOTOR DRIVE 1 - Batteries; Installing Batteries; Battery Cautions

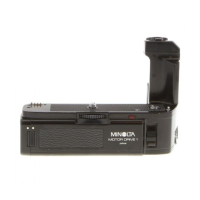
Minolta MOTOR DRIVE 1
56 pages
To Next Page IconTo Next Page
To Previous Page IconTo Previous Page
Loading...
ENGLISH
BATTERIES
Your
new
Minolta
Motor
Drive
1
is
powered
by
eight
AA-size
(penlight)
batteries.
These
may
be
of
sealed
carbon-zinc,
alkaline-
manganese
("AM"
or
"alkaline"),
or
recharge¬
able
nickel-cadmium
("Ni-Cd"
or
"nicad")
type
cells.
Installing
batteries
1.
With
the
selector
dial
(A-2)
in
the
"OFF"
position
(G),
press
in
with
your
thumb
and
forefinger
at
the
same
time
both
battery-
holder
releases
<A-6),
and
remove
the
holder
(B).
2.
Insert
eight
AA-size
batteries
with
their
plus
(+)
and
minus
(—)
ends
positioned
as
indi¬
cated
inside
the
battery
holder
(C).
3.
Reinsert
the
holder
so
that
its
white
dot
is
aligned
with
the
white
dot
on
the
body
of
the
motor
drive
(D).
Slide
the
holder
all
the
way
into
the
body
until
it
snaps
securely
into
place.
CAUTIONS
If
the
battery
holder
Is
inserted
incorrectly,
it
will
not
snap
shut
and
the
motor
drive
will
DEUTSCH
BATTERIEN
Der
Minolta
Motor-Drive
1
wird
von
acht
Mignonbatterien
(Kohle-Zink-
Oder
Alkali-
Mangan-Batterien)
Oder
gleichgroRen
auf-
ladbaren
NC-Akkus
mit
Strom
versorgt.
Einsetzen
der
Batterien
1.
Wahrend
der
Hauptschalter
(A-2)
in
der
Position
OFF
steht
(G),
gleichzeitig
mit
Daumen
und
Zeigefinger
beide
Batterie-
halter-Entriegelungen
(A-6)
eindriicken
und
den
Batteriehalter
herausziehen
(B|.
2.
Acht
Mignonbatterien
Oder
NC-Akkus
mit
den
Plus
{+)
und
Minus
(—)
Seiten
gemalJ
den
Markierungen
Im
Batteriehalter
ein¬
setzen
(C).
3.
Batteriehalter
so
ins
Motor-Drive-Gehause
einschieben,
daS
die
weiUen
Punkte
iiber-
einstimmen
(D);
dann
eindriicken
bis
zum
Einrasten.
ACHTUNG
Wird
der
Batteriehalter
nicht
richtig
ein-
gesetzt,
rastet
er
nicht
ein,
und
der
Motor-
Drive
funktioniert
nicht.
Niemals
mit
Gewalt
eindriicken!

Related product manuals