17
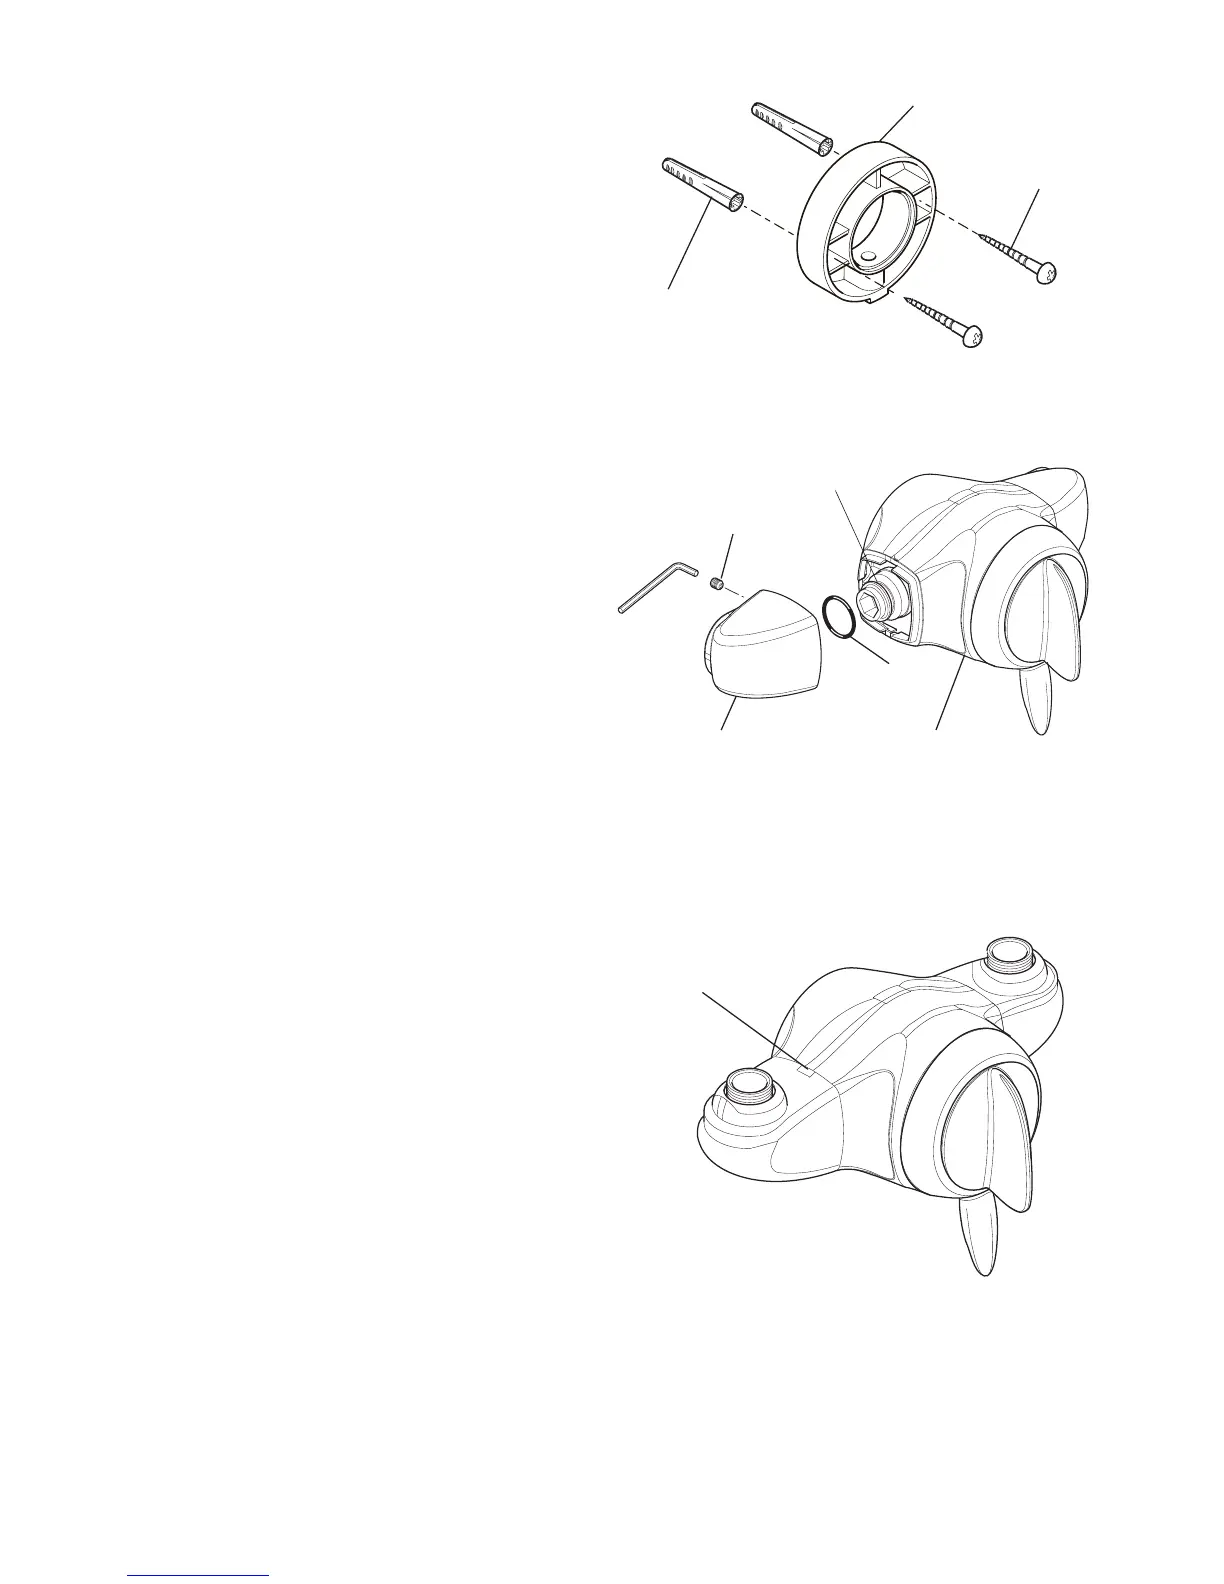
1.6 Drill and suitably plug the two fixing
holes. Secure the backplate to the wall
by means of the screws provided.
1.7 Install the hot and cold supply pipes.
The distance between the pipe centres
must be 151 mm.
1.8 Adjust the inlet elbow to accept falling
or rising supplies as follows:-
Using the 2.5 mm A/F hexagonal
wrench loosen the grub screws and
remove the inlet elbows.
Make sure that the 'O' seal is on the
inlet connector, not in the 'V' groove.
Turn the inlet elbows to the required
position and refit onto the inlet
connectors.
Tighten the grub screws to fix the inlet
elbows and fit the concealing caps.
1.9 Locate the shower control body onto
the backplate and secure by tightening
the recessed grub screw using the 2.5
mm A/F hexagonal wrench.
Backplate
Wall Plug
Screw
Inlet Elbow
'O' Seal
Shower Control Body
Grub Screw
Concealing Cap
V Groove
 Loading...