12
Installation
4
en
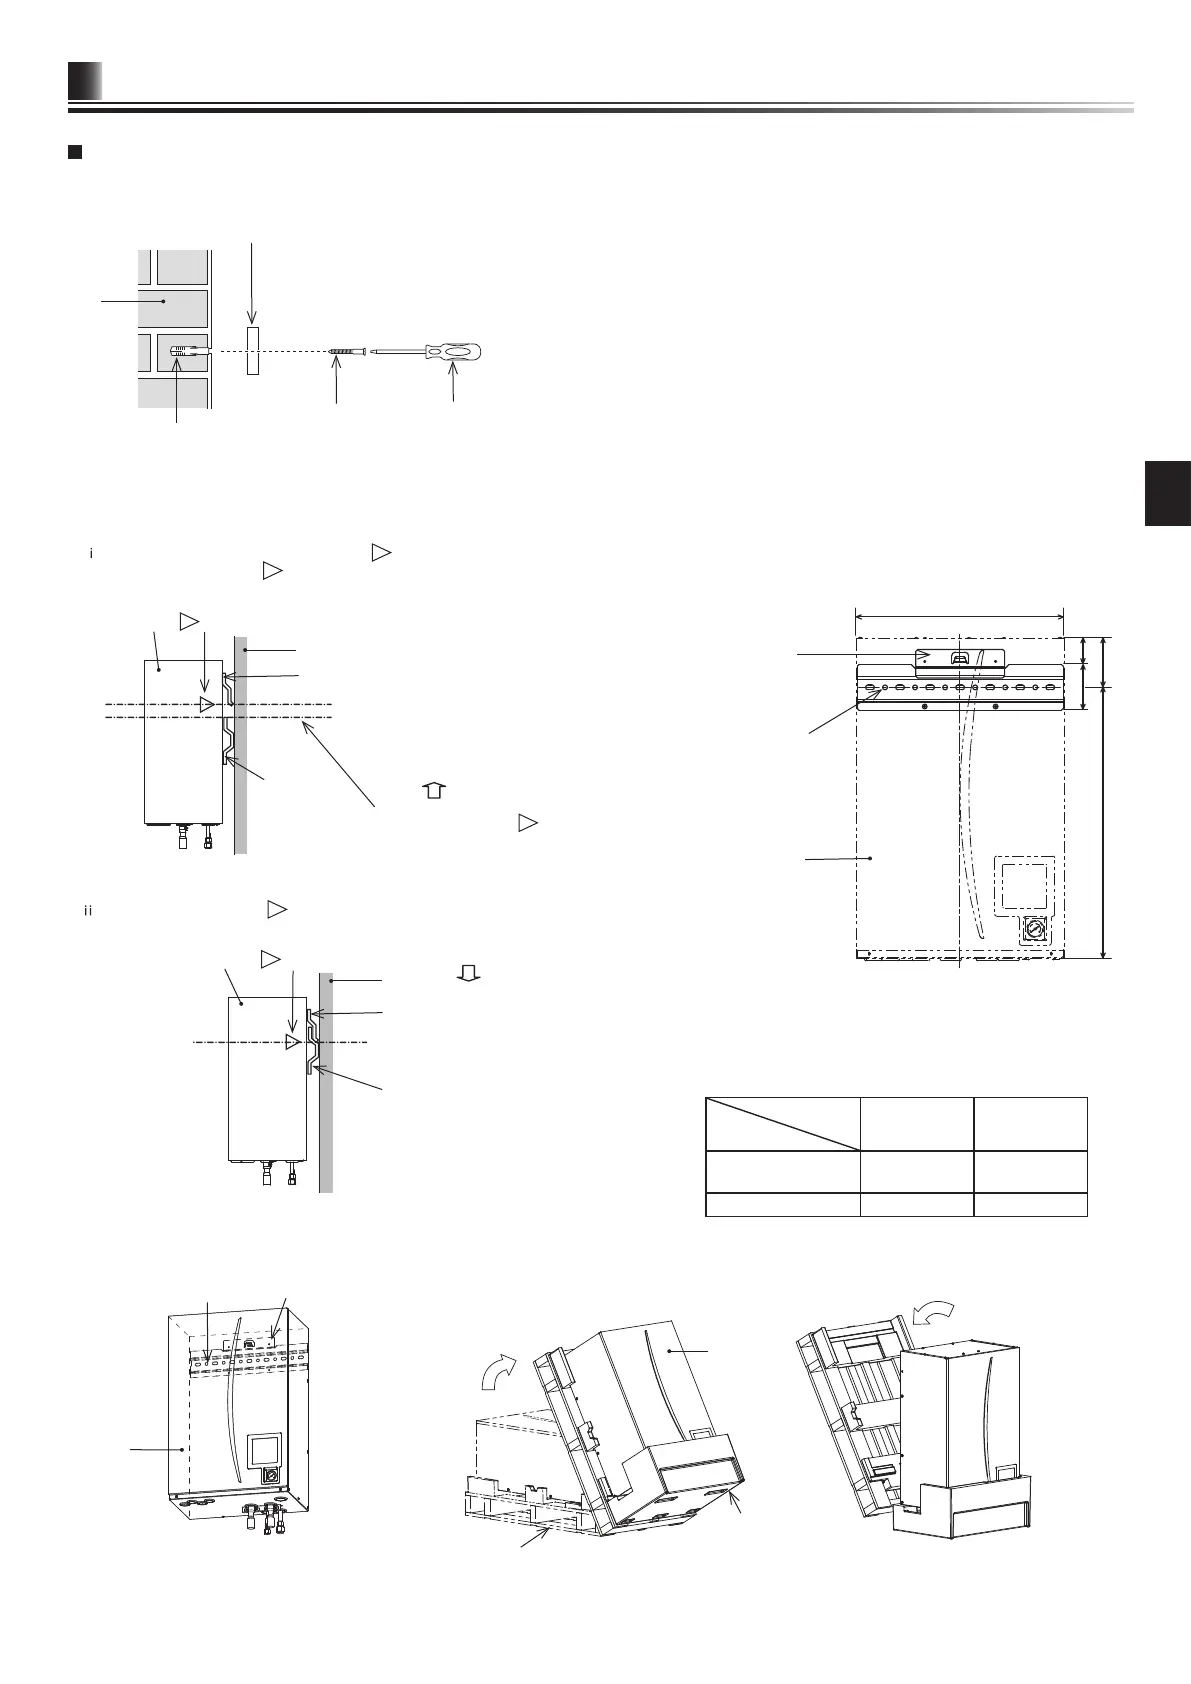
Mounting procedure
1. Install the included back plate accessory.
* When installing the back plate, use locally-supplied screws and compatible xing plugs.
● Fit the back plate correctly with its horizontal notch prole positioned at the TOP.
The back plate is provided with screw mounting holes that are round or oval.
To prevent the unit from falling off the wall, choose the appropriate number of
holes or hole positions and horizontally secure the back plate to the appropriate
wall location.
2. Insert the hook on the back of the hydrobox behind the notch of the back plate.
*The lifting up of the hydrobox is facilitated by rst tilting the unit forward using the included packaging cushioning.
<Side view>
Wall
Plugs
Back plate (horizontal)
Screws
Screwdriver
<Figure 4.1.4>
) Each of the right and left side panels has a mark indication.
Lift up the unit so that the
marks are positioned above the top edge of the back plate as shown below.
Lift up the unit so that the
marks are
positioned above the top edge of the back plate.
Lift up the unit.
Unit
mark
Wall
Hook
Back plate
(wall mounted)
Top edge of back plate
<Figure 4.1.5>
<Side view of unit>
) Check and ensure that the mark is positioned and properly engaged at the bent section
level on the back plate as shown.
Mount the unit.
Unit
mark
Hook
Back plate
Bent section of back plate
Wall
<Figure 4.1.6>
● Do NOT hold piping when moving the hydrobox.
A
123
65
116
B
Unit
Hook
(on the back
of casing)
Back plate
<Front view of unit>
<Figure 4.1.7>
Center line
Dimensions
(mm)
Hydro box
A B
E*SC/E*SD
EHPX
530 677
E*SE 600 827
● Figure 4.1.7 shows the relative positions between the unit and the
wall secured back plate.
Referring to the <Figure 4.1.3> Service access, install the back
plate.
Hook
Unit
Back plate
Packaging cushion
Unit
Wooden packaging base
Tilting the unit.
<Figure 4.1.8>
<Figure 4.1.9>
Removing the wooden
packaging base.
<Process 1>
<Process 2>