Do you have a question about the Mitsubishi Electric MUZ-WR-NA Series and is the answer not in the manual?
| Brand | Mitsubishi Electric |
|---|---|
| Model | MUZ-WR-NA Series |
| Category | Air Conditioner |
| Language | English |
Details specific model additions and voided revision notices.
Introduction of a new model and its specific updates.
Describes changes to indoor electronic and power P.C. boards.
Lists standard accessories included with the unit.
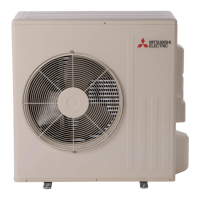
Technical specifications for MSZ-WR09NA and MSZ-WR12NA models.
Technical specifications for MSZ-WR18NA and MSZ-WR24NA models.
Defines voltage limits and operating temperature/humidity ranges.
Provides airflow rates, air speed, and coverage data for various models.
Diagrams showing external dimensions and installation details.
Diagrams showing external dimensions and installation details.
Electrical schematic for MSZ-WR09NA/12NA (U1) indoor units.
Electrical schematic for MSZ-WR09NA/12NA (U2) indoor units.
Electrical schematic for MSZ-WR18NA/24NA indoor units.
Illustrates refrigerant piping and component layout.
Illustrates refrigerant piping and component layout.
Procedure to shorten timer set times for service.
Modifying remote controller PC board for individual unit operation.
Explains and shows how to disable the auto restart function.
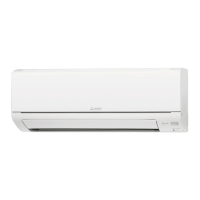
Details the functions and buttons of the wireless remote controller.
Explains the operation indicator lamp states and meanings.
Steps to operate the unit in DRY mode.
Steps to operate the unit in HEAT mode.
Details the operation and control of the horizontal vane.
Explains automatic vane angle adjustment for optimal comfort.
Describes vane position during operation stop and timer standby.
Instructions for setting and releasing ON/OFF timers.
How to use the emergency operation switch for testing or service.
Explains the 3-minute delay for compressor restart protection.
Procedure to switch between Fahrenheit and Celsius temperature display.
Important safety precautions and checks before troubleshooting.
Specific handling precautions during servicing procedures.
Steps to identify and diagnose issues using the operation indicator.
Instructions for replacing batteries in the remote controller.
How to recall and interpret memorized failure codes.
Procedure to delete memorized failure information after repair.
Table detailing failure modes, conditions, and remedies based on blinking patterns.
Flowchart guiding diagnosis of common operational problems.
Table correlating operation indicator blinking patterns with specific faults.
Methods and criteria for checking main internal components.
Step-by-step troubleshooting for indoor fan motor issues.
Procedures to check remote controller and indoor P.C. board functionality.
Detailed checks for indoor P.C. boards and fan motor.
Steps to diagnose miswiring and serial signal communication errors.
Specific troubleshooting steps for wiring on MSZ-WR18/24NA models.
List of checks to perform before contacting service for noise issues.
Diagram and voltage test points for indoor power and terminal P.C. boards.
Diagram and test points for the indoor electronic control P.C. board.
Diagram and test points for indoor power/terminal boards (U2 models).
Diagram and test points for indoor power boards (WR18/24NA).
Procedures for disassembling the front panel of WR09/12NA models.
Steps to remove the indoor electronic control P.C. board and electrical box.
Steps to remove indoor power/terminal P.C. boards and electrical box.
Procedure for removing the nozzle assembly.
Steps to remove the horizontal vane motor unit.
Procedures for removing fan motor, coil thermistors, and line flow fan.
Procedures for disassembling the front panel of WR18/24NA models.
Steps to remove indoor power P.C. board and electrical box for WR18/24NA.
Steps to remove the indoor electronic control P.C. board.
Steps to remove the vane motor.
Procedures for removing fan motor, coil thermistors, and line flow fan.
Instructions for mounting the indoor coil thermistor clip-shape part.