K
Kelli JimenezAug 30, 2025
What does Error Code 6600 mean on a Mitsubishi Electric PUHY-P96 Air Conditioner?
- HHeather RoyAug 31, 2025
If your Mitsubishi Electric Air Conditioner displays Error Code 6600, it indicates an address overlap.
What does Error Code 6600 mean on a Mitsubishi Electric PUHY-P96 Air Conditioner?
If your Mitsubishi Electric Air Conditioner displays Error Code 6600, it indicates an address overlap.
What does Error Code 7113 mean on a Mitsubishi Electric PUHY-P96?
If your Mitsubishi Electric Air Conditioner displays Error Code 7113, it indicates a function setting error.
What does Error Code 7110 mean on a Mitsubishi Electric PUHY-P96?
If your Mitsubishi Electric Air Conditioner displays Error Code 7110, it indicates a connection information signal transmission or reception error.
What does Error Code 4116 mean on a Mitsubishi Electric PUHY-P96 Air Conditioner?
If your Mitsubishi Electric Air Conditioner displays Error Code 4116, it indicates an RPM error or a motor error.
What does Error Code 4230 mean on a Mitsubishi Electric PUHY-P96 Air Conditioner?
If your Mitsubishi Electric Air Conditioner is showing Error Code 4230, it indicates that heatsink overheat protection has been activated.
What does Error Code 7106 mean on a Mitsubishi Electric PUHY-P96 Air Conditioner?
If your Mitsubishi Electric Air Conditioner displays Error Code 7106, it indicates an attribute setting error.
What does Error Code 7101 mean on Mitsubishi Electric PUHY-P96?
If your Mitsubishi Electric Air Conditioner displays Error Code 7101, it indicates a capacity code setting error.
What does Error Code 7105 mean on a Mitsubishi Electric PUHY-P96 Air Conditioner?
If your Mitsubishi Electric Air Conditioner displays Error Code 7105, it means there is an address setting error.
What does Error Code 7100 mean on Mitsubishi Electric PUHY-P96 Air Conditioner?
If your Mitsubishi Electric Air Conditioner is showing Error Code 7100, this indicates a total capacity error.
What does it mean when my Mitsubishi Electric PUHY-P96 Air Conditioner displays Error Code 4250 or 4255?
Error Codes 4250 and 4255 on your Mitsubishi Electric Air Conditioner indicate several potential issues: an instantaneous overcurrent, a short-circuited IPM/ground fault, an overcurrent error due to a short-circuited motor, or simply an overcurrent situation.
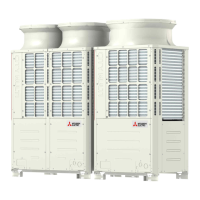
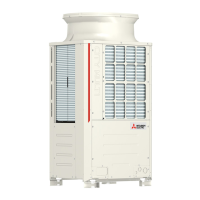
| Model | PUHY-P96 |
|---|---|
| Cooling Capacity | 96, 000 BTU/h |
| Refrigerant | R410A |
| Power Supply | 208-230V, 60Hz, 3-Phase |
| Dimensions (Indoor Unit) | Varies depending on the connected indoor units |
| Weight (Indoor Unit) | Varies depending on the connected indoor units |
| Operating Temperature Range (Cooling) | 23°F to 115°F DB |
| Indoor Unit Compatibility | Compatible with various City Multi indoor units (ceiling concealed, wall-mounted, floor-standing) |
Specific safety guidelines for handling units with R410A refrigerant, focusing on piping and tools.
General safety guidelines to follow before installing the unit, covering location and environmental factors.
Safety precautions for unit installation, moving, reinstallation, and electrical work.
Safety measures and checks required before operating the unit for the first time (test run).
Essential checks and procedures to perform before starting any servicing on the unit.
Lists all necessary tools and materials for installation and servicing of R410A units.
Details on approved copper pipe materials and radial thickness requirements for R410A systems.
Guidelines for storing refrigerant piping to prevent contamination and moisture infiltration.
Instructions on pipe processing, including coating flares and flanges with specific oils.
Recommendations for performing brazing, emphasizing the use of non-oxidized solder and clean connections.
Procedures for conducting air tightness tests using nitrogen, and notes on R410A leak detection.
Steps and standards for performing vacuum drying to remove moisture from the refrigerant circuit.
Guidelines for charging refrigerant R410A, emphasizing liquid phase charging for system safety.
Procedures for addressing refrigerant leaks, including replenishment and referencing troubleshooting sections.
Comparison of chemical properties, composition, and pressure characteristics of R410A and older refrigerants.
Information on the specific refrigerating machine oil used with HFC refrigerants and effects of contaminants.
Table summarizing compatible indoor units with different outdoor units and total capacity limits.
Details on cable types, number of cores, sizes, and maximum allowable lengths for control wiring.
Instructions for setting DIP switches and assigning addresses for indoor units, outdoor units, and controllers.
Illustrative examples of typical system connections for MA and M-NET remote controllers.
Control wiring diagram and cautions for a system with an MA remote controller.
Control wiring diagram and cautions for a system with an M-NET remote controller.
Control wiring diagram and cautions for systems using both MA and M-NET remote controllers.
Tables detailing allowable pipe lengths between outdoor units, indoor units, and distributors for various models.
Exploded views of outdoor unit components and their corresponding refrigerant circuit diagrams.
Identification of components within the outdoor unit's control box, including warnings for high voltage.
Detailed diagrams of the outdoor unit's control board, showing connectors and components.
Comparison of functions, specifications, and selection criteria for MA and M-NET remote controllers.
Procedures for setting up group operations and interlocks with LOSSNAY units using the ME remote controller.
Step-by-step guide for setting up interlock configurations between LOSSNAY units and indoor units via MA controller.
Instructions on how to use the built-in temperature sensor on the remote controller for accurate room temperature detection.
Detailed electrical wiring diagrams for the outdoor unit, illustrating connections between major components.
Electrical wiring schematic for the transmission booster, showing its connections and components.
Visual representation of the refrigerant flow path within the outdoor units for different models.
Description of the main parts within the refrigerant circuit, their symbols, usage, and specifications.
Explains the functions and factory settings of various DIP switches on the outdoor unit control board.
Details on control methods, startup sequences, and bypass controls for outdoor units.
Flowcharts illustrating the operational logic for indoor and outdoor units during cooling, heating, and dry modes.
Essential checks before performing a test run, including refrigerant leaks, wiring, and power supply.
Step-by-step guide on how to perform a test run using the MA remote controller (PAR-21MAA).
Understanding refrigerant characteristics and operating parameters for adjusting refrigerant amounts.
Guidance on adjusting refrigerant levels based on observed symptoms and operating conditions.
Detailed flowchart and procedure for entering and performing refrigerant amount adjustments.
Lists symptoms that are considered normal during operation and their causes.
Reference data for standard operation parameters (temperatures, pressures, currents) for various models.
Comprehensive list of error codes, their definitions, and the units affected.
Actions to take and checks to perform when specific error codes are displayed on the remote controller.
Methods for checking transmission line wave patterns and investigating noise interference issues.
Detailed troubleshooting procedures for principal parts like sensors, valves, and fans.
Procedures for locating and repairing refrigerant leaks in the system, for both cooling and heating seasons.
Step-by-step instructions for safely removing and replacing the compressor unit.
Guide on interpreting LED error displays on the outdoor unit board for diagnosing issues.
Explanation of how to read the LED indicators on the service monitor for displaying operational status and errors.