Do you have a question about the Mitsubishi Electric XD8100U and is the answer not in the manual?
| Brand | Mitsubishi Electric |
|---|---|
| Model | XD8100U |
| Category | Projector |
| Language | English |
Covers reading instructions, warnings, cleaning, attachments, water, accessories, ventilation, power sources, power cord protection, overloading, objects and liquids.
Covers servicing, damage, replacement parts, and safety checks for the projector.
Covers unplugging, not removing cabinet, not modifying, not using damaged projector, sun, voltage, multiple appliances, cord extension, uneven surface, lens, hot parts, air outlet, fingers, blocked inlets/outlets, solvents, condensation.
Covers temperature, humidity, altitude, and continuous operation recommendations.
Lists provided accessories like cables, remote control, power parts, and other items.
Describes inserting and removing batteries for the remote control.
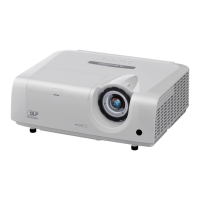
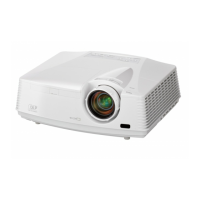
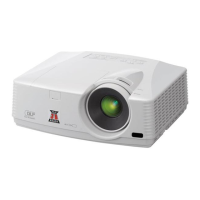
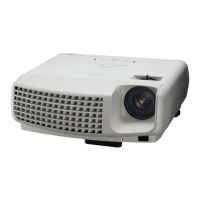
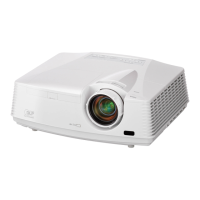
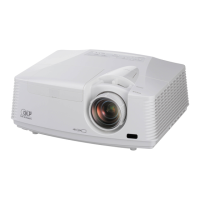
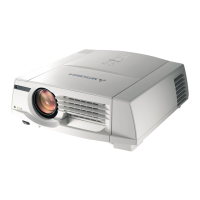
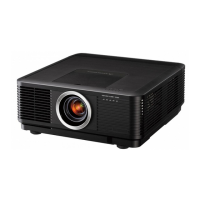
Identifies projector parts like lens, grilles, sensors, and control buttons on the unit.
Details the various input/output terminals located on the projector's rear panel.
Explains the function and meaning of various indicator lights on the projector.
Lists and describes the functions of all buttons on the projector's remote control.
Describes the lock bar (security anchor) and adjustment feet on the projector's bottom.
Details the remote control's effective distance, reception angles, and environmental factors.
Explains how to connect and use the projector with a wired remote control cable.
Explains how to set ID numbers for controlling multiple projectors individually or collectively.
Describes how to set the controller ID directly via the remote control unit.
Describes how to set the projector ID directly from the projector unit's controls.
Details allowable operating temperature, humidity, and altitude for projector use.
Provides a table for screen sizes and corresponding projection distances.
Outlines turning on the projector and adjusting focus/image position.
Explains how to configure the auto power off feature and its options.
Explains setting cooling conditions based on projector orientation and projection angle.
Describes settings for high altitudes and image reverse for mounting orientation.
Explains how to use adjustment feet to correct image skew and distortion.
Details how to correct trapezoidal distortion using the KEYSTONE mode.
Addresses fine streaks on images and minor focus adjustments.
Continues Keystone mode discussion, covering effects and limitations.
Explains how to adjust image shape using Cornerstone mode for fine-tuning.
Details how to adjust images projected on curved surfaces using the CURVED mode.
Explains ARC menu for vertical/horizontal correction and origin adjustment.
Continues Curved mode discussion, covering effects and limitations.
Discusses requirements and considerations for ceiling mounting installations.
Provides guidance and recommendations for rear projection setups.
Lists locations and conditions to avoid for safe and proper projector installation.
Explains how to connect computers via analog (RGB, BNC) and digital (DVI) interfaces.
Provides information about the DDC standard for computer communication with the projector.
Details safe power cord connection and usage practices for the projector.
Describes the steps required to install the projector's terminal cover.
Step-by-step guide to projecting images from a connected computer source.
Details fine-tuning image size and position for optimal display.
Explains the correct procedure to turn off the projector and its lamp.
Describes how to turn off projector power directly without using the POWER button.
Explains the BLANK button function and the AUTO POSITION feature.
Notes on connecting notebooks and matching computer/projector resolutions.
Explains connections for video players via BNC and S-Video terminals.
Details connecting DVD players or HDTV decoders via component video inputs.
Explains connecting devices with HDMI or DVI-D output terminals.
Specifics on DVI-D, HDMI signals, black levels, and related settings.
Refers back to previous sections for power cord and terminal cover installation.
Step-by-step guide to projecting images from connected video sources.
Details fine-tuning image size and position for optimal video display.
Explains the correct procedure to turn off the projector after video projection.
Describes how to turn off projector power directly without using the POWER button.
Explains how to change image aspect ratios (Normal, 16:9, Full) for video input.
Provides an overview of all main menus (Image, Installation, Feature, Signal, Network, Information).
Explains the general procedure for navigating and setting menu options on the projector.
Details the specific settings and functions available within the Image menu.
Details the specific settings and functions available within the Installation 1 menu.
Details the specific settings and functions available within the Installation 2 menu.
Details the specific settings and functions available within the Multi-Screen menu.
Details the specific settings and functions available within the Feature menu.
Continues Feature menu details including Lamp Warning, Hide OSD, and reset options.
Details the specific settings and functions available within the Signal menu.
Details the specific settings and functions available within the Network menu.
Explains the information displayed in the Information menu, such as lamp time and serial number.
How to adjust brightness, contrast, color, and tint of the projected image.
How to adjust image sharpness and select color temperatures.
Explains how to customize and store color temperature settings for the image.
Explains user-defined balance for brightness and hue using the Color Enhancer.
How to adjust image fineness and clarity using the Super Resolution feature.
How to adjust the tone of each color using the NCM settings.
Provides a flowchart for adjusting computer images when they are not displayed correctly.
Details how to adjust image position for computer input signals using menu options.
Explains how to enable LPF to reduce streak noise in projected images.
How to make image joints unnoticeable in multi-screen displays using edge blending.
How to correct brightness non-uniformity for single projector use.
How to manually adjust color variations using settings like COLOR and SATURATION.
How to adjust color variations using a chroma meter and measured data.
How to reset image adjustment settings to their factory defaults.
How to set the projector's name for identification on the network.
How to set a password for network control and web access.
How to enable or disable DHCP for automatic IP configuration.
How to manually set the projector's IP address, subnet mask, and gateway.
How to configure the subnet mask and default gateway for network settings.
Covers enabling network certification and selecting the control system.
How to reset all network settings to their factory defaults.
Explains network function usage, requirements, and troubleshooting.
How to set the interval for lamp relay when using dual lamps in the projector.
How to set the interval for lamp relay when using a single lamp in the projector.
How to set a custom image as the startup or splash screen.
How to enable and set the password function for projector operation.
How to disable or cancel the projector's password function.
How to use the PinP mode to display multiple images simultaneously.
How to zoom in on parts of the image using the MAGNIFY button.
How to temporarily stop motion in the image and display a still image.
Overview of controlling the projector via LAN using software applications.
Information on ProjectorView Global+, AMX, and Crestron integration.
Lists commands supported by the PJLink™ protocol for projector control.
How to monitor and control projectors using the serial terminal connection.
How to assign Projector IDs for individual or collective control of projectors.
How to assign Group IDs to organize projectors into groups for collective control.
How to control the projector using a control panel connected to the REMOTE 1 IN terminal.
Important warnings and precautions regarding lamp replacement safety.
Recommended intervals for lamp replacement based on projector usage hours.
Steps to take before starting the lamp replacement process.
Step-by-step instructions for removing and installing the projector lamp.
How to reset the lamp operating time after a lamp has been replaced.
Specific procedure for replacing lamps in ceiling-mounted projector installations.
General warnings and instructions for cleaning the projector and its components safely.
Explains how the automatic cleaning filter operates during projector use.
How to set the interval for automatic filter cleaning cycles.
Step-by-step instructions for cleaning the filter and its dust box.
Addresses problems with the projector not turning on and interpreting indicator lights.
Covers problems with no image appearing, no signal, and cable connectivity.
Discusses scenarios where the projector unexpectedly turns off during operation.
Covers issues like shaking, displacement, distortion, darkness, blurriness, and dots.
Addresses rainbow effect, streaks, wavy images, and hue problems.
Discusses incorrect tint, different color tints, and partial image display problems.
Covers exhaust vents, menu usability, temperature display, remote control, and abnormal sounds.
Addresses problems with focus, zoom, and lens shift not working correctly.
Checks to perform after replacing the lamp, including power and indicator status.
Information about the Kensington Security Standard connector for securing the projector.
Explains the conditions indicated by the POWER, STATUS, and FILTER lights.
Explains the conditions indicated by the LAMP 1 and LAMP 2 lights.
Covers Type, Model, Resolution, Signal Types, and available Terminals.
Covers operating temperatures, rated voltage, and power consumption.
Covers physical dimensions, weight, and optional accessories for the projector.
Detailed table of RGB signals, resolution, frequency, and normal mode compatibility.
Important notes regarding RGB signal compatibility and resolution limitations.
Details the pin assignments for various connectors like Serial, Computer, and HDMI.
Provides dimension drawings of the projector with and without the terminal cover.