5
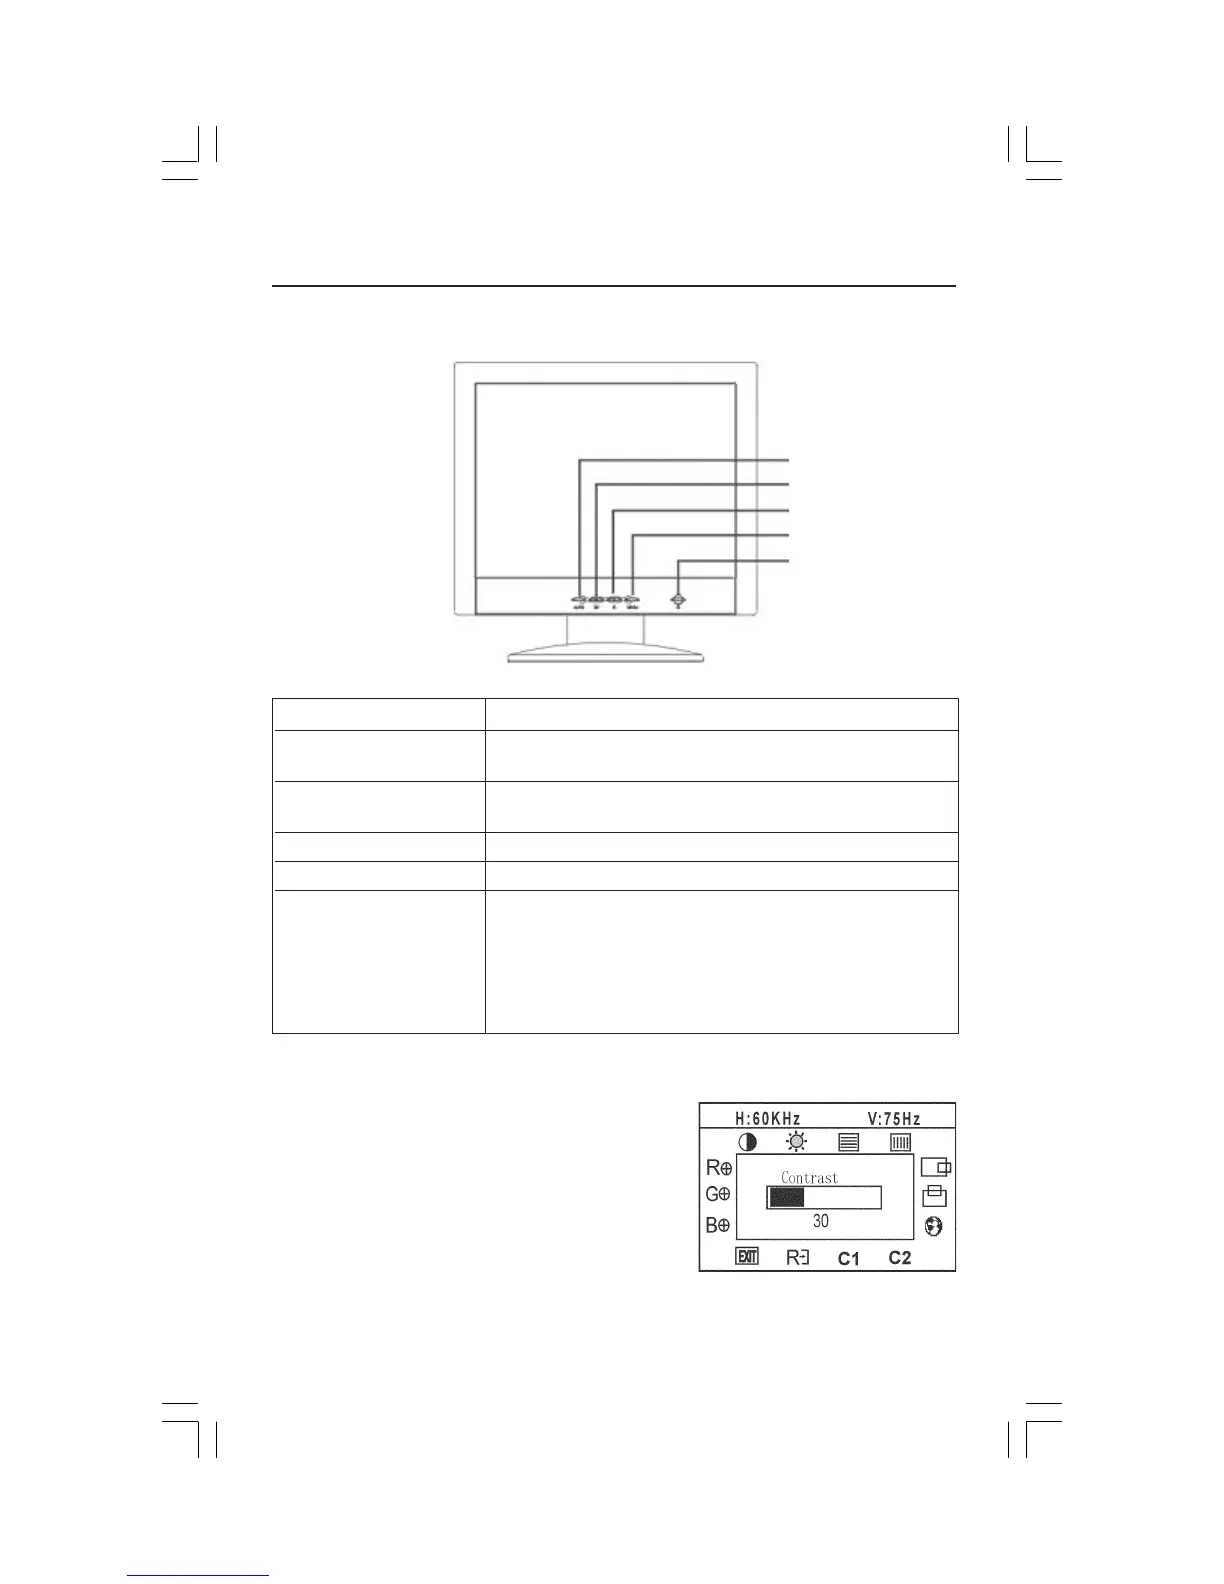
Controls
OSD (On-Screen Display) control buttons on the front of the monitor function
as follows:
Adjusting a Setting
1. Press the MENU key to make the OSD window appear.
2. Press
<<
<<
< or
>>
>>
> to select the desired function.
3. Press the MENU key to select the function that you want to
adjust.
4. Press
<<
<<
< or
>>
>>
> to change the settings of the current function.
5. When the OSD window is active, it shows the input signal
timing. The “H” stands for the horizontal frequency and “V”
for the vertical frequency.
6. To exit and save, select the exit functions, or leave the
monitor alone for 10 seconds. If you want to adjust any
other function, repeat steps 2-4.
5
4
3
2
1
Menu
1.
Power key/Power indicator
Press this button to power ON or OFF the LCD’s power.
Power ON mode (green LED), Power OFF mode (orange LED).
2. 2.
2. 2.
2. MENU/ENTER Activates the OSD menu or confirm the adjust function or Exit
OSD menu when in Brightness/Contrast OSD status.
3. > / Contrast Adjust contrast or adjust function.
4. < / Brightness Adjust brightness or adjust function.
5. Auto Adjust/EXIT Key 1. When OSD menu is in active status, this button will act as EXIT
KEY (EXIT OSD menu).
2. When OSD menu is in off status, press this button for two
seconds to
activate the Auto Adjustment function.
The Auto Adjustment function is used to set the HPos, VPos,
Clock and Focus.
DPVLCDmanualFINAL.P65 10/27/03, 12:42 PM5

 Loading...