F9Q ENGINE – Camshaft and Vacuum PumpF9Q ENGINE – Camshaft and Vacuum Pump
11A-10-2
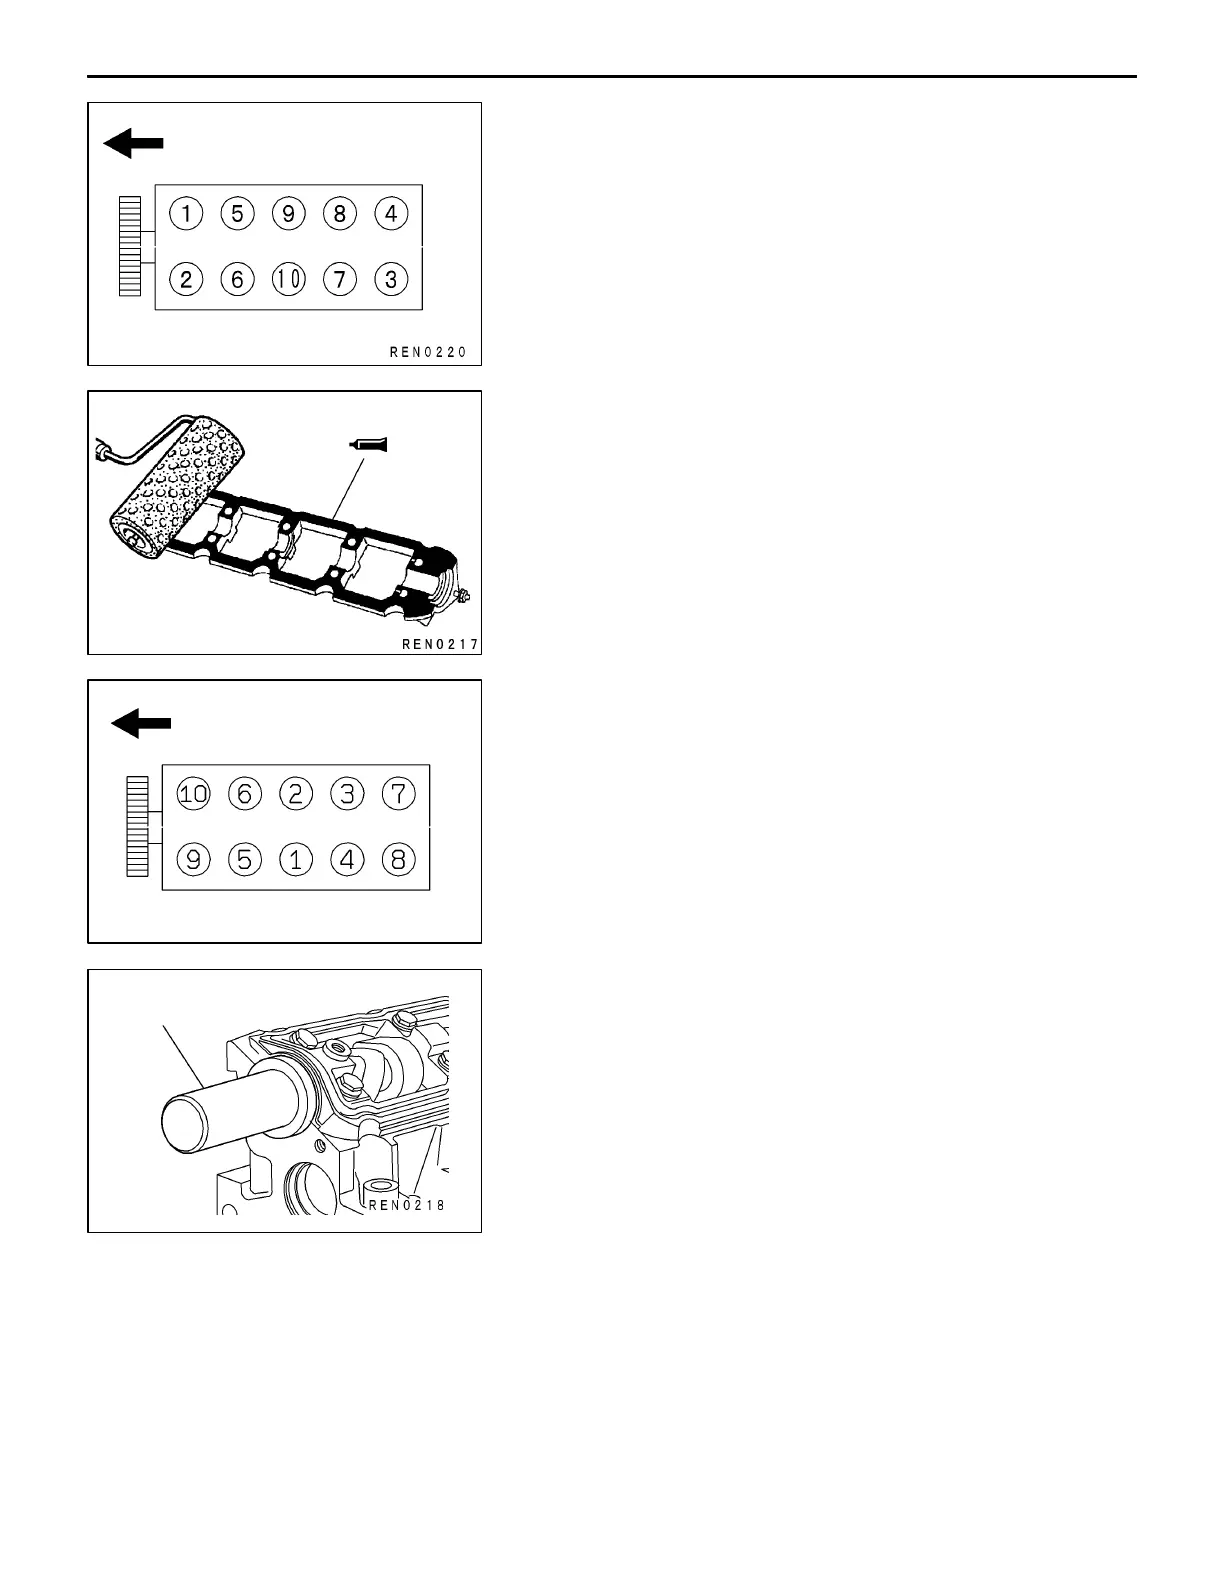
REMOVAL SERVICE POINT
AA" BEARING CAP REMOVAL
Remove the bearing cap bolts by loosening them in two or
three steps in the order shown in the illustration.
INSTALLATION SERVICE POINTS
"AA BEARING CAP INSTALLATION
(1) Apply sealant Loctite 518 on the bearing cap at a position
where it comes in contact with the cylinder head.
(2) Tighten the bearing cap bolts to a torque of 20"2 Nm
in the sequence given in the illustration.
"BA OIL SEAL INSTALLATION
Using the special tool, install the oil seal.
"CA VACUUM PUMP INSTALLATION
Install the vacuum pump while aligning coupling section with
the notch in the camshaft.
PWEE0001
E
Jun. 2000Mitsubishi Motors Corporation
PWEE0001-A
E
Mar. 2001Mitsubishi Motors Corporation Revised
Timing belt side
REN0183
Timing belt side
MB998304
 Loading...