(Caution)
Adjustment
of
Needle
Stop
Position
(LT2-230-B1T, LT2-250-B1T)
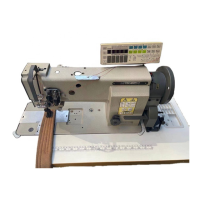
The machines, LT2-230-B1T and LT2-250-B1T, are shipped out after completion of the
sewing
and thread
trimming
tests with the thread of
vinyion
No.B
for both the
needle
and
bobbin
on
three-folded
denim
(0.8mm
in
thickness).
It is necessary to adjustthe needle
stop
position after the thread is trimmed according to
the
thickness
and
material
of
the
used
sewing
thread,
and
the
thickness
and
material
of
the
fabric
to
be
sewn.
Follow
the
adjusting
procedure
mentioned
below.
Adjustment
Check
the
distance
between
the
white
mark
on
the
balance
wheel
and
the
black
mark
on
the
arm
when
the
needle
stops
at UP
position
after
the
fabric is
sewn
and
the
thread
is trimmed.
1.
When
the
needle
stop
early;
4
2.
When
the
needle
stop
late;
£\
If
the
distance
A
shown
left
is 2
mm
or
more,
the
malfunction
of
the
knives
occur,
and
the
needle
threads
and
the
bobbin
threads
(at
the
left
and
right
sides)
are
not
trimmed
properly.
If
the
distance
B
shown
left
is 5
mm
or
more,
the
clearance
between
the
needle
and
the
throat
plate
becomes
narrow.
3.
Adjusting
Method
If
the
needle
stop
position is deviated as
shown
above, adjust
the
setting
location of
the
synchronizer
detector
disc
so
that
the
distance
A may be within 2 mm
and
the
distance
8
within 5 mm
according
to the adjusting
procedure
mentioned inthe secion
[T],
Adjustment
of Needle Bar
Stop
Position, on the
page
2 of
the
Instruction Manual. In adjusting, make
sure
of
the
stop
position after
the
sewing
and
the
thread
trimming is actually completed.
-27
-
 Loading...