ADJUSTMENT
AND
OPERATION
OF
CONTROL
UNIT
I 1 I
"1—2
POSITION"
select
switch
Needlestop position can be selected between "1—POSITION" and "2-POSITION".
_•
mark
"2-POSITION"
—1
t_mark
"1-POSITION"
When
the
switch
setat "1
POSITION",
thread is
trimmed
inone turn of the
sewing
machine
when
the
pedal is kicked
back
by heel.
I2 I
Pedal
operation
The
pedal
operation and
resultant
motion
(stitching,
thread
trimming
and
needle
motion)
are as
follows;
\
Pedal
\
operation
•T-2 POSITION"'
switch
setting
1
POSITION
2
POSITION
Pedal
operation
Toe
down
Neutral
Stop
with
needle
at
"UP"
position
Stop
with
needle
at
"DOWN"
position
' 1 '
.J-i
Neutral
I
Light
heeling
Neutral
4
Full
heeling
Presser foot goes Presser foot goes UPafter one
up
turn
and
thread
trimming
Presser foot goes Presser
foot
goes UP
after
holf
up
(needle
DOWN
to
UP)
and
thread
trimming
Neutral (stitching
start
position)
Neutral
Notes; 1. Stitching speed can be changed by changingdegree of pressingdown of the pedal.
2. For automatic presser foot lift, use optional unit.
LE-FM-1
or LE-FM-2.or solenoid valve
(DC
24V).
3.
For
tackstitching.
use
optional
control
bn-..
LD-C2, C4
or
06.
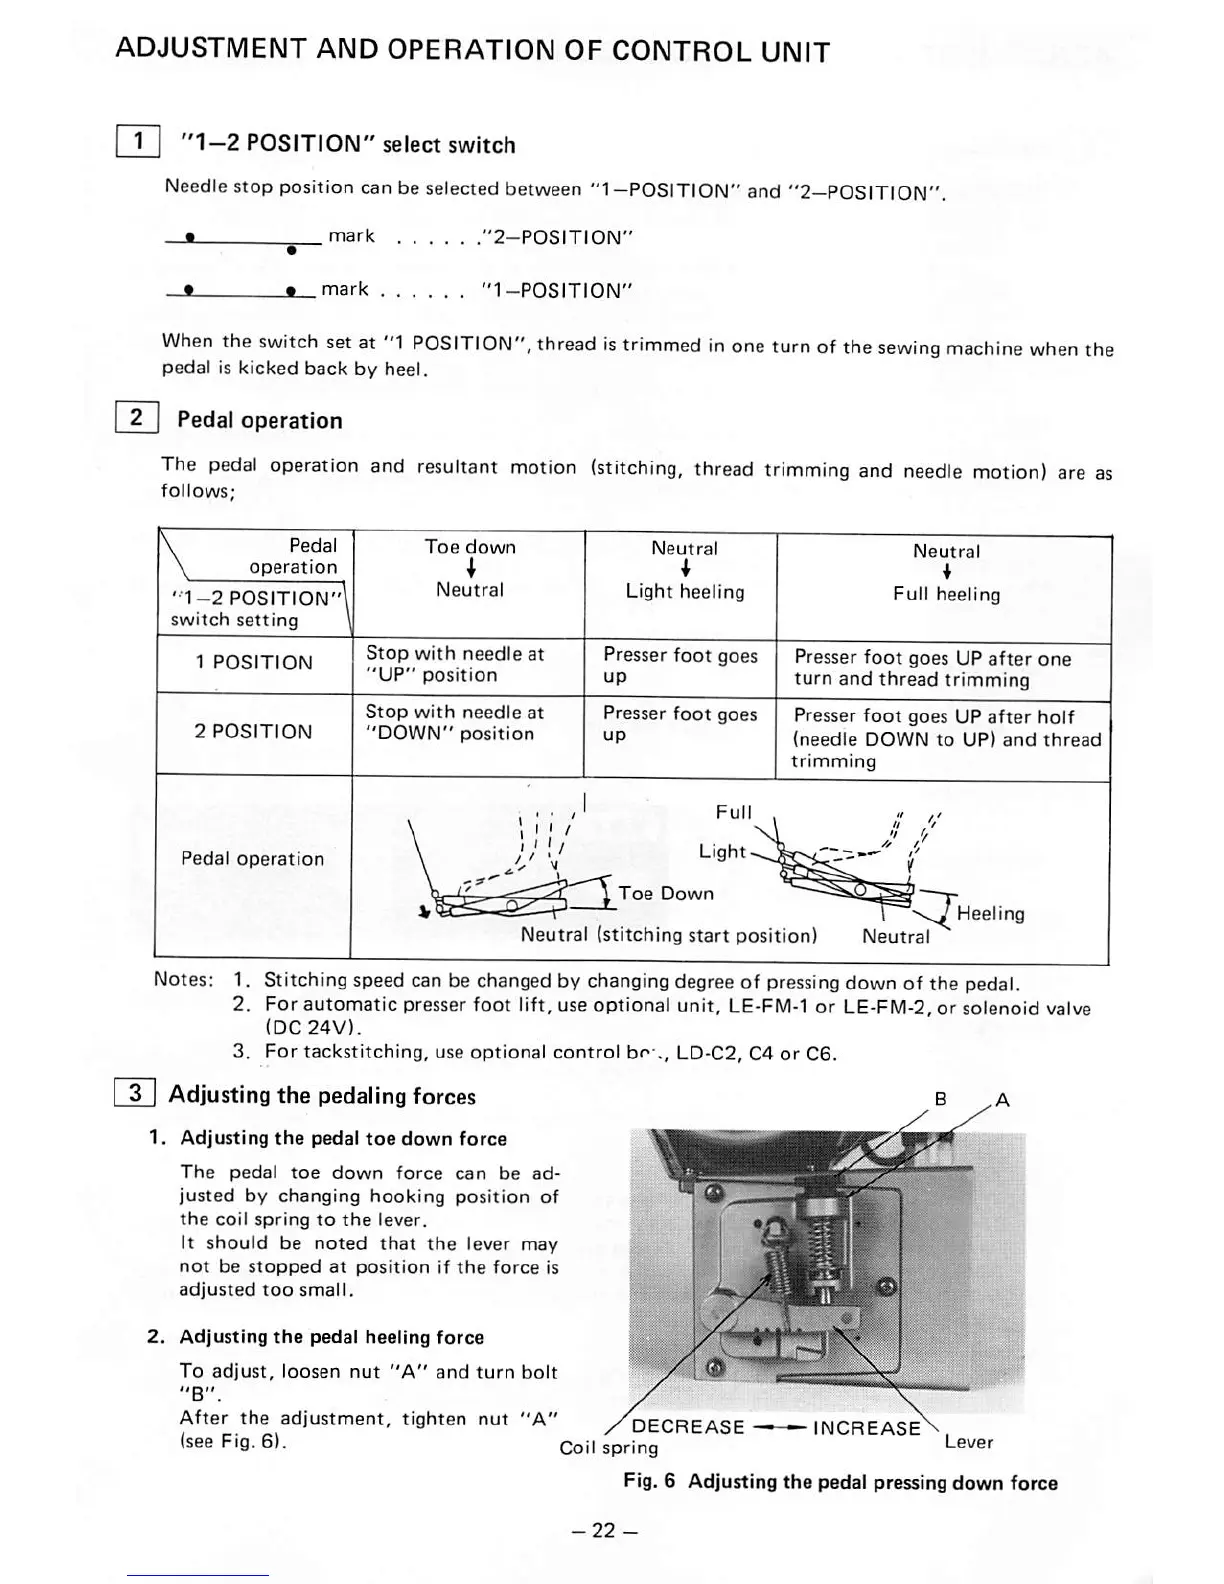
I 3 I
Adjusting
the
pedaling
forces
B A
1.
Adjusting
the
pedal
toe
down
force
The
pedal
toe down force can be ad- ^
justed by
changing
hooking
position
of ®
the coil spring to the lever. ^ ^
It should be noted that the lever may f
not
be
stopped
at
position
if
the
force
is
» ^
2.
Adjusting
the
pedal
heeling
force
x "
To adjust,
loosen
nut "A" and turn bolt ^
.,g„_
/ " \
After
the
adjustment,
tighten
nut
"A"
/DECREASE
—
INCREAS^
(see
Fig.
6).
Coil
spring
Lever
Fig. 6
Adjusting
the
pedal pressing
down
force

 Loading...