5. Remove the wheel nuts with the wheel nut
wrench, then take the wheel off.
CAUTION
l
Handle the wheel carefully when chang-
ing the tyre, to avoid scratching the wheel
surface.
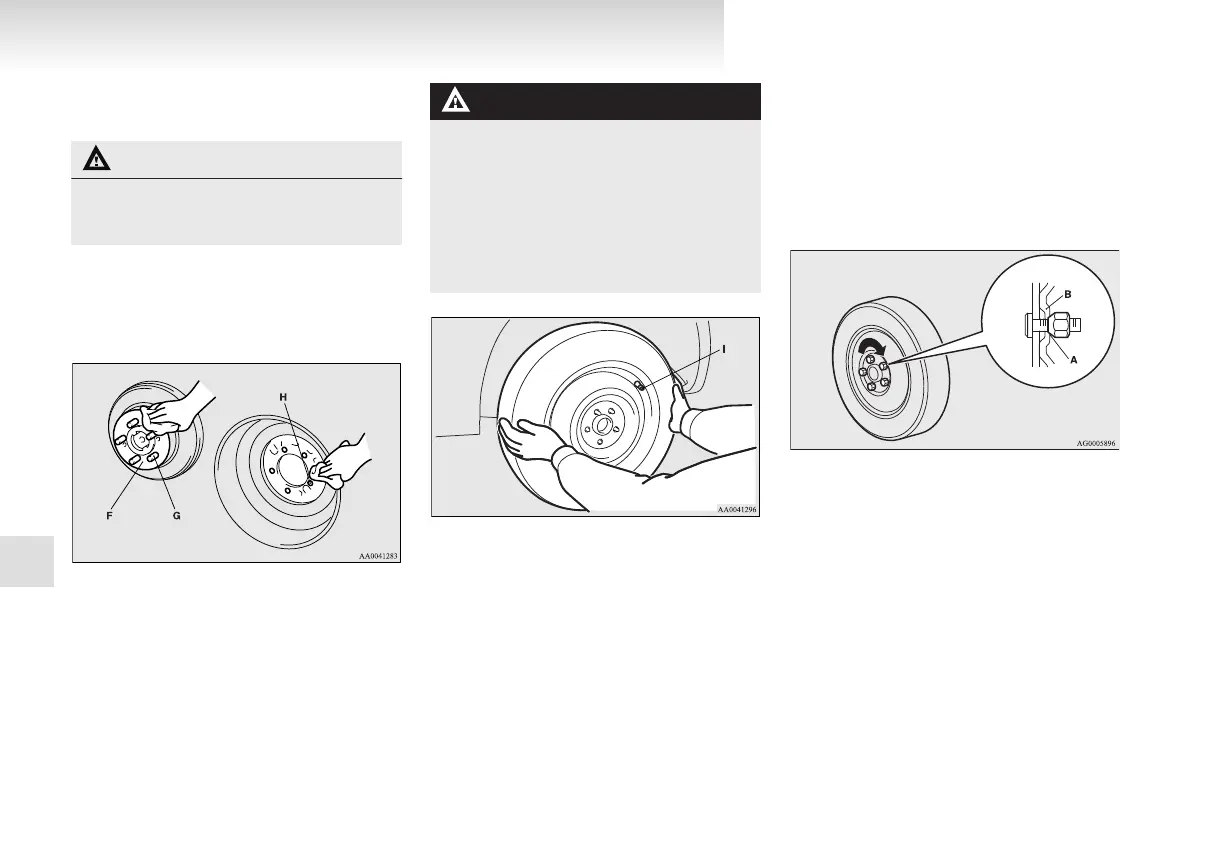
6. Clean out any mud, etc. on the hub surface
(F), hub bolts (G) or in the installation holes
(H) in the wheel, and then mount the spare
tyre.
WARNING
l
Be sure to position the tyres the correct
way when putting them on the vehicle.
The valves should be on the outer side of
the vehicle. If the valve (I) cannot be seen,
the tyre has been mounted the wrong way
around.
If tyres are mounted the wrong way
around it could have a negative effect on
the vehicle and cause an accident.
7. Turn the wheel nuts clockwise by hand to in-
itially tighten them.
[On vehicles with steel wheels]
l
Normal wheel and temporary spare wheels
Initially tighten the wheel nuts until the ta-
pered part (A) of the nuts lightly touches
the wheel hole seats (B) enough to keep
the tyre from wobbling.
Initially tighten the nuts in the same way
when mounting the temporary spare
wheel.
[On vehicles with aluminium wheels]
l
Normal wheel
Initially tighten the wheel nuts until the
wheel nut flange area (C) touches the
For emergencies
6-14
6

 Loading...