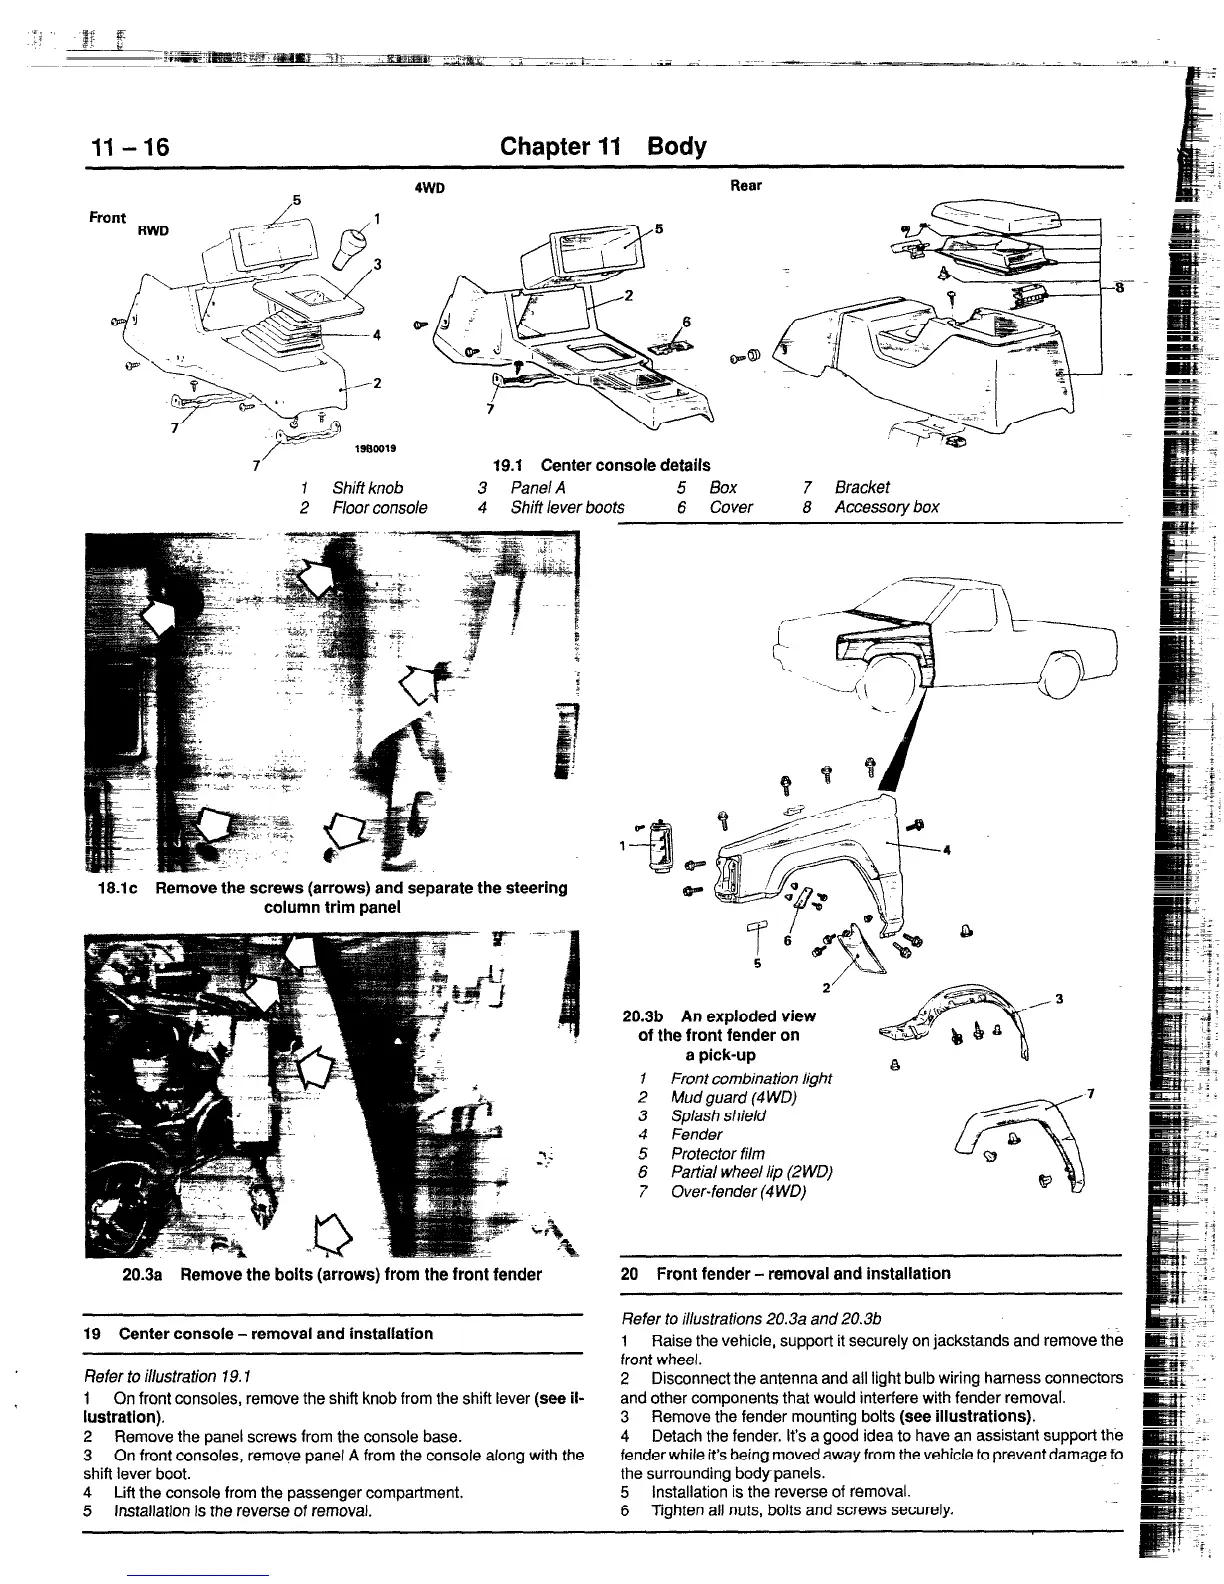
19.1 Center console details
I Shift knob 3 Pane/A 5 Box 7 Bracket
2 Floor console 4 Shift lever boots 6 Cover 6 Accessory box
18.1~ Remove the screws (arrows) and separate the steering
column trim panel
19 Center console - removal and installation
Refer to illustration 79.7
1 On front consoles, remove the shift knob from the shift lever (see
il-
lustration).
2 Remove the panel screws from the console base.
3 On front consoles, remove panel A from the console along with the
shift lever boot.
4 Lift the console from the passenger compartment.
5 Installation is the reverse of removal.
20.3a Remove the bolts (arrows) from the front fender 20 Front fender - removal and installation
Refer to illustrations 20.3a and 20.3b
1
Raise the vehicle, support it securely on jackstands and remove the
front wheel.
2 Disconnect the antenna and all light bulb wiring harness connectors
and other components that would interfere with fender removal.
3 Remove the fender mounting bolts
(see illustrations).
4 Detach the fender. It’s a good idea to have an assistant support the
fender while it’s being moved away from the vehicle to prevent damage to
the surrounding bodypanels.
5 Installation is the reverse of removal.
6 Tighten all nuts, bolts and screws securely.
II-16 Chapter II Body
Rear
e
20.3b An exploded view
of the front fender on
a pick-up
1 Front combination light
2 Mud guard (4 WD)
3 Splash shield
4 Fender
5 Protector film
6 Partial wheel lip (2 WD)
7 Over-fender (4 WD)
 Loading...


