4-40 Chapter 4 Fuel and exhaust systems
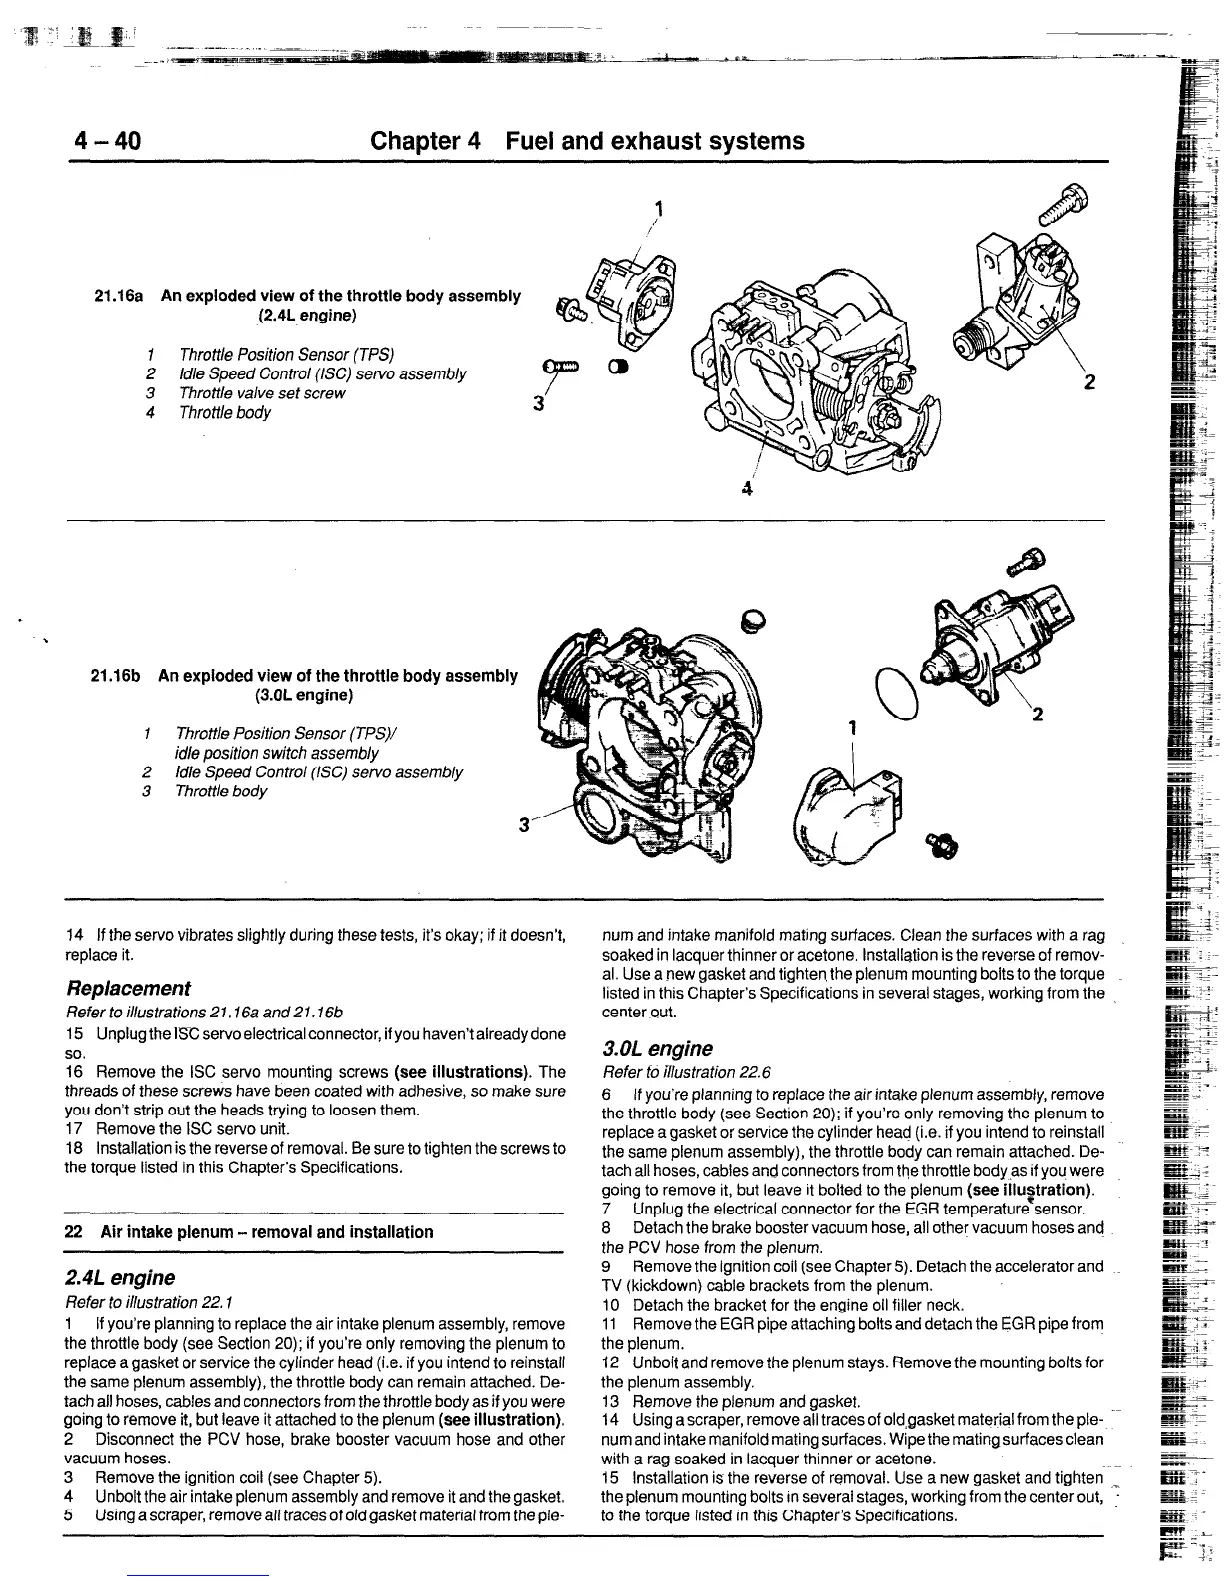
21.16a An exploded view of the throttle body assembly
(2.4L engine)
1 Throttle Position Sensor (TPS)
2 Idle Speed Control (EC) servo assembly
CD
3 Throttle valve set screw
4 Throttle body
3
21.16b An exploded view of the throttle body assembly
(3.OL enaine) c
1
Throttle Position Sensor (TPS)/
idle position switch assembly
2 Idle Speed Control (/SC) servo assemblv I
f
,
3 Throile body
14 If the servo vibrates slightly during these tests, it’s okay; if it doesn’t,
replace it.
Replacement
Refer to illustrations 2 1.16a and 2 1.166
15 Unplug the ISC servo electrical connector, if you haven’t already done
so.
16 Remove the ISC servo mounting screws (see
illustrations).
The
threads of these screws have been coated with adhesive, so make sure
you don’t strip out the heads trying to loosen them.
17 Remove the ISC servo unit.
18 Installation is the reverse of removal. Be sure to tighten the screws to
the torque listed in this Chapter’s Specifications.
22 Air intake plenum - removal and installation
2.4L engine
Refer to illustration 22.1
1 If you’re planning to replace the air intake plenum assembly, remove
the throttle body (see Section 20); if you’re only removing the plenum to
replace agasket or service the cylinder head (i.e. if you intend to reinstall
the same plenum assembly), the throttle body can remain attached. De-
tach all hoses, cables and connectors from the throttle body as if you were
going to remove it, but leave it attached to the plenum
(see illustration).
2 Disconnect the PCV hose, brake booster vacuum hose and other
vacuum hoses.
3 Remove the ignition coil (see Chapter 5).
4 Unbolt the air intake plenum assembly and remove it and the gasket.
5 Using a scraper, remove all traces of old gasket material from the ple-
num and intake manifold mating surfaces. Clean the surfaces with a rag
soaked in lacquer thinner or acetone. Installation is the reverse of remov-
al. Use anew gasket and tighten, the plenum mounting bolts to the torque
listed in this Chapters Specifications in several stages, working from the
center out.
3.OL engine
Refer to illustration 22.6
6 If you’re planning to replace the air intake plenum assembly, remove
the throttle body (see Section 20); if you’re only removing the plenum to
replace a gasket or service the cylinder head (i.e. if you intend to reinstall
the same plenum assembly), the throttle body can remain attached. De-
tach all hoses, cables and connectors from the throttle bodyas if you were
going to remove it, but leave it bolted to the plenum (see
illu$ration).
7 Unplug the electrical connector for the EGR temperature sensor.
8 Detach the brake booster vacuum hose, all other vacuum hoses and
the PCV hose from the plenum.
9 Remove the ignition coil (see Chapter 5). Detach the accelerator and
TV (kickdown) cable brackets from the plenum.
IO Detach the bracket for the engine oil filler neck.
11 Remove the EGR pipe attaching bolts and detach the EGR pipe from
the plenum.
12 Unbolt and remove the plenum stays. Remove the mounting bolts for
the plenum assembly.
13 Remove the plenum and gasket.
14 Using a scraper, remove all traces of old,gasket material from the ple- -~
num and intake manifold mating surfaces. Wipe the mating surfaces clean
with a rag soaked in lacquer thinner or acetone.
15 Installation is the reverse of removal. Use a new gasket and tighten ,_
the plenum mounting bolts In several stages, working from the center out,
to the torque listed in this Chapter’s Specifications.
 Loading...


