2C-8
Chapter 2 Part C 3.OL V6 engine
6
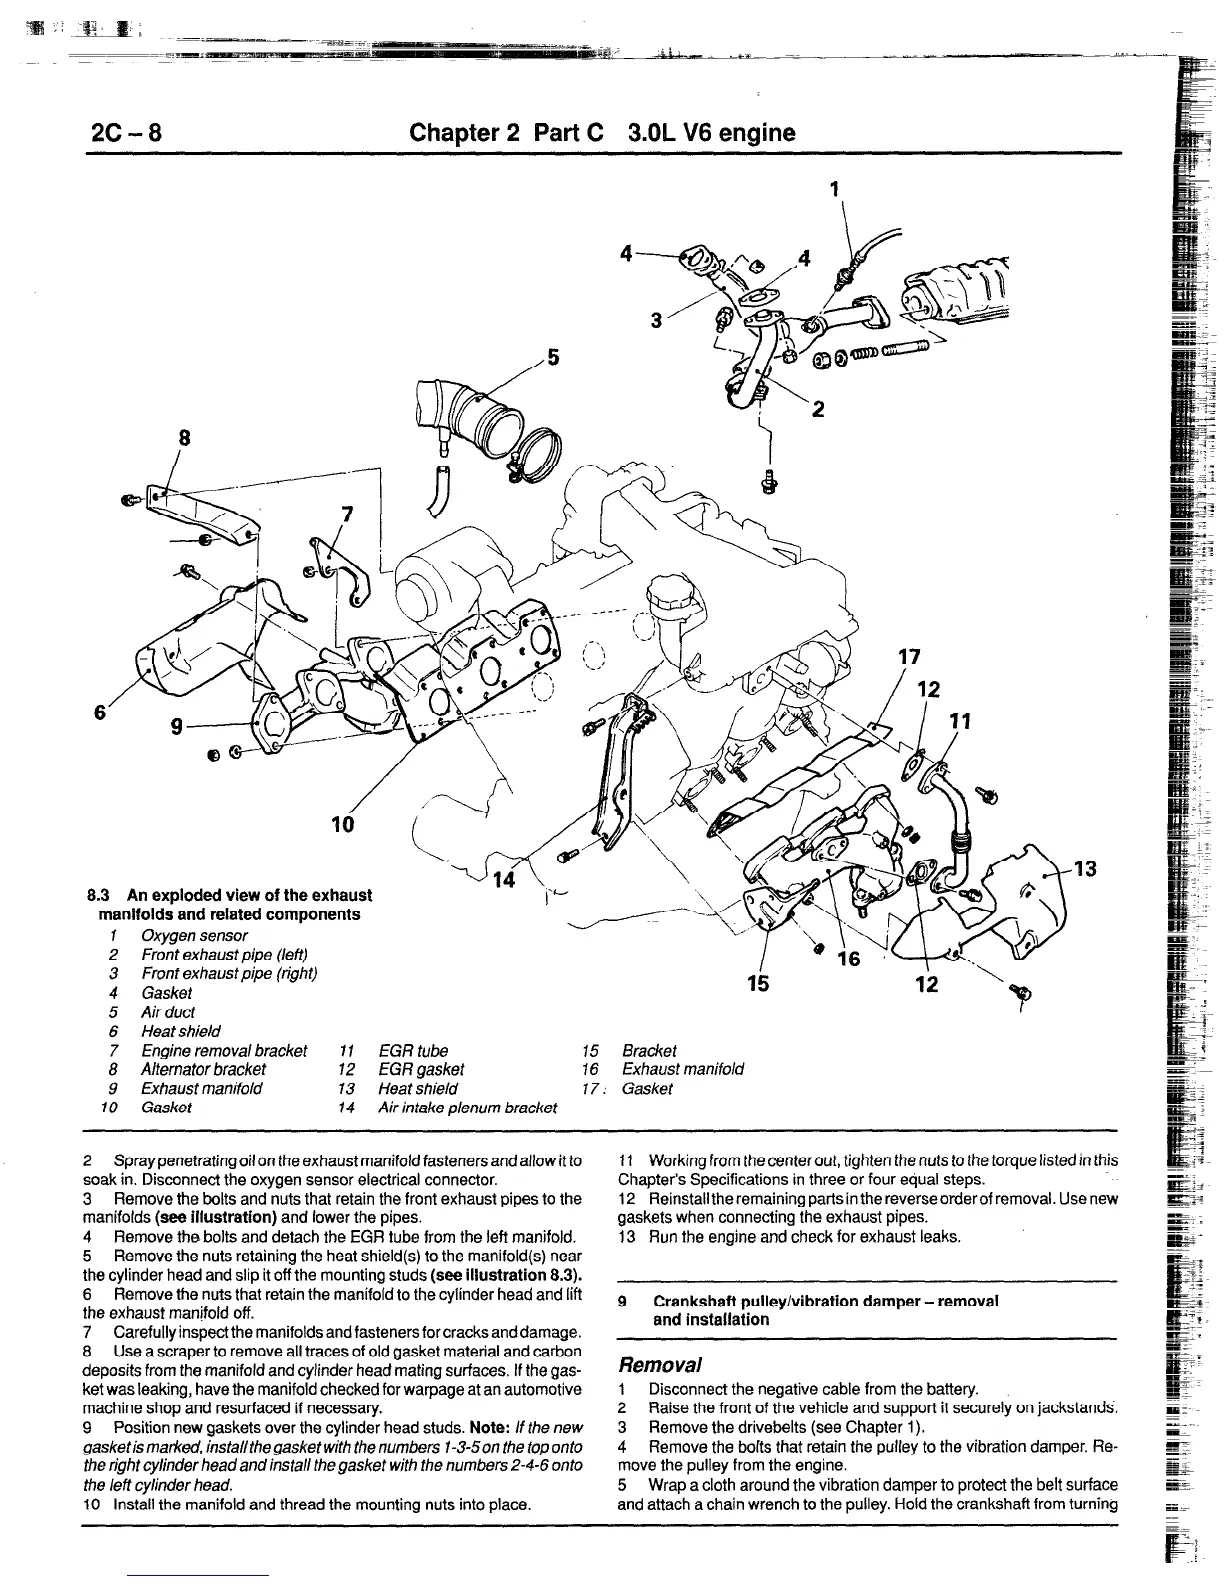
8.3 An exploded view of the exhaust
manifolds and related components
1 Oxygen sensor
2 Front exhaust pipe (left)
3 Fronf exhaust pipe (right)
4 Gasket
5 Air duct
6 Heat shield
7 Engine removal bracket
8 Alternator bracket
9 Exhaust manifold
10 Gasket
I
11 EGR tube 15 Bracket
12 EGR gasket
16 Exhaust manifold
13 Heat shield
17: Gasket
14 Air intake plenum bracket
2 Spray penetrating oil on the exhaust manifold fasteners and allow it to
soak in. Disconnect the oxygen sensor electrical connector.
3 Remove the bolts and nuts that retain the front exhaust pipes to the
manifolds
(see illustration)
and lower the pipes.
4 Remove the bolts and detach the EGR tube from the left manifold.
5
Remove the nuts retaining the heat shield(s) to the manifold(s) near
the cylinder head and slip it off the mounting studs
(see illustration 8.3).
6
Remove the nuts that retain the manifold to the cylinder head and lift
the exhaust manifold off.
7 Carefullyinspectthemanifoldsandfastenersforcracksanddamage.
8 Use a scraper to remove all traces of old gasket material and carbon
deposits from the manifold and cylinder head mating surfaces. If the
gas-
ket was leaking, have the manifold checked for warpage at an automotive
machine shop and resurfaced if necessary.
9 Position new gaskets over the cylinder head studs.
Note: If the new
gasketis marked, install thegasket with the numbers I-3-5on the top onto
the right
cylinder
headand install thegasket with the numbers 2-4-6 onto
the left cylinder head.
10
Install the manifold and thread the mounting nuts into place.
If Working from the center out, tighten the nuts to the torque listed in this
Chapter’s Specifications in three or four equal steps.
12 Reinstall the remaining parts in the reverseorderof removal. Use new
gaskets when connecting the exhaust pipes.
13 Run the engine and check for exhaust leaks.
9
Crankshaft pulley/vibration damper - removal
and installation
Removal
1 Disconnect the negative cable from the battery.
2 Raise the front of the vehicle and support it securely on jackstands.
3 Remove the drivebelts (see Chapter 1).
4 Remove the bolts that retain the pulley to the vibration damper. Re-
move the pulley from the engine.
5 Wrap a cloth around the vibration damper to protect the belt surface
and attach a chain wrench to the pulley. Hold the crankshaft from turning
 Loading...


