Chapter 2 Part C
3.OL V6 engine
2C-9
10.9
1
2
3
4
5
6
7
8
9
IO
11
12
13
14
15
16
18
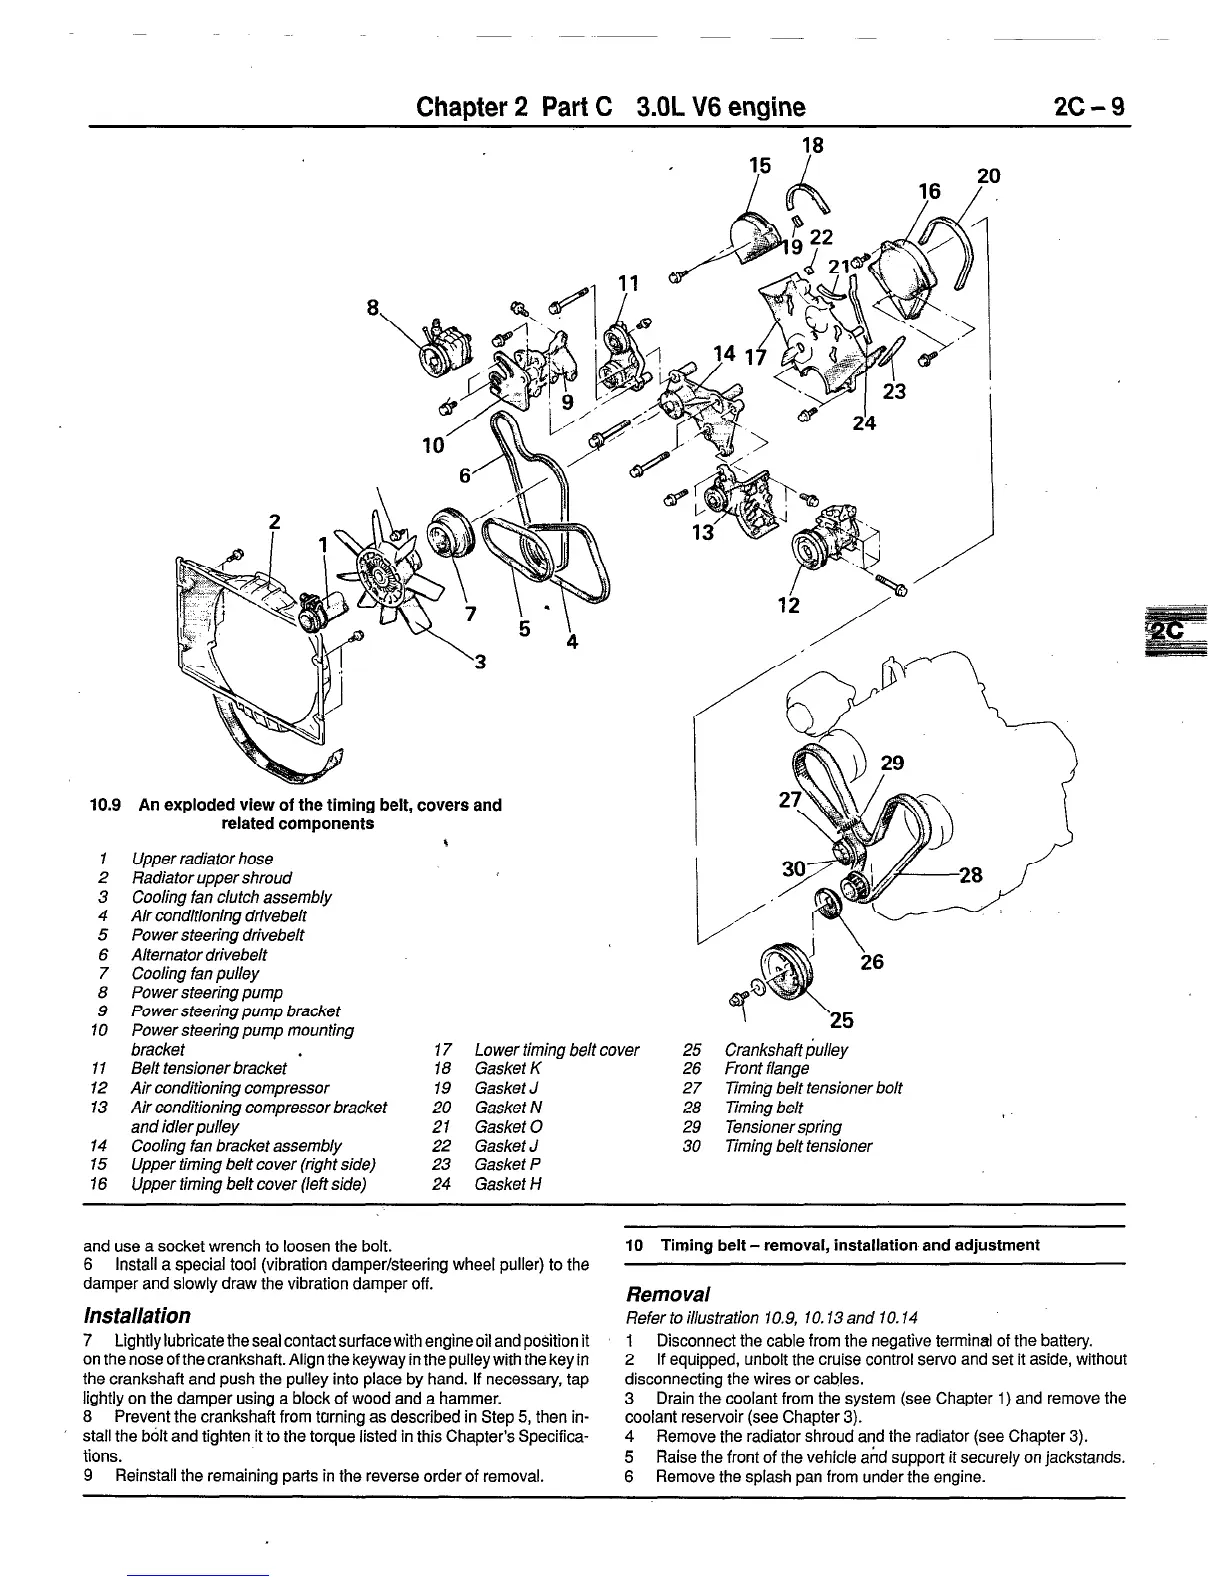
An exploded view of the timing belt, covers and
related components
Upper radiator hose
Radiator upper shroud
Cooling fan clutch assembly
Air conditionina drivebelt
Power steering drivebelt
Alternator drivebelt
Cooling fan pulley
Power steering pump
Power steering pump bracket
Power steering pump mounting
bracket
Belt tensioner bracket
Air conditioning compressor
Air conditioning compressor bracket
and idler pulley
Cooling fan bracket assembly
Upper timing belt cover (right side)
Upper timing be/t cover (left side)
17 Lower timing belt cover
18 Gasket K
19 Gasket J
20 Gasket N
21 Gasket 0
22 Gasket J
23 Gasket P
24 Gasket t-l
\
'25
25 Crankshaft pulley
26 Front flange
27 Timing belt tensioner bolt
28 Timing belt
29 Tensioner spring
30 Timing belt tensioner
and use a socket wrench to loosen the bolt.
6 Install a special tool (vibration damper/steering wheel puller) to the
damper and slowly draw the vibration damper off.
Installation
7 Lightly lubricate the seal contact surfacewith engine oil and position it
on the nose of the crankshaft. Align the keyway in the pulley with the key in
the crankshaft and push the pulley into place by hand. If necessary, tap
lightly on the damper using a block of wood and a hammer.
8 Prevent the crankshaft from turning as described in Step 5, then in-
stall the bolt and tighten it to the torque listed in this Chapter’s Specifica-
tions.
9 Reinstall the remaining parts in the reverse order of removal.
10 Timing belt - removal, installation and adjustment
Removal
Refer to illustration 10.9, IO. 13 and IO. 14
1 Disconnect the cable from the negative terminal of the battery.
2 If equipped, unbolt the cruise control servo and set it aside, without
disconnecting the wires or cables.
3 Drain the coolant from the system (see Chapter 1) and remove the
coolant reservoir (see Chapter 3).
4 Remove the radiator shroud and the radiator (see Chapter 3).
5 Raise the front of the vehicle and support it securely on jackstands.
6 Remove the splash pan from under the engine.
 Loading...


