Chapter 4 Fuel and exhaust systems
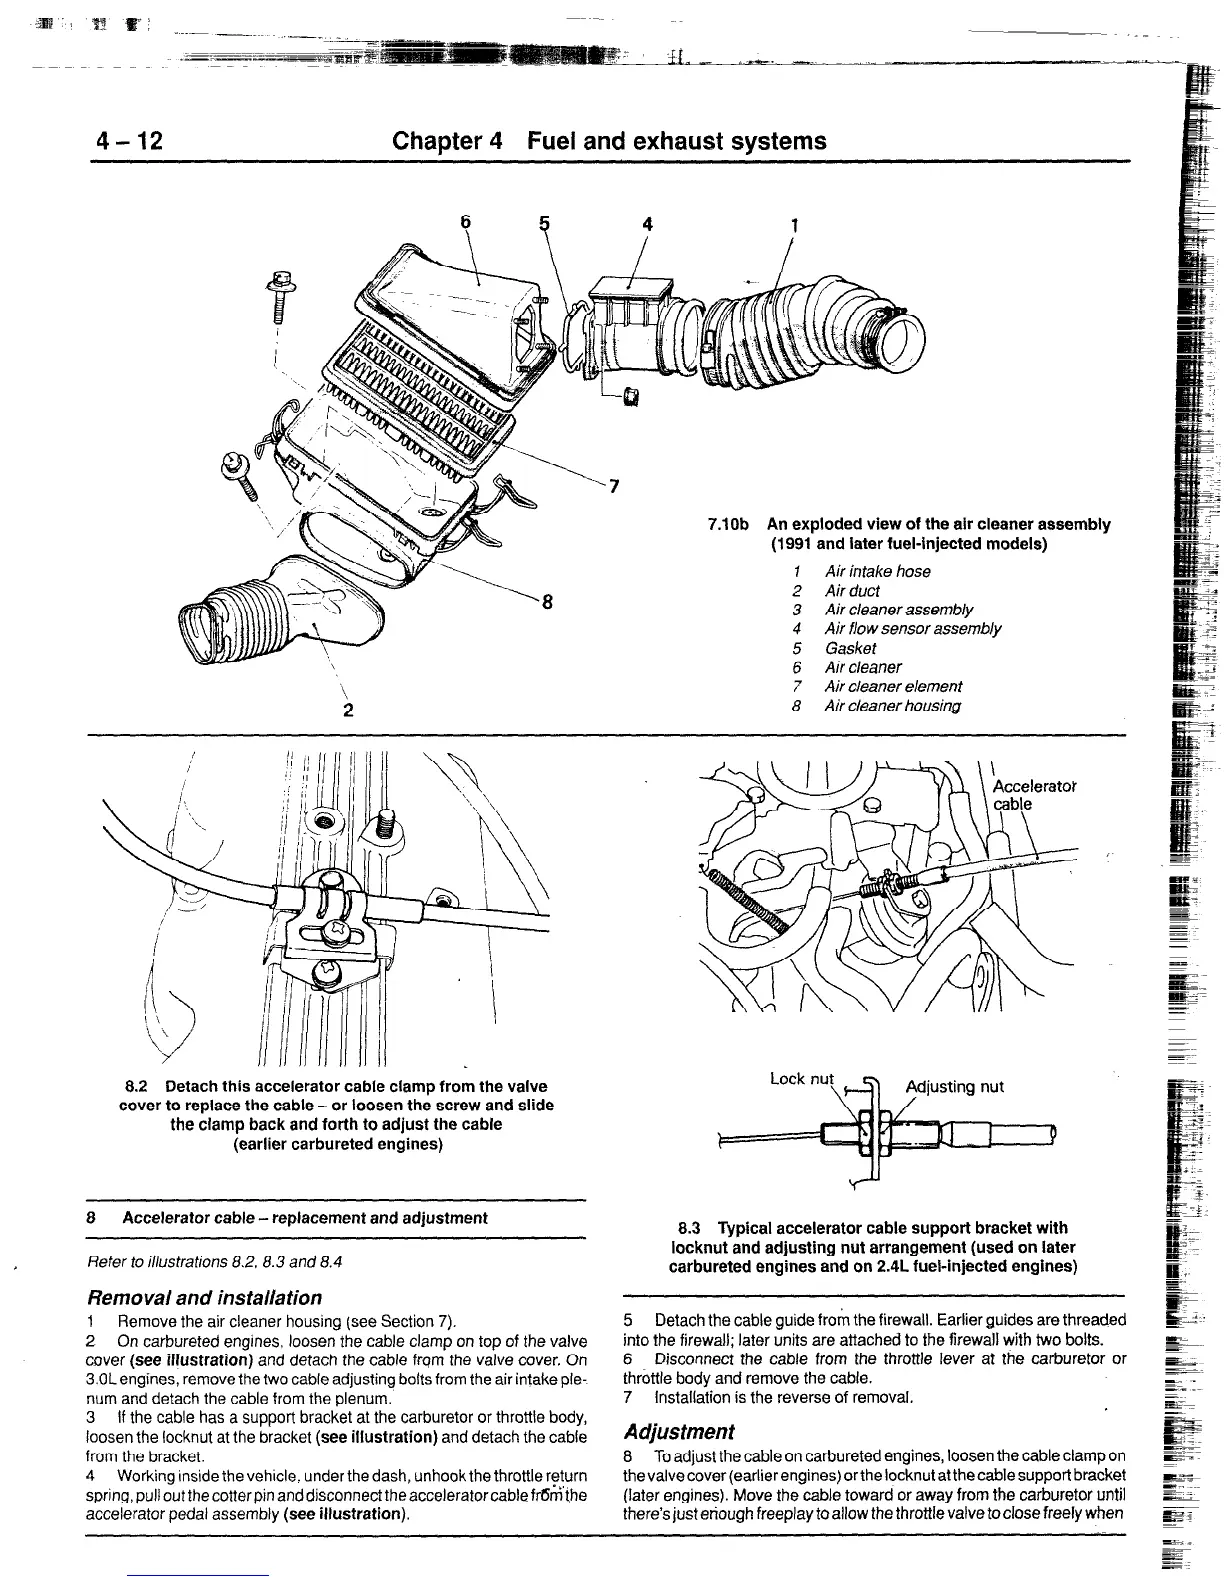
7.10b An exploded view of the air cleaner assembly
(1991 and later fuel-injected models)
1 Air intake hose
2 Air duct
3 Air cleaner assembly
4 Air flow sensor assembly
5 Gasket
6 Air cleaner
7 Air cleaner element
8 Air cleaner housing
8.2 Detach this accelerator cable clamp from the valve
cover to replace the cable - or loosen the screw and slide
the clamp back and forth to adjust the cable
(earlier carbureted engines)
8
Accelerator cable - replacement and adjustment
Refer to illustrations 8.2. 8.3 and 8.4
Removal and installation
1 Remove the air cleaner housing (see Section 7).
2 On carbureted engines, loosen the cable clamp on top of the valve
cover (see illustration) and detach the cable from the valve cover. On
3.OL engines, remove the two cable adjusting bolts from the air intake ple-
num and detach the cable from the plenum.
3 If the cable has a support bracket at the carburetor or throttle body,
loosen the locknut at the bracket (see illustration) and detach the cable
from the bracket.
4 Working inside the vehicle, under the dash, unhook the throttle return
spring, pull outthecotterpinanddisconnecttheacceleratorcabiefr6r;i’the
accelerator pedal assembly (see illustration).
8.3 Typical accelerator cable support bracket with
locknut and adjusting nut arrangement (used on later
carbureted engines and on 2.4L fuel-injected engines)
5 Detach the cable guide fro& the firewall. Earlier guides are threaded
into the firewall; later units are
attached
to the firewall with two bolts.
6 Disconnect the cable from the throttle lever at the carburetor or
throttle body and remove the cable.
7 Installation is the reverse of removal.
Adjustment
8 To adjust the cable on carbureted engines, loosen the cable clamp on
thevalvecover(earlierengines)orthelocknutatthecablesupport bracket
(later engines). Move the cable toward or away from the carburetor until
there’s just eriough freeplay to allow the throttle valve to close freely when
 Loading...


