Chapter 1 Tune-up and routine maintenance
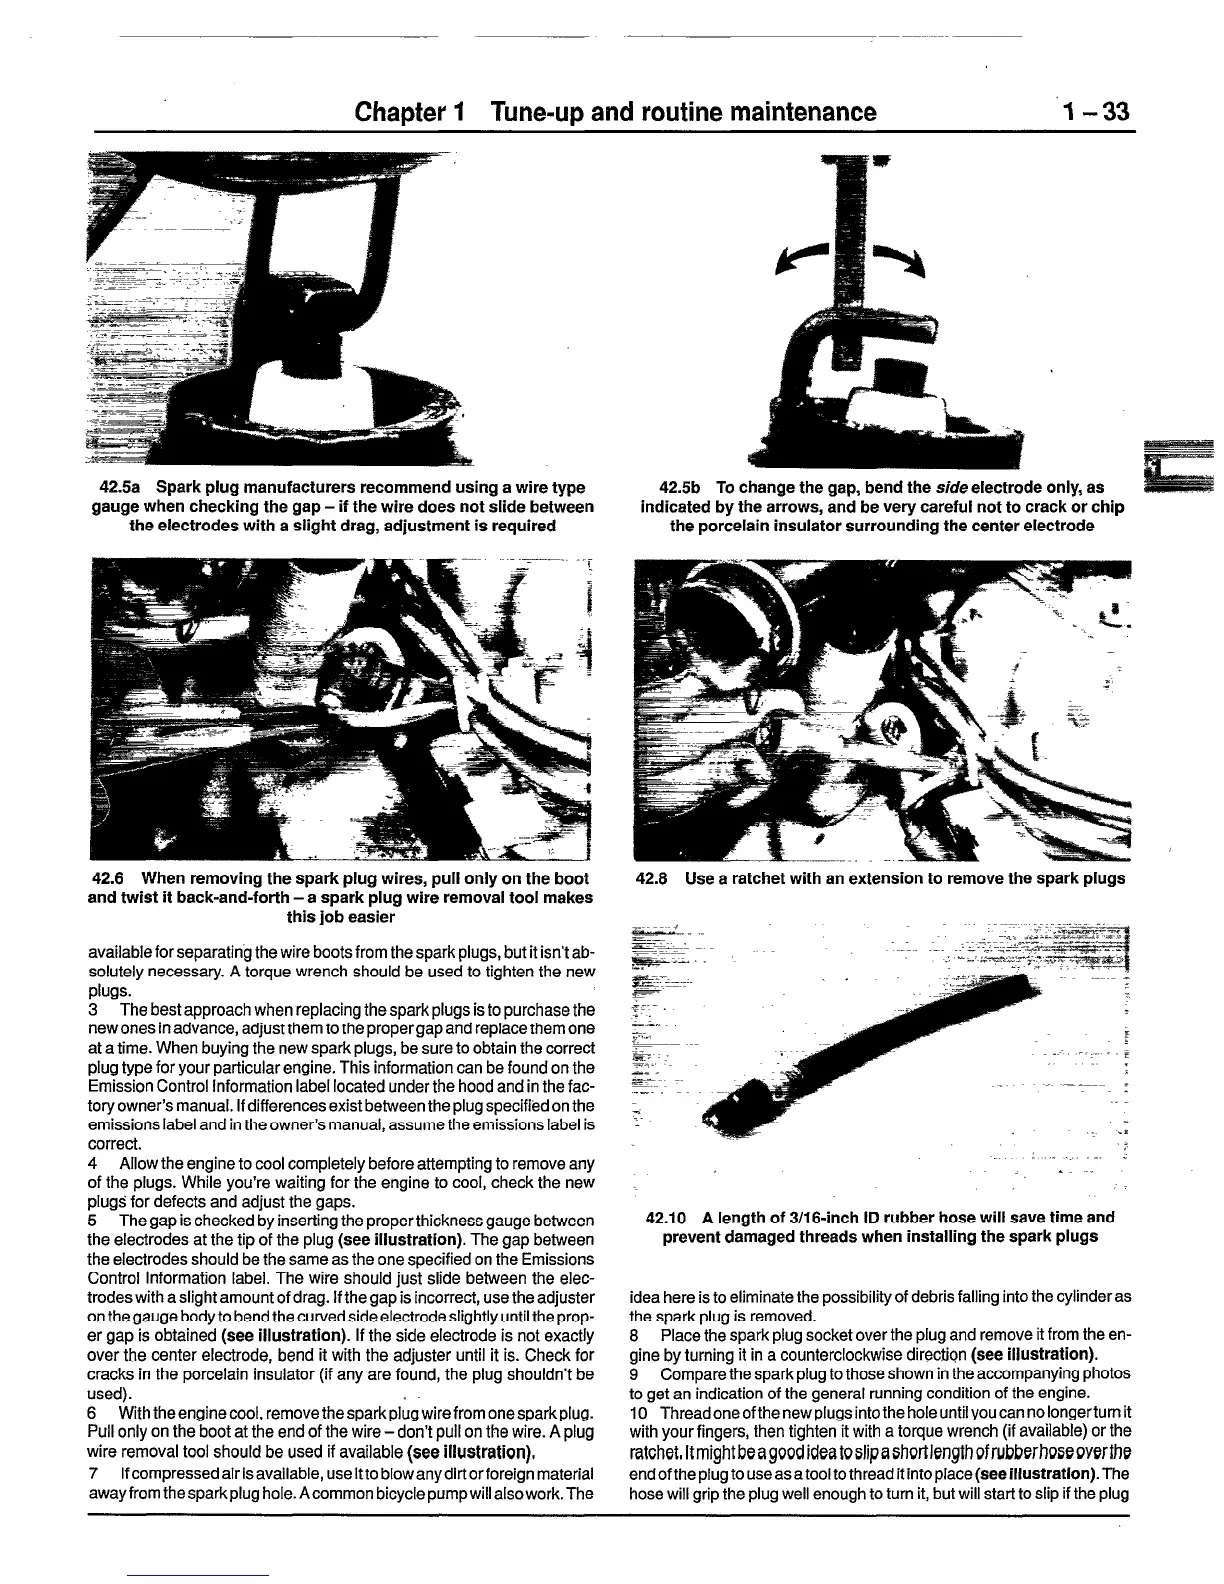
42.5a Spark plug manufacturers recommend using a wire type
gauge when checking the gap - if the wire does not slide between
the electrodes with a slight drag, adjustment is required
42.5b To change the gap, bend the
side
electrode only, as
indicated by the arrows, and be very careful not to crack or chip
the porcelain insulator surrounding the center electrode
42.6 When removing the spark plug wires, pull only on the boot
and twist it back-and-forth -a spark plug wire removal tool makes
this job easier
available for separating the wire boots from the spark plugs, but it isn’t ab-
solutely necessary. A torque wrench should be used to tighten the new
plugs.
3 The best approach when replacing the sparkplugs is to purchase the
new ones in advance, adjust them to the proper gap and replace them one
at a time. When buying the new spark plugs, be sure to obtain the correct
plug type for your particular engine. This information can be found on the
Emission Control Information label located under the hood and in the fac-
tory owner’s manual. If differences exist between the plug specified on the
emissions label and in the owner’s manual, assume the emissions label is
correct.
4 Allow the engine to cool completely before attempting to remove any
of the plugs. While you’re waiting for the engine to cool, check the new
plugs: for defects and adjust the gaps.
5 The gap is checked by inserting the proper thickness gauge between
the electrodes at the tip of the plug
(see illustration).
The gap between
the electrodes should be the same as the one specified on the Emissions
Control Information label. The wire should just slide between the elec-
trodes with a slight amount of drag. If the gap is incorrect, use the adjuster
on the gauge body to bend the curved side electrode slightly until the prop-
er gap is obtained
(see illustration).
If the side electrode is not exactly
over the center electrode, bend it with the adjuster until it is. Check for
cracks in the porcelain insulator (if any are found, the plug shouldn’t be
used). .
6 With theenginecool, removethesparkplugwirefromonesparkplug.
Pull only on the boot at the end of the wire-don’t pull on the wire. A plug
wire removal tool should be used if available
(see illustration),
7 If compressed air is available, use it to blow any dirt or foreign material
awayfrom thesparkplug hole.Acommon bicyclepumpwillalsowork.The
42.8 Use a ratchet with an extension to remove the spark plugs
: _. _
42.10 A length of 3/16-inch ID rubber hose will save time and
prevent damaged threads when installing the spark plugs
idea here is to eliminate the possibility of debris falling into the cylinder as
the spark plug is removed.
8 Place the spark plug socket over the plug and remove it from the en-
gine by turning it in a counterclockwise directiQn
(see illustration).
9 Compare the spark plug to those shown in the accompanying photos
to get an indication of the general running condition of the engine.
10 Threadoneofthenewplugsintotheholeuntilyoucannolongertumit
with your fingers, then tighten it with a torque wrench (if available) or the
ratchet, ItmightbeagoQdideatoslipashQrtlengthQfrubberhoseQYerthe
endoftheplugto useasatool tothreadit
intoplace(seeillustration).The
hose will grip the plug well enough to turn it, but will start to slip if the plug
 Loading...


