Chapter 2 Part A
2.6L four-cylinder engine
2A-3
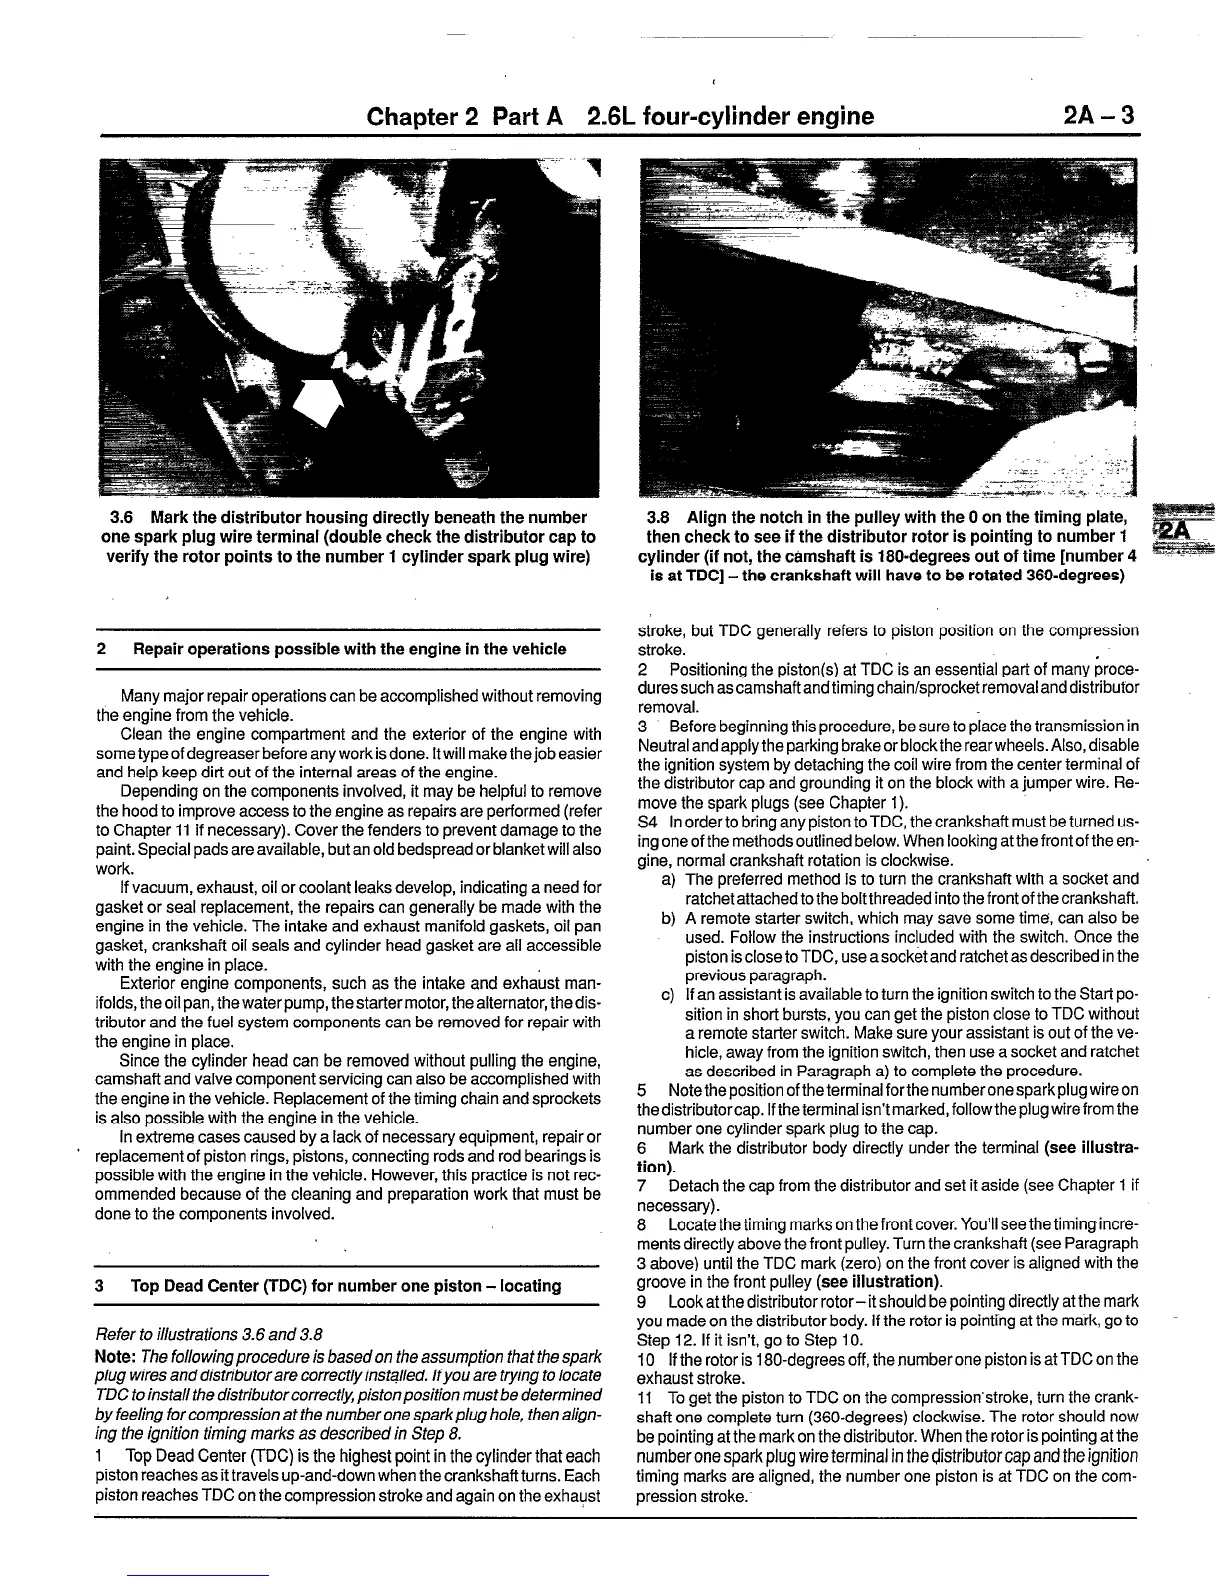
3.6 Mark the distributor housing directly beneath the number
one spark plug wire terminal (double check the distributor cap to
verify the rotor points to the number 1 cylinder spark plug wire)
2
Repair operations possible with the engine in the vehicle
Many major repair operations can be accomplished without removing
the engine from the vehicle.
Clean the engine compartment and the exterior of the engine with
sometypeofdegreaserbeforeanyworkisdone. [twill makethejobeasier
and help keep dirt out of the internal areas of the engine.
Depending on the components involved, it may be helpful to remove
the hood to improve access to the engine as repairs are performed (refer
to Chapter 11 if necessary). Cover the fenders to prevent damage to the
paint. Special pads are available, but an old bedspread or blanket will also
work.
If vacuum, exhaust, oil or coolant leaks develop, indicating a need for
gasket or seal replacement, the repairs can generally be made with the
engine in the vehicle. The intake and exhaust manifold gaskets, oil pan
gasket, crankshaft oil seals and cylinder head gasket are all accessible
with the engine in place.
Exterior engine componenfs, such as the intake and exhahst man-
ifolds, the oil pan, the water pump, the starter motor, the alternator, the dis-
tributor and the fuel system components can be removed for repair with
the engine in place.
Since the cylinder head can be removed without pulling the engine,
camshaft and valve component servicing can also be accomplished with
the engine in the vehicle. Replacement of the timing chain and sprockets
is also possible with the engine in the vehicle.
In extreme cases caused by a lack of necessary equipment, repair or
’ replacement of piston rings, pistons, connecting rods and rod bearings is
possible with the engine in the vehicle. However, this practice is not rec-
ommended because of the cleaning and preparation work that must be
done to the components involved.
3 Top Dead Center (TDC) for number one piston - locating
Refer to illustrations 3.6 and 3.8
Note:
The following procedure is based on the assumption that the spark
plug wires and distributor are correctly installed. lfyoo are frying to locate
TDC to install fhe distributor correctly piston position must be determined
by feeling for compression at the number one sparkplug hole, then align-
ing the ignition timing marks as described in Step 8.
1 Top Dead Center (TDC) is the highest point in the cylinder that each
piston reaches as it travels up-and-down when the crankshaft turns. Each
piston reaches TDC on the compression stroke and again on the exhaust
3.8 Align the notch in the pulley with the 0 on the timing plate,
then check to see if the distributor rotor is pointing to number 1
cylinder (if not, the camshaft is 180.degrees out of time [number 4
is at TDC] -the crankshaft will have to be rotated 360-degrees)
stroke, but TDC generally refers to piston position on the compression
stroke.
2 Positioning the piston(s) at TDC is an essential part of many proce-
duressuch ascamshaftand timing chain/sprocket removal and distributor
removal.
3 Before beginning this procedure, be sure to place the transmission in
Neutral and apply the parking brake or block the rear wheels. Also, disable
the ignition system by detaching the coil wire from the center terminal of
the distributor cap and grounding it on the block with a jumper wire. Re-
move the spark plugs (see Chapter 1).
S4 In order to bring any piston to TDC, the crankshaft must be turned us-
ing one of the methods outlined below. When looking at the front of the en-
gine, normal crankshaft rotation is clockwise.
a) The preferred method is to turn the crankshaft with a socket and
ratchet attached to the bolt threaded into the front of the crankshaft.
b) A remote starter switch, which may save some time’, can also be
used. Fotlow the instructions included with the switch. Once the
piston is close to TDC, use a socket and ratchet as described in the
previous paragraph.
c) If an assistant is available to turn the ignition switch to the Start po-
sition in short bursts, you can get the piston close to TDC without
a remote starter switch. Make sure your assistant is out of the ve-
hicle, away from the ignition switch, then use a socket and ratchet
as described in Paragraph a) to complete the procedure.
5 Notetheposition offheterminalforthe numberonesparkplug wireon
thedistributorcap. Iftheterminalisn’tmarked,followtheplug wirefrom the
number one cylinder spark plug to the cap.
6 Mark the distributor body directly under the terminal
(see illustra-
tion).
7 Detach the cap from the distributor and set it aside (see Chapter 1 if
necessary).
8 Locate the timing marks on the front cover. You’ll see the timing incre-
ments directly above the front pulley. Turn the crankshaft (see Paragraph
3 above) until the TDC mark (zero) on the front cover is aligned with the
groove in the front pulley
(see illustration).
9 Look at the distributor rotor-it should be pointing directly at the mark
you made on the distributor body. If the rotor is pointing at the mark, go to
Step 12. If it isn’t, go to Step IO.
10 If the rotor is 180-degrees off, the number one piston is at TDC on the
exhaust stroke.
11 To get the piston to TDC on the compression’stroke, turn the crank-
shaft one complete turn (360-degrees) clockwise. The rotor should now
be pointing at the mark on the distributor. When the rotor is pointing at the
number one spark plug wire terminal in the distributor
cap and the ignition
timing marks are aligned, the number one piston is at TDC on the com-
pression stroke.
 Loading...


