4
5
ON/OFF
CHECK
ADDRESS
UNIT No.
FUNCTION No.
SELECTION No.
AM
PM
RESET
AM
PM
TEST RUN
FUNCTION
˚C
MODE FAN
VANE
TEMP.
START
STOP
HR.
MIN.
BA
7
3
6
44
TEST RUN
2-7 Test run
(1) WIRED REMOTE CONTROLLER
<Before test run>
● After installing, wiring, and piping the indoor and outdoor units, check for refrigerant leakage, looseness in power supply or
control wiring, and mistaken polarity.
● Use a 500-volt megohmmeter to check the resistance between the power supply terminal block and ground to make sure
that it is at least 1.0MΩ.
Attention:
Do not use the air conditioner if resistance is less than 1.0MΩ.
TEST RUN button
TEST RUN
Indoor coil temperature code
Display
Display
Remote controller
1
Turn on main switch.12 hours before proceeding to step 2 to allow
for crankcase heater operation.
2
Push the TEST RUN button twice and indication of TEST RUN will
be shown on the liquid crystal display.
4
Push button LOW/HIGH to check that the fan speed changes
properly.
6
After the check is finished leave the test run mode, push the power
ON/OFF button.
It can also be stopped by pushing the timer MODE button.
5
Check the operation of outdoor unit fans.This unit controls the rota-
tion speed and performance capacity of fans. ln some cases, it may
rotate at low speed as the condition of outside air requires and the
speed will be kept unless the performance has become deficient.
Therefore, when the condition of outside air demands, there may be
such cases as the fan stops or rotates reversely.
Please note that these symptoms are not malfunction.
3
Press the button to display , COOL/DRY(or HEAT)to
confirm that cool (or warm) air is blown out.
(At heating operation, there may be a short delay before warm air
begins to blow out.)
*The above figure shows the state of TEST
RUN at cooling operation.
●When a TEST RUN is started,the timer shall be set to 2 hours. The unit will automatically turn off after 2 hours.
<Before test run>
Measure an impedance between the power supply terminal block
on the outdoor unit and the ground with a 500 V Megger and
check that it is equal or greater than 1.0M
""
.
1 Turn on the main power to the unit..
2 Set the Nrm/Set selector switch (on the back of the controller)to <Set>.
AThe FUNCTION , TEST RUN and CHECK begin to blink.
3 Press the MIN. button.
B TEST RUN and current operation mode are displayed.
4 Press the MODE button to activate COOL mode, then check
whether cool air in blown out from the unit.
5 Press the
FAN button and check whether strong air is blown
out from the unit.
6 Press the
VANE button and check whether the auto vane
operates properly.
7 Press the ON/OFF button to stop the test run.
8
After trial run is complete, set the Nrm/Set selector switch to <Nrm.>
Note :
·Point the remote controller toward the inside unit’s receiver
while steps
33
through
77
.
·It is not possible to run the unit in FAN or DRY mode.
(2) WIRELESS REMOTE CONTROLLER
82
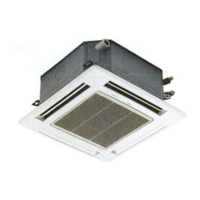
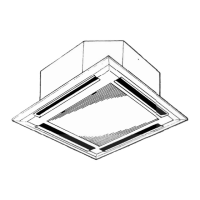
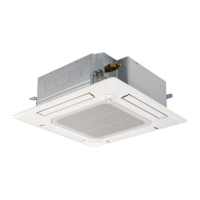
PLH-3AK.UK PLH-4, 5, 6AKS.UK
PLH-3AKH.UK PLH-4, 5, 6AKHS.UK
OC211-A--2.qxp 04.9.28 4:41 PM Page 44
 Loading...