41
OPERATING PROCEDURE PHOTOS&ILLUSTRATIONS
1. Removing the air intake grille
(1) Press the PUSH button.
(2) Open the intake grille 90°.
(3) Remove the chip.
(4) Slide the shaft in the hinge to the left and remove the
intake grille.
PUSH button
Shaft
Intake grille
4. Removing the fan motor
(1) Remove the turbo fan nut and radiator aluminum cap.
(2) Pull out the turbo fan.
(3) Disconnect the connector of the fan motor lead wire.
(4) Remove the 3 nuts of fan motor.
3. Removing the controller cover assy (electrical parts)
(1) Disconnect the lead wire of the vane motor from the clamp,
and disconnect the red connector (10P).
(2) Remove 2 of 4 screws from the bell mouth.
(3) Remove the bell mouth.
(4) Disconnect the following connectors from the box.
White (3P) for the fan motor
White (2P) for the pipe temperature thermistor (TH2)
Blue (2P) for the drain pump
White (3P) for the drain sensor
(5) Disconnect the blue ground wire of the controller cover assy.
(6) Remove 3 of 4 screws from the controller cover assy, and
loosen the other screw.
(7) Pull out the controller cover assy.
(Electrical parts inside the bell mouth)
Terminal block
power board
Indoor fan capacitor
Room temperature thermistor (TH1)
Indoor controller board
Relay
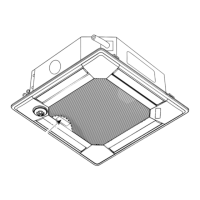
2. Removing the bell mouth.
(1) Open the intake grille.
(2) Remove the 4 screws of the bell mouth.
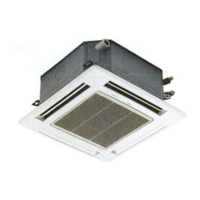
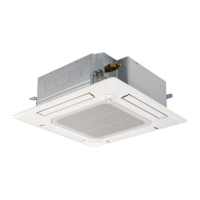
1. INDOOR UNIT
PLH-P1.6KAH.UK, PLH-P1.6KAH1.UK
Be careful on removing heavy parts.
Photo 1
Photo 2
Photo 3
Figure 1
Photo 4
Nut
Fan motor
Connector
screws
Lead wire for
vane motor
Screws
Bell
mouth
Clamp
Fan guard
Screws
Power board
Radiator
aluminum cap
Screws
Relay
Nut
Room
temperature
thermistor (TH1)
Terminal
block
Connector
Screws
Indoor
controller board
Connector
Bell mouth
DISASSEMBLY PROCEDURE11
OC235B---2.qxp 04.9.29 3:23 PM Page 41
 Loading...