88 / 195
Service Manual Mitsubishi SL-Series diesel engines
Version 08/2004
ENGLISH
Cylinder Block, Crankshaft, Pistons and
Oil pan
ASSEMBLY
88 / 195
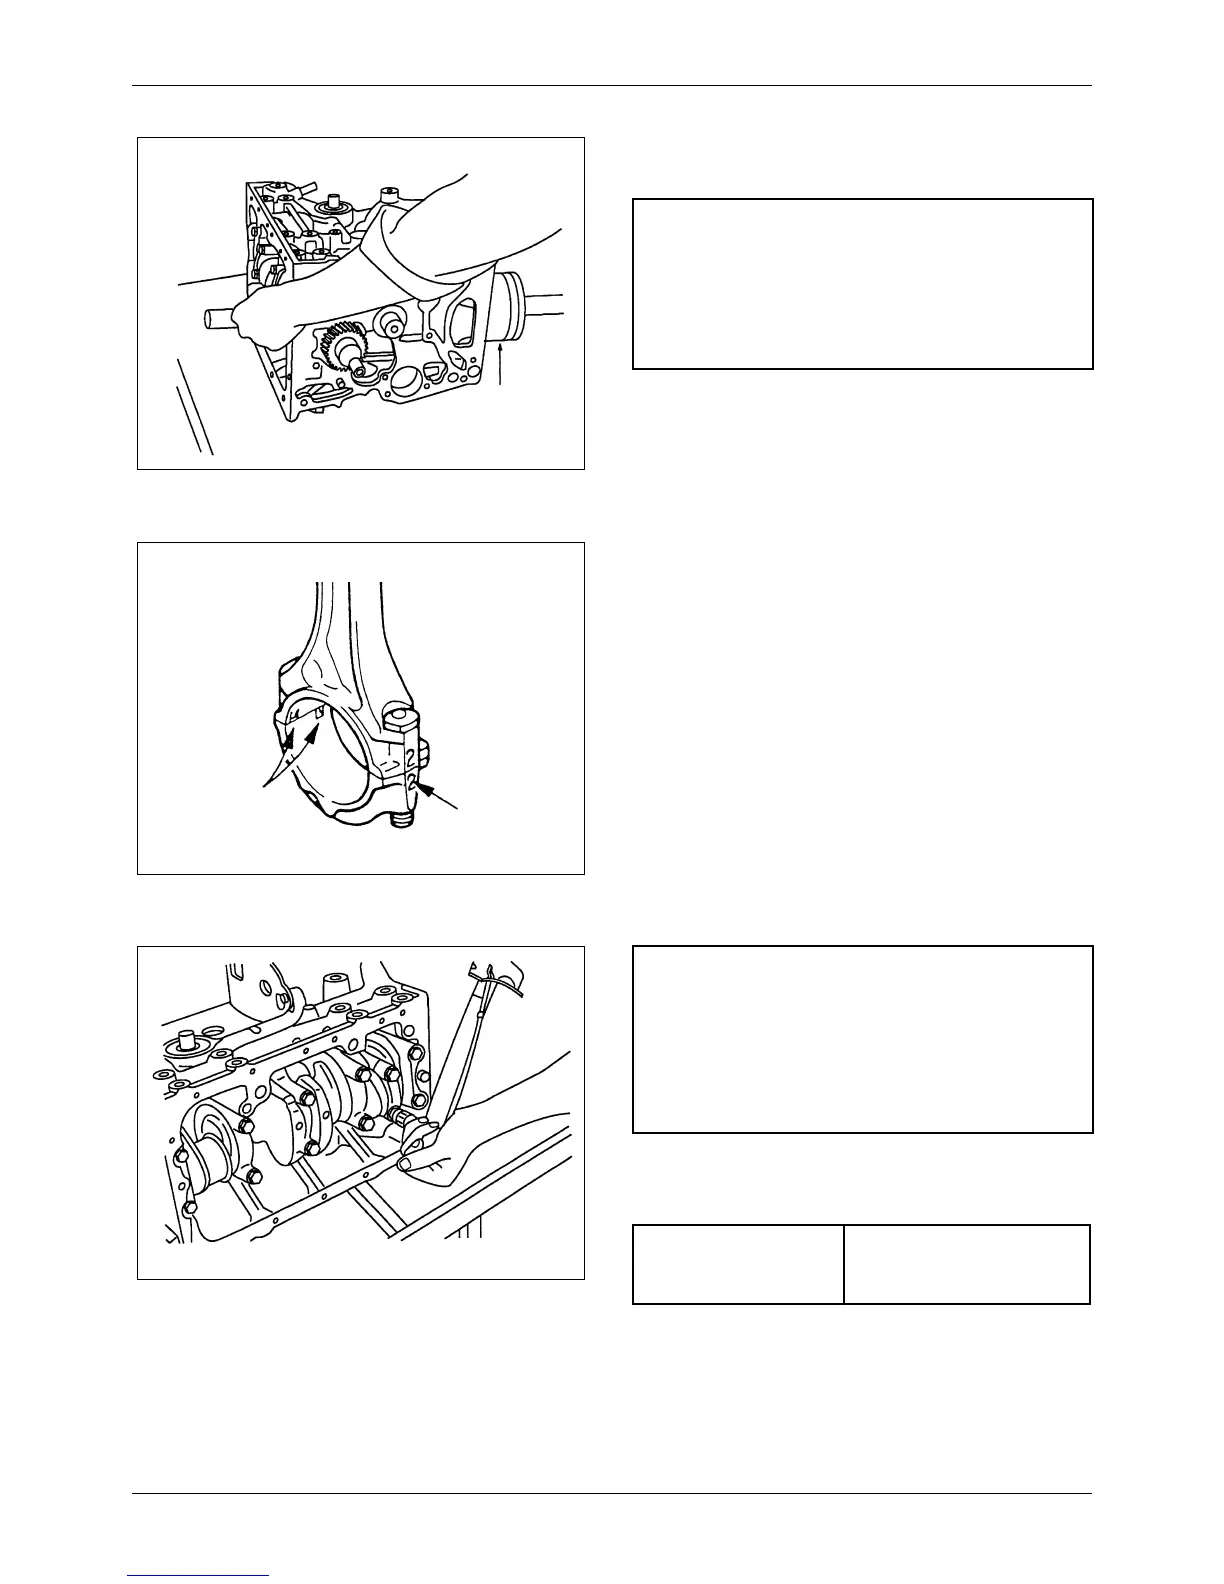
6. Using a piston guide (commercially available), put
the piston and connecting rod into the cylinder
from the top of the cylinder block.
20.8 Connecting rod cap
installation
1. Push the piston into position until the big end of the
connecting rod is put into position over the
crankpin. Then turn the crankshaft 180° while
pushing on the top of the piston.
2. Install the lower half of the connecting rod bearing
in the connecting rod cap, making sure the tab in
the back of the bearing is in the notch of the cap.
3. Install the bearing cap to the connecting rod.
4. Tighten the connecting rod cap nuts in steps to the
specified torque.
5. Check the thrust clearance for the connecting rod
big end.
Figure 128 Installing piston and connecting rod
Piston guide
CAUTION
Do not hit the piston with a hammer to install the
piston and connecting rod. This will put force on the
piston and connecting rod and cause damage to the
piston rings and crankpin..
Figure 129 Installing connecting rod cap
Notches
Cilinder
number
Figure 130 Tightening connecting rod cap nuts
NOTE
• Make sure the number on the cap is the same as
the number on the connecting rod.
• In case of a new connecting rod having no
cylinder number, install the cap to the rod with
the notches on the same side.
Tightening torque
3.55 ± 0.25 kgf·m
(25.7 ± 2 lbf·ft)
[34.8 ± 2.5 N·m]

 Loading...