Introduction
Monitor Audio is a wholly British owned and managed loudspeaker designer and manufacturer.
Since 1972, it has been at the leading edge of loudspeaker design and technology, perfecting the
implementation of metal drivers. It is renowned for exemplary speaker cabinet construction and finish.
In 2017, Monitor Audio purchased Roksan, a brand that has created award-winning audio products in
the UK for over thirty years. Extreme attention to detail and an uncompromising approach to quality has
inspired a range of turntables, CD players, amplifiers and streaming systems that are enjoyed throughout
the world.
Guarantee
Both the craftsmanship and the performance of this product is guaranteed against manufacturing
defects for the period of five years from the date of purchase (see conditions in the Important Safety
Instructions booklet), provided that the product was supplied by an authorised Monitor Audio retailer
under the consumer sale agreement.
To help us find your warranty details within our customer database, should the need arise, please take a
few minutes to register your product(s) online at: monitoraudio.com.
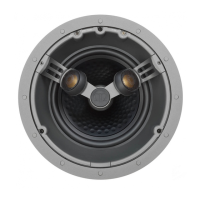
Subwoofer Positioning and Set Up
Initial Set Up
Leave the subwoofer unplugged from the mains until all signal cables are connected
and feet attached.
Fix the feet to the bottom of the subwoofer using either the screws supplied into the pilot holes or by
screwing the foot directly in to the inserts on the bottom of the cabinet depending on the model.
The subwoofer should now be sited in the most suitable position, preferably not directly in the corner of
a room as this may cause excessive bass boom. Once a desirable position is achieved it is important to
check if the cables are long enough to reach comfortably without being under tension. Cables should be
less than 10 metres to avoid interference.
WARNING: Never connect or disconnect the RCA input/ output leads with the
subwoofer switched on.
For initial setting up, put the Power Mode Switch in the ‘On’ position and leave the 12v trigger cable (if
being used) disconnected.
Once the input cables are connected and the power mode switch is in the On position, the subwoofer
can be connected to the mains power supply and switched on at the mains power switch.
Connecting to an AV Receiver
The majority of AV amplifiers have automatic setup systems. If your amp has an auto set up procedure,
run this now with the volume set to around 10 - 12 o’clock, and the power mode switch in the On
position.
When the auto set up is complete check the settings on the AV amp for the sub woofer to ensure they
are correct. If not we would suggest adjusting accordingly.
Now play a variety of music/ film excerpts that you are familiar with gradually increasing the volume to an
average listening level once you are sure everything is working correctly
monitoraudio.com 1
ENGLISH
 Loading...