5
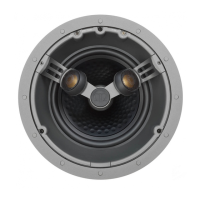
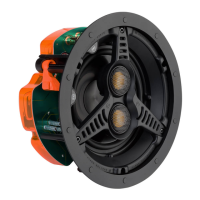
Installation –In-Ceiling Units
The CP Series In-Ceiling loudspeakers will provide long term satisfaction in terms of sound quality and reliability
provided they are installed correctly, according to the instructions and conditions contained in this manual. Please
read this installation guide carefully before proceeding. We assume the installer is trained and skilled in the correct
and safe use of hand and power tools, and has a working knowledge of local building and fire regulations/codes as
well as experience of the conditions/services behind walls and ceilings into which these speakers will be installed. IF
IN DOUBT ABOUT YOUR ABILITY TO INSTALL THESE PRODUCTS SAFELY AND CORRECTLY PLEASE CONTACT YOUR
LOCAL AUTHORISED MONITOR AUDIO DEALER OR CUSTOM INSTALLER.
NOW AVAILABLE: Pre-construction brackets. These are for use when installing any CP product before the
plaster board/ rock wall, is fitted. They show the location of the speakers to the builder and give them a solid
secure edge to cut around.
Parts List
PLEASE CHECK YOU HAVE THE FOLLOWING ITEMS IN THIS KIT BEFORE PROCEEDING:
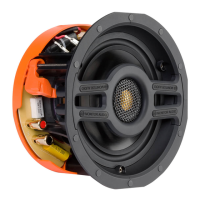
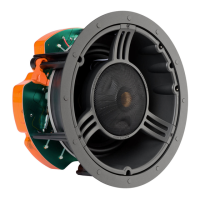
1 x Complete speaker & tweeter assembly fitted to back box.
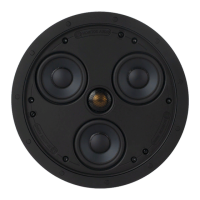
1 x Grille (which can be painted).
1 x Mounting cut out template (in packaging).
1 x Plastic paint mask (for covering the baffle while painting the frame)
1 x Self adhesive grille membrane (to be attached to the inside the grille after it has been painted).
2 x Spare baffle fixing screws plus guarantee card in this manual.
WARNINGS:
A minimum depth of 190mm (7½ Inches) is required for the back box on the BR, RS & GS In-Ceiling products
to fit into recess. The Radius In-Ceiling Products require 159mm (6 ¼ Inches).
The fixing clamps require a minimum of 25mm (1 Inch) of surface area around the cutout hole to ensure a
secure fixing!
The fixing clamps will operate on ceilings with a minimum thickness of 9mm (
3
/
8
Inches) to a maximum depth
of 32mm (1¼ Inches).
Do not attempt to fix these speakers to your ceiling if you are unsure of your ability to provide a secure and
safe fixing. IF IN DOUBT CONTACT YOUR LOCAL AUTHORISED MONITOR AUDIO DEALER.
Ensure that there are no water pipes, air ducts or electricity cables running immediately behind the cut out
area!
Please work from secure steps or scaffold and avoid trailing wires for your safety and those around you.
Always turn off the amplifier or other devices in the system when connecting these speakers.