1
Contents
Important information 1
Introduction 2
Speaker Location 2
Fine Tuning & Calibration 2
Timbre Matching Guide 2
Technology 3
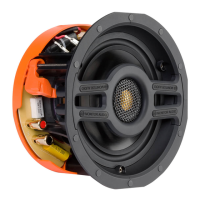
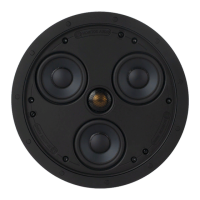
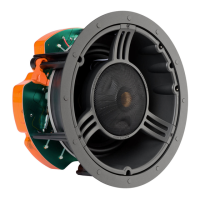
In-Ceiling & In-Wall features 4
In-Ceiling installation 5-6
In-Wall installation 7-8
Setting Up In-Ceiling Loudspeakers 9
Fine tuning of In-Ceiling & In-Wall Loudspeakers 9
In-Ceiling Technical Specifications 10
In-Wall Technical Specifications 11
Guarantee & Service 12
Declaration of Conformity 12
Multi-lingual safety warnings 13-14
(German, Italian, Spanish and French)
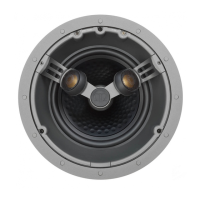
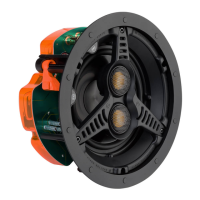
The CP Series In-Ceiling and In-Wall
loudspeakers will provide long term satisfaction in terms of
sound quality and reliability provided they are installed correctly, accord
ing to the instructions and
conditions contained in this manual. Please read this installation guide carefully before proceeding.
We assume the installer is trained and skilled in the correct and safe use of hand and power tools and
of local building and fire regulations/codes as well as experience of the
conditions/services behind walls and ceilings into which these speakers will be installed.
ABOUT YOUR ABILITY TO INSTALL THESE PRODUCTS SAFELY AND CORRECTLY PLEASE
CONTACT YOUR LOCAL AUTHORISED MONITOR AUDIO DEALER OR CUSTOM INSTALLER.
WARNINGS:
A minimum depth of 190mm (7½ Inches) is required for the BR, RS & GS In-Ceiling
recess. The BR, RS & GS In-Wall requires 101mm (4 Inches). The Radius In-Ceiling and Stereo In-
Ceiling require a minimum depth of 159mm (6 ¼ Inches) and the Radius In-Wall requires 98mm (3
7
/
8
Inches)
The fixing clamps require a minimum of 25mm (1 Inch) of surface area around the cut-
a secure fixing!
The fixing clamps will operate on ceilings or walls with a minimum thickness of 9mm (
3
/
8
maximum depth of 32mm (1¼Inches)
Do not attempt to fix these speakers to your ceiling or wall if you are unsure of your ability to provide a
IF IN DOUBT CONTACT YOUR LOCAL AUTHORISED MONITOR AUDIO
DEALER OR CUSTOM INSTALLER.
Ensure that there are no water pipes, air ducts or electricity cables running immediately behind the cut
out area!
Please work from secure steps or scaffold and avoid trailing wires for your safety and those around you.
Always turn off the amplifier or other devices in the system when connecting these speakers