Monitored Therapeutics, Inc. © Copyright 2020 10 P/N 45-50035 Rev. K, 2020-10-21
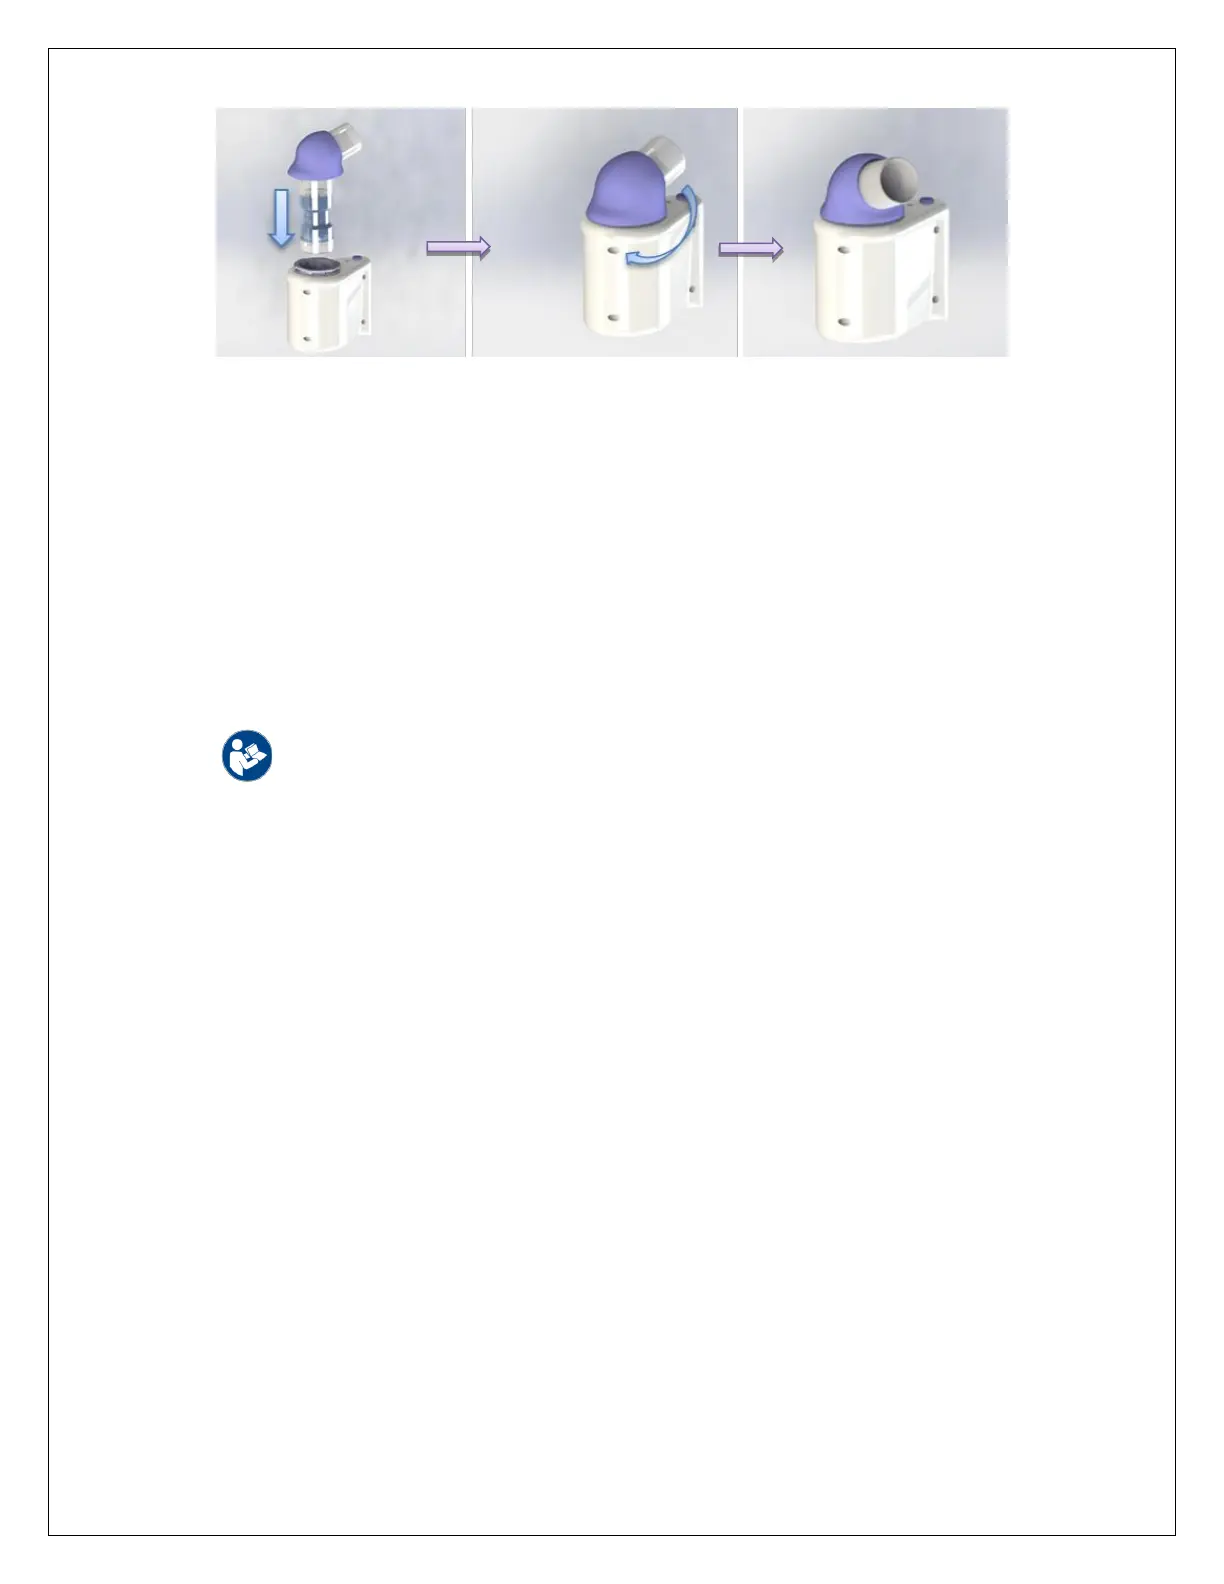
Figure 4 Insert transducer for left hand use
8.4. If using the GoSpiro for more than one patient, it is mandatory that a new filter is used to
prevent cross contamination between patients.
9. PAIRING YOUR GOSPIRO
®
WITH A GOHOME™ AND/OR SMARTPHONE
Your GoSpiro should have been paired with your smartphone already. If your GoSpiro
has not already been paired (the communications between them set up), then you
need to follow the steps in section 9.1. If your GoSpiro has been paired already,
proceed to Section 10, Performing Tests. Also read the GoSpiro App Quick Start Guide
for displaying and transmitting your data that came with your GoSpiro.
WARNING: Only IEC 60601-1 or IEC 60950-1 certified products should be
used with the GoSpiro charging station or for data collection.
9.1. Pairing the GoSpiro with a data collection device
9.1.1. Ensure that the GoSpiro is turned OFF (no LED is lit).
9.1.2. Select the “GoSpiro Setup” option on your smartphone.
9.1.3. Press and hold the GoSpiro’s purple power button for at least 6 seconds.
The buzzer will sound for 2 seconds and the LED on the GoSpiro will
light up PURPLE.
9.1.4. Following the instructions on the screen, press the “OK” button on the
screen.
9.1.5. The smartphone will now scan for the GoSpiro, locate it, and configure
it. Press the “DONE” button and then the GoSpiro will turn off.
9.1.6. After the pairing process, every next time you power on your GoSpiro
and select the GoSpiro App, it will flash its LED in blue, showing that it is
now searching for a device it’s already been paired with. If the data
collection device is nearby, GoSpiro will build the connection in 4 to 5
seconds and then its LED will turn solid blue, and there will be a short
beep of the buzzer, then you could use your GoSpiro to perform tests.