Reference 13-4July 2012 pg.6 of 8Copyright 2012 Monster Tower, Inc.
Attaching Bases to the Deck of the Boat
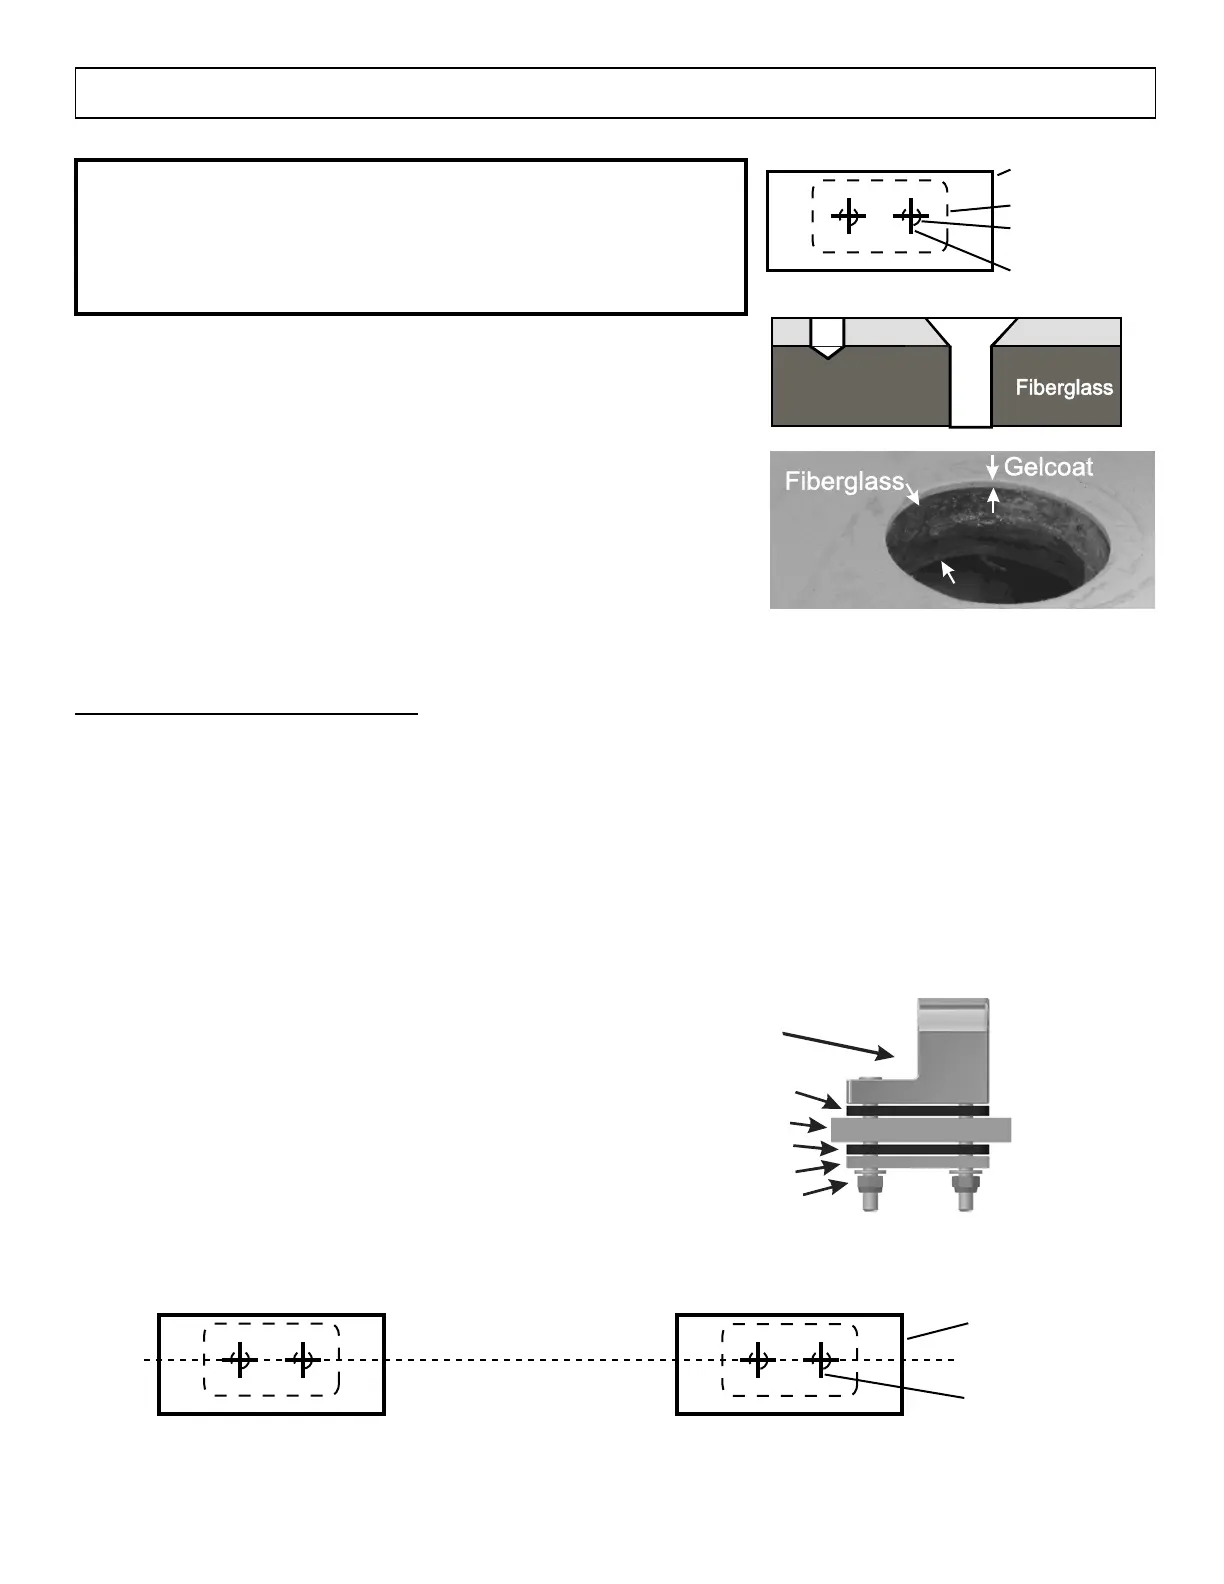
Masking Tape
on Deck
Outline of base
Outline of holes
in base
Mark center of
holes with pencil
Gelcoat
Understand the following procedures before drilling to ensure a clean hole
through the deck. Boats have a very hard exterior gelcoat surface as shown
to the right. The gelcoat is a very thin layer approximately 1/16” thick and
the berglass below it is normally about 3/8” thick.
IMPORTANT: Due to the uniqueness of each individual boat, mounting
location and accessorization, Monster Tower REQUIRES decks to be reinforced
by a berglass professional to ensure the forces generated from towing do not
cause damage to the deck and other areas of your boat. Monster Tower is
not responsible for damages.
Next: Return to “Forward Folding Instructions” or “Back Folding Instructions” to pick up where you left off.
Hole Pattern Note:
Center of all holes will be close to a straight line as shown below. If your boat deck is very curved, the line may not be as straight.
Masking Tape
on Deck
Center of holes
Drilling holes:
You MUST run the drill in reverse while drilling the holes or the gelcoat will chip because it is extremely brittle.
Run the drill in reverse for the entire hole. For safety, have someone with a vacuum remove the berglass shavings while you drill.
Use the following procedure for drilling holes:
1) Begin with a 1/8” bit and run the drill in reverse until you are through the berglass.
2) Repeat step 1 using a 5/16” bit running in reverse. DO NOT USE THE INCLUDED 10mm BIT for deck holes. ( It’s used in Step 12 )
3) Finish the hole by putting a slight angle (chamfer) on the edge of the gelcoat turning the drill bit by hand (without the drill)
as shown on the right side in the above diagram. This further helps protect the boat.
4) Using the Below Deck plate, double check the location of the second hole for each base. Drill the second hole using steps 1-3.
5) Conrm the two M8 x 60 bolts will go gthrough the Below Deck plate and the two holes without binding. If bolts bind, make
the holes a little larger using the 5/16” bit, drilling at a slight angle. As a last resort, oversize one hole only using a 3/8“ bit.
6) Optionally, you can use a small piece of sand paper to add a radius to the chamfered edge of each hole.
With the holes drilled you can now remove the tape and bolt bases onto the deck. Diagram below shows component stacking.
The hollow side of the rubber pads go toward the boat deck. Tighten bolts
by hand, do not use a drill or pneumatic /air driver. There is
not a specic torque specication since each boat is dierent.
Tighten the M8 bolts until you see the rubber pad being
compressed. Check the base to make sure it is tight.
If needed, turn another 1/4 turn. Repeat until the
base is rigid and stable.
Note: you can optionally add non-adhesive caulk or
sealant between the top of the boat and the rubber
pad to ensure a watertight seal.
Base
Rubber Base Pad
Reinforced Boat Deck
Below Deck Plate
M8 x 60 Bolts, Washers, and Nuts
Component Stacking Through Reinforced Deck
Rubber Base Pad
Take a few minutes to double check the dimensions between the base locations
and several reference points on your boat to make sure they are in the same
location on each side (measure twice, drill once). Check underneath the deck to
make sure it is reinforced around the mounting points. Make sure there are no
wires or obstructions as well as good places for the Below Deck plates. For each
base mark, the location to drill two holes through the deck as shown to the right.
Use the holes in the base as a guide for the center of each hole to be drilled.
 Loading...