6. While squeezing the yellow Flow-Stop, keep the medication bag upside down and gently
squeeze the bag (the blue cap at the end of the tubing may be left in place while priming to avoid
contamination).
NOTE: If there is a lter on the tubing, hold the lter upright until uid has completely lled both
sides of the lter (do not turn the lter upside down). When both sides are lled with uid you
may lay it down.
7. Completely prime the tubing with uid until uid is seen exiting the end of the set and all air is
removed.
8. If additional priming is necessary, squeeze the yellow ow-stop again until fully primed then
release when done.
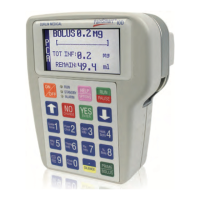
First, twist and remove
breakaway tab from the
yellow Flow-Stop
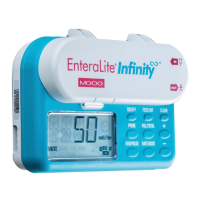
Then, open the slide clamp
OPEN CLOSED
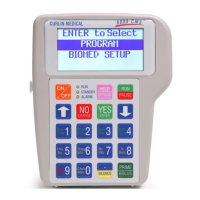
Finally, squeeze the yellow Flow-
Stop between your ngers
LOADING THE ADMINISTRATION SET (TUBING) INTO THE PUMP
1. To open the door of the pump, lift the latch on the top of the door.
2. Pull the door up and all the way to the right (refer to the diagram on the next page).
3. Locate the BLUE and YELLOW arrows within the pump as a reference point. These arrows are on the
right and left sides of the back plate of the pump.
4. Insert the blue “Tubing Guide Pin” into the tubing guide receptacle (indicated by the blue arrow).
5. Ensure the tubing is in FRONT of the door hinge. There is a notched area on the door hinge for the
tubing to exit the pump.
6. Place your nger over the blue “Tubing Guide Pin” to hold it in place.
7. Lay the soft portion of the tubing over the top of the light gray pumping ngers.
8. Place the yellow Flow-Stop into its receptacle (indicated by a yellow arrow), with the longer end
down into the receptacle.
CAUTION: Do not press on the top of the yellow Flow-Stop while it is in the receptacle, as this may
allow uid to ow through the tubing.
9. Close the door securely and snap latch shut.
10. Run your hand over the top of the pump to be sure top of door is ush with top of the pump.
5
 Loading...